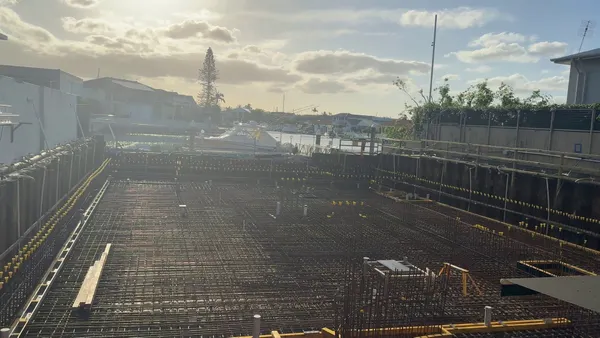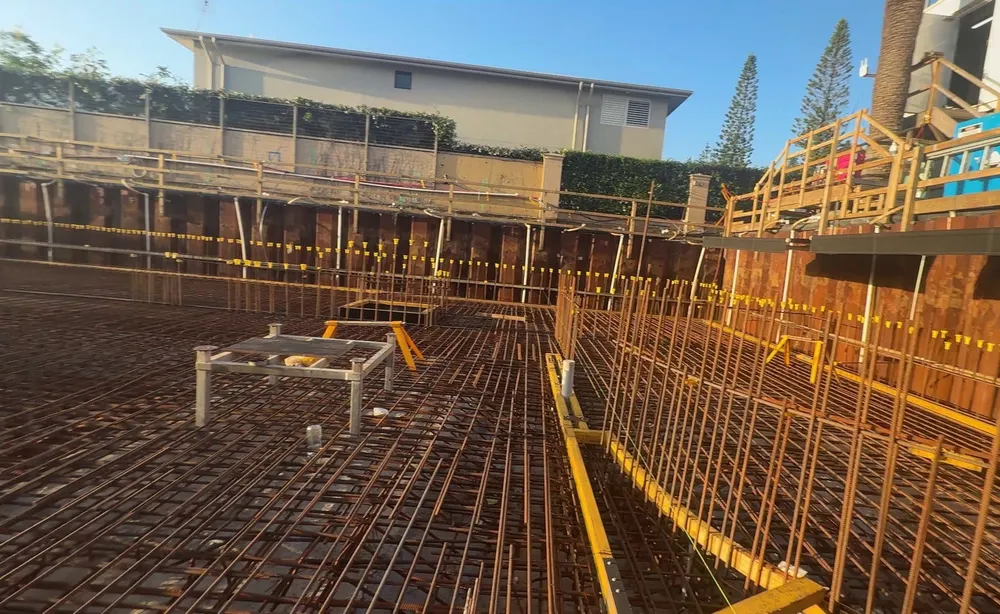
In Post 52 we did the paperwork and everything around the slab. Now you've got out of the car, done the outside checks, and you're walking up to the slab. This part is about the slab itself.
I'll go through the list as if this were your house slab, then finish with a walk around ours, so you can see the real thing.
Is it in the right place?
The first thing I check is where the slab is on the block:
- The side boundary clearance, on both sides.
- The front setback and the back setback, measured off the survey pegs.
Mistakes happen. It's much easier to fix the boxing before the pour than the slab after it. So do a quick check.
The boxing
Your slab on ground will be boxed: formwork around the edge. Measure all of it, every run, all the ins and outs, and make sure each one matches the plan. You want to be within 5 mm. Anything more is painful.
The more accurate the slab edge, the better friends the carpenter and the concreter will be, and the better friends you'll be with everyone. A slab that's too big or too small creates hassles with the engineer, with the certifier, and to look at. A perfect slab edge, no overhang at all, was the holy grail when I was in project building, and almost impossible. The chippies can move things around a little to help, but it's extra work for them, and they have limits on where they can pitch from, so they can't just move everything in.
- The boxing is braced properly. Boxing systems use star pickets at about 600 mm centres, braced back. Watch where they go: they always seem to end up right where the stormwater runs. It's a fluke we don't see Swiss-cheese stormwater pipes more often. Fixing stormwater isn't hard, but it's painful. We don't have that problem here: the boxing is done differently, and the blinding slab means nothing can punch through our pipes.
- The boxing is clean and plumb, so there's no overhang. Form oil or release agent usually goes on the day of the pour.
- Brick veneer overhang. Brickwork shouldn't overhang the slab edge by more than 15 mm. The timber frame is tighter: a bottom plate narrower than 90 mm (a 70 mm frame) shouldn't overhang the slab at all, and a 90 mm or wider plate no more than 10 mm, with the brick cavity still kept to its minimum width. Those are the limits in the state guides to standards and tolerances.
Footings, tie downs and joints
- Strip and pad footings are dug, or marked out, if they're being poured with the slab.
- Cast-in plates and tie downs. Depending on your wind rating you may need more. The metal strap braces used at N3 and above need cast-in bolts, often a 20 mm J-bolt. You can rig them off the side of the boxing so they land exactly at the brace walls. Cast in is better than a chemical anchor later. We've got a heap of cast-in plates in the next level for our structural steel (about $60,000 worth), which I'll show you at ground floor.
- Construction joints are marked, so nobody is surprised on pour day.
Plastic, pipes and pods
We have a blinding slab, so we don't need plastic. You will.
- Check all the plastic. Taped laps (about 200 mm), no tears, and any tears taped.
- The plastic extends at least 300 mm past the boxing, so it can be wrapped up the side of the slab before the slab prep is pushed against it. A lot of builders don't do this. Skip it and you get damp slab edges, efflorescence and a pile of problems that are painful to fix.
- The plastic is taped to every pipe.
- Every pipe has a cap. Glued caps are much better than duct tape. People like poking a finger through duct tape, then dropping things in. That's how pipes get blocked before you've even moved in.
- Ribs and pods. Internal and external ribs as per your engineer's drawings, the rib widths, the pod heights, and that the right pods were supplied.
- The mesh. Check the size. Measure the squares and the wire, or check the delivery docket against the engineer's design.
- Edge beams and internal beams, and bar chairs. More chairs is better. Some of the newer plastic and cardboard pods don't let chairs punch through, but a lot of builders buy the cheapest pods they can, because they're just void formers.
Thickenings, set downs and pipes
- Thickenings in the right place. We checked ours a while ago (Post 44). You may also have set downs in the pods.
- Water pipes, gas pipes and conduits in the right place.
A real example: while we were checking pipes, we found the hydraulic engineer had missed a vent pipe. We picked it up and have been working with them to get it in. That's exactly why you check.
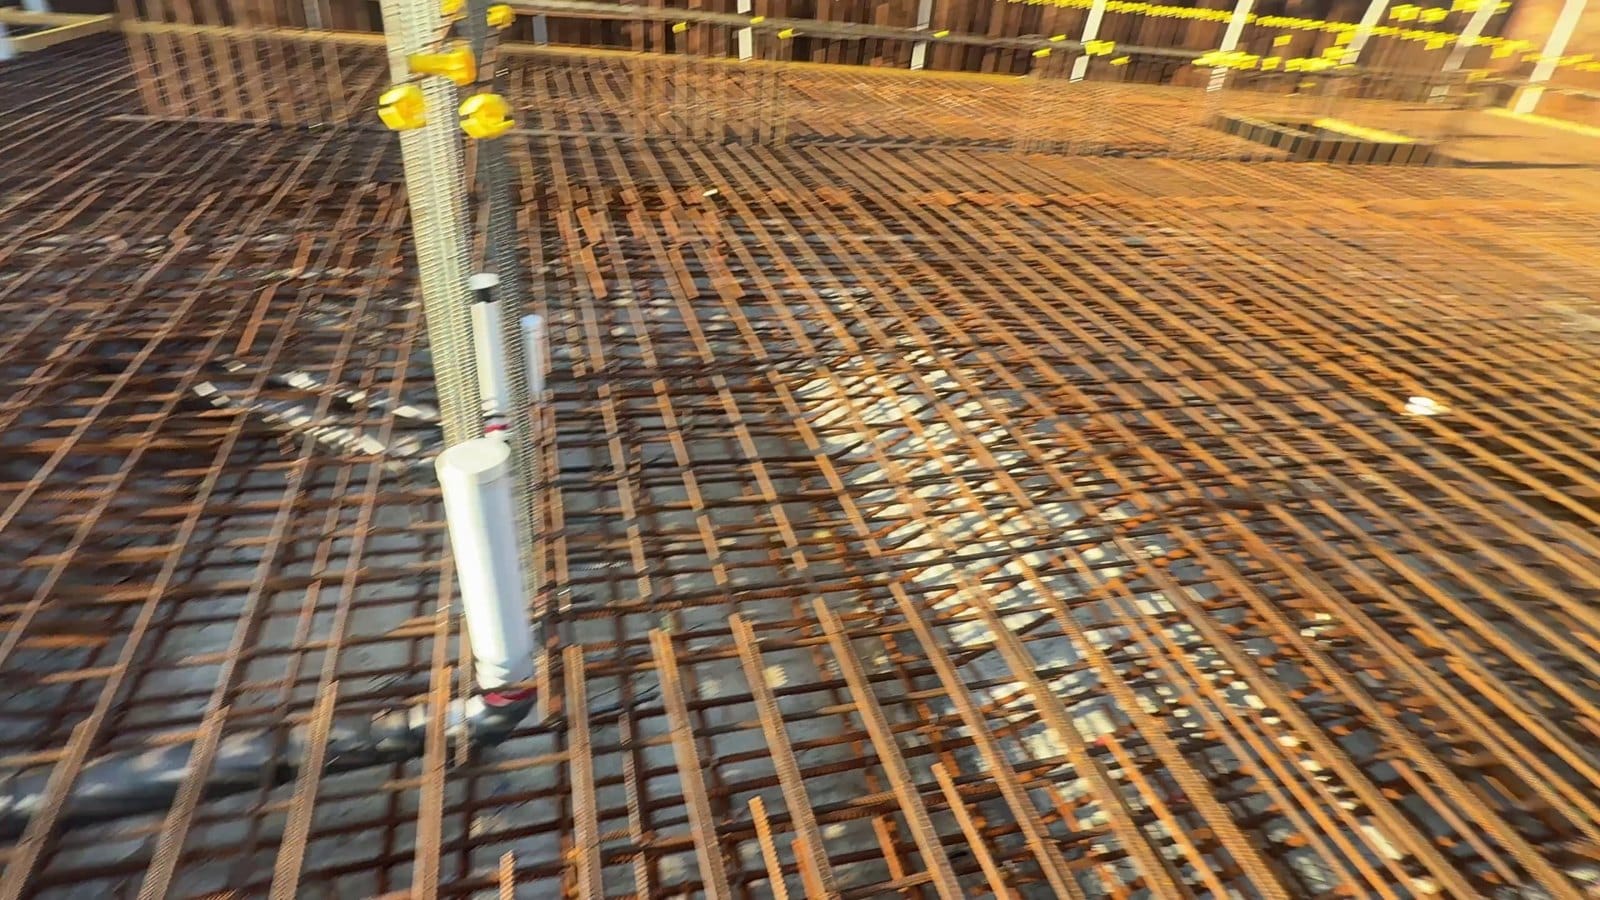
Our sewer runs to the sewer tank, and it's pressurised: pumps take it up a column and out to street level. The tank is overkill. It holds 850 to 1,000 litres, and it only picks up two fixtures (a toilet and a couple of basins down here). Think how much flushing it would take to fill that.
On yours:
- The wet area pipes are in the right spot. Vanities are usually 50 mm. Floor wastes and toilets in the right places.
- The vent pipe is inside a wall. They get this wrong all the time. If you see a random 100 mm pipe with a 50 mm reducer and wonder what it is, that's probably the vent. It's usually near the laundry.
- Dry wastes. A dry waste is just a pipe with a bend and a floor waste on top, running to a frog flap or connected in. It's dry because it isn't charged with water. Ours here is a car wash point.
- Conduits run from one point to another, usually a U shape up both ends. Island benches are the classic. You can chase them into the slab later, but it's extra work and thins the slab.
- Set downs are formed, and the slab is deepened under them.
We don't have termite collars. The slab is very thick, and because it's a hydrostatic slab, we don't want anything around a pipe that could leave a void and a path for water under pressure. Instead every pipe has a waterstop, the red material you can see around them.
Steel, cover and laps
- The trenches and the slab measure the right size.
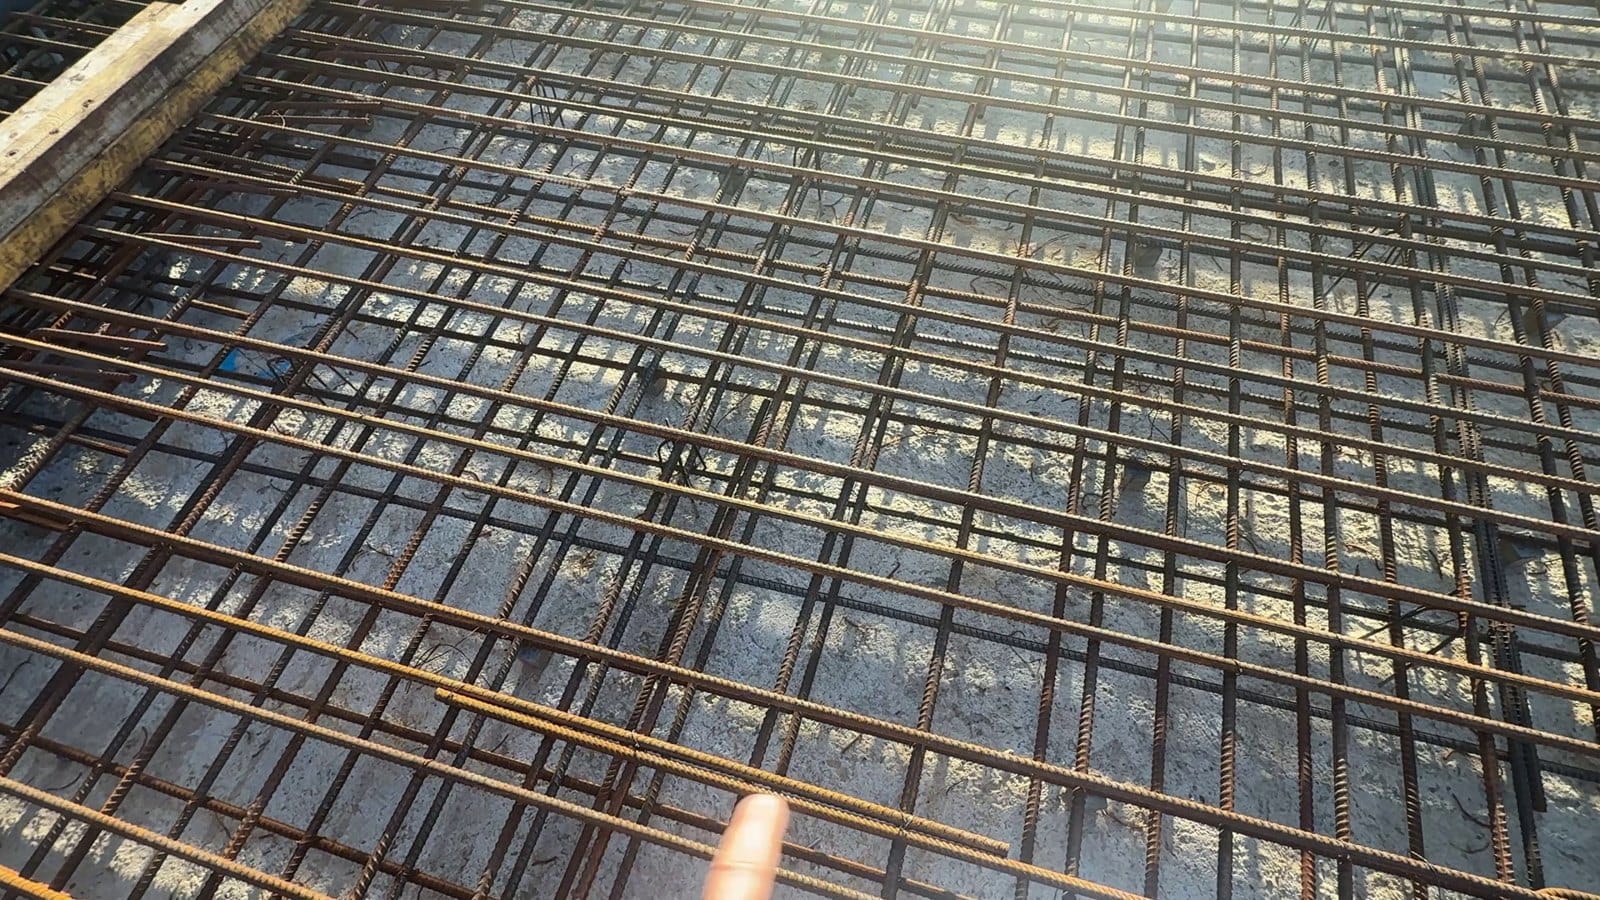
- The bar sizes. All ours are 16 mm bars. You know that from the drawings, but measure them anyway.
- The spacing. Ours is 200 by 200 centres. The engineer has checked all of this.
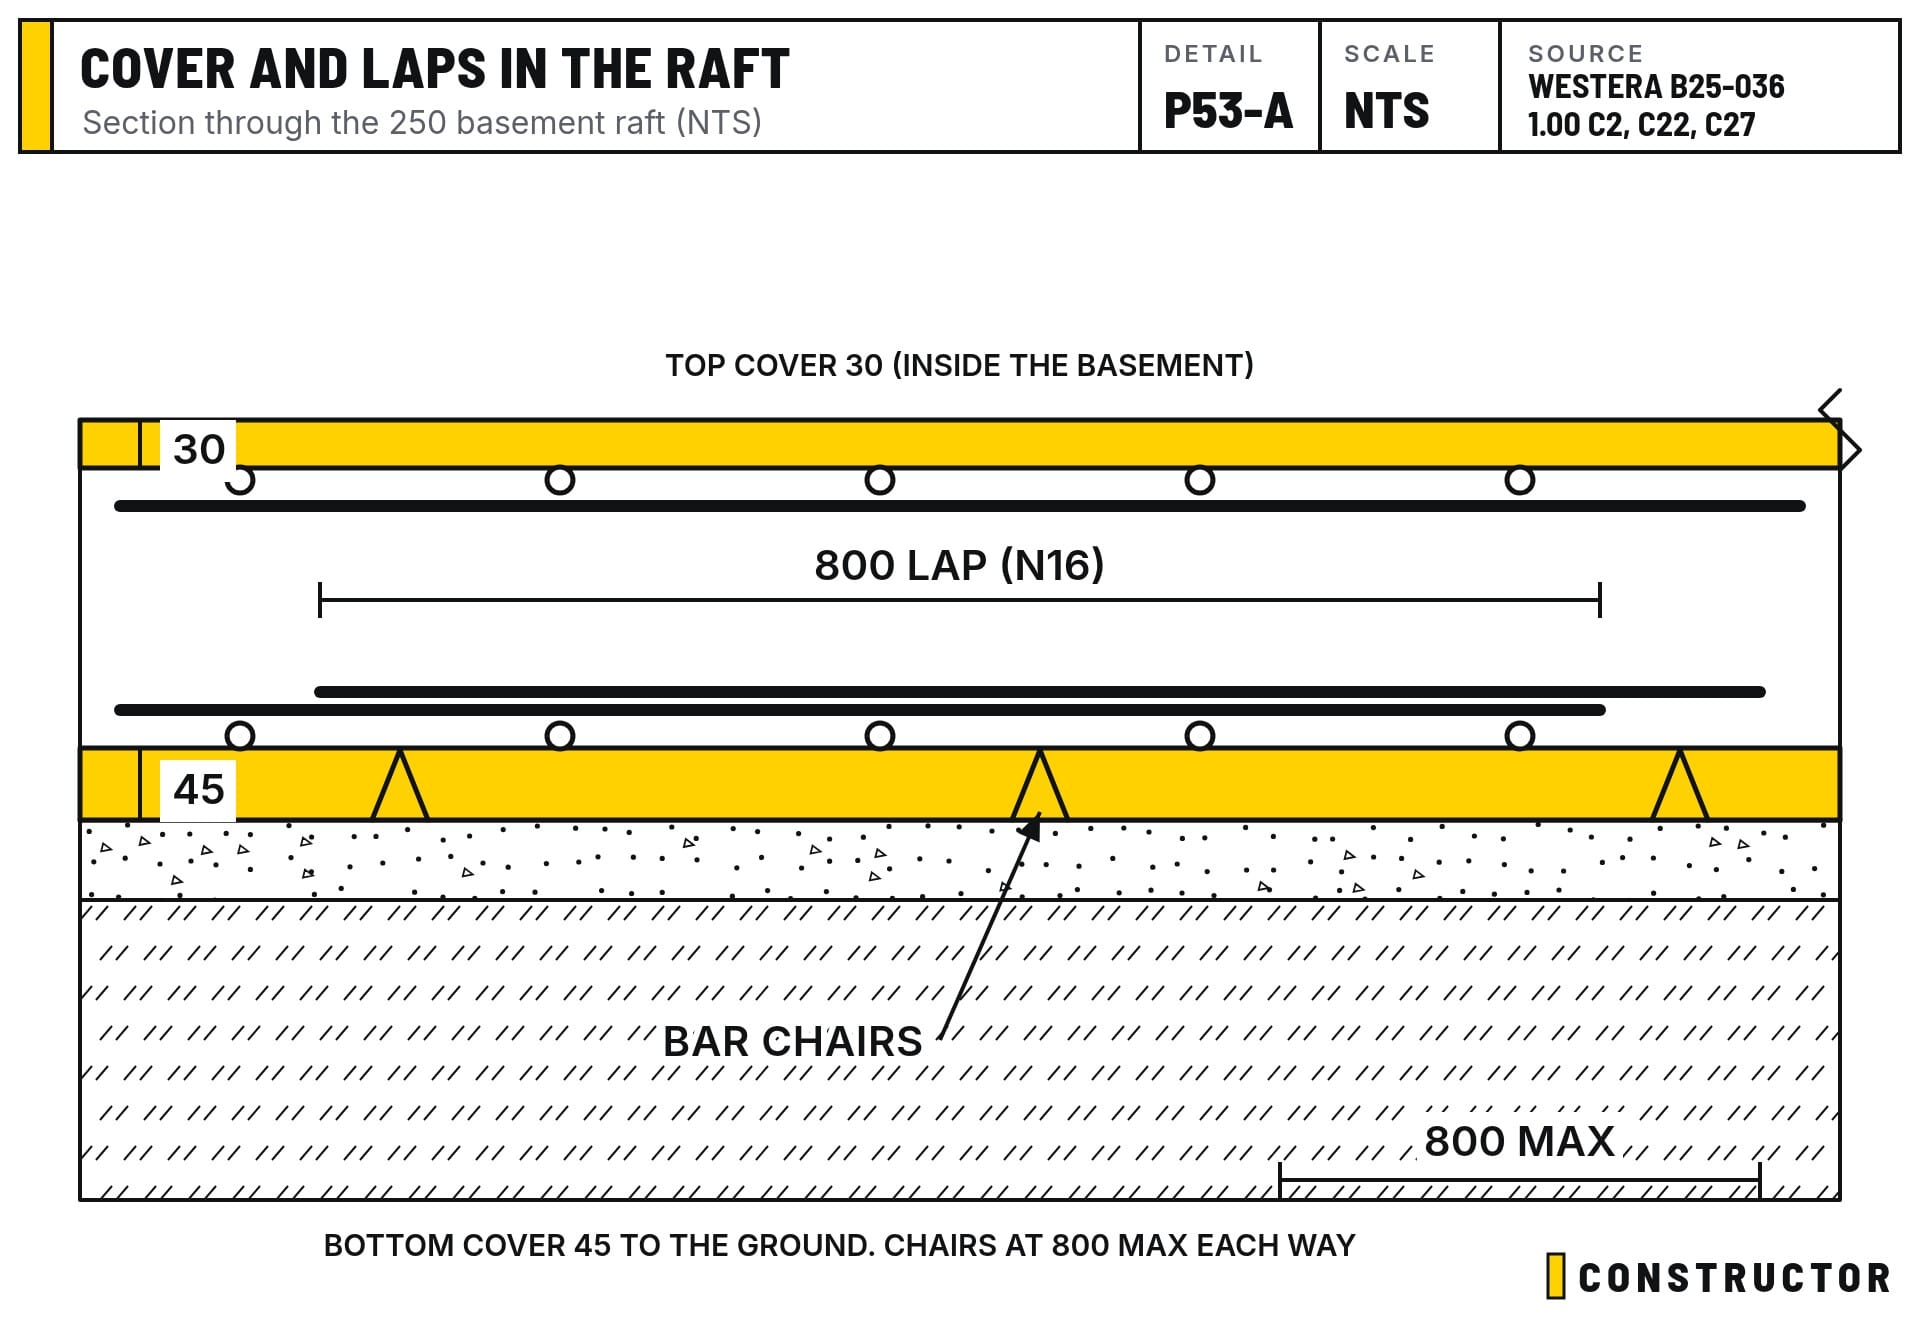
- Cover. A big one. The bar chairs supplied were 5 mm the wrong size. Five millimetres matters here, because it carries up through all four layers and eats into the top cover. We checked it and ended up with 30 mm top cover, which is the minimum on this job. We'd have preferred 40.
- Laps, where two bars overlap. For 16 mm bars it's 800 mm.
- Re-entrant corners, and steel on chairs.
A walk around the basement raft
It's hard to talk with paper in my hand, so here's what's going on, in the order I walked it.
Drains and the step for the walls
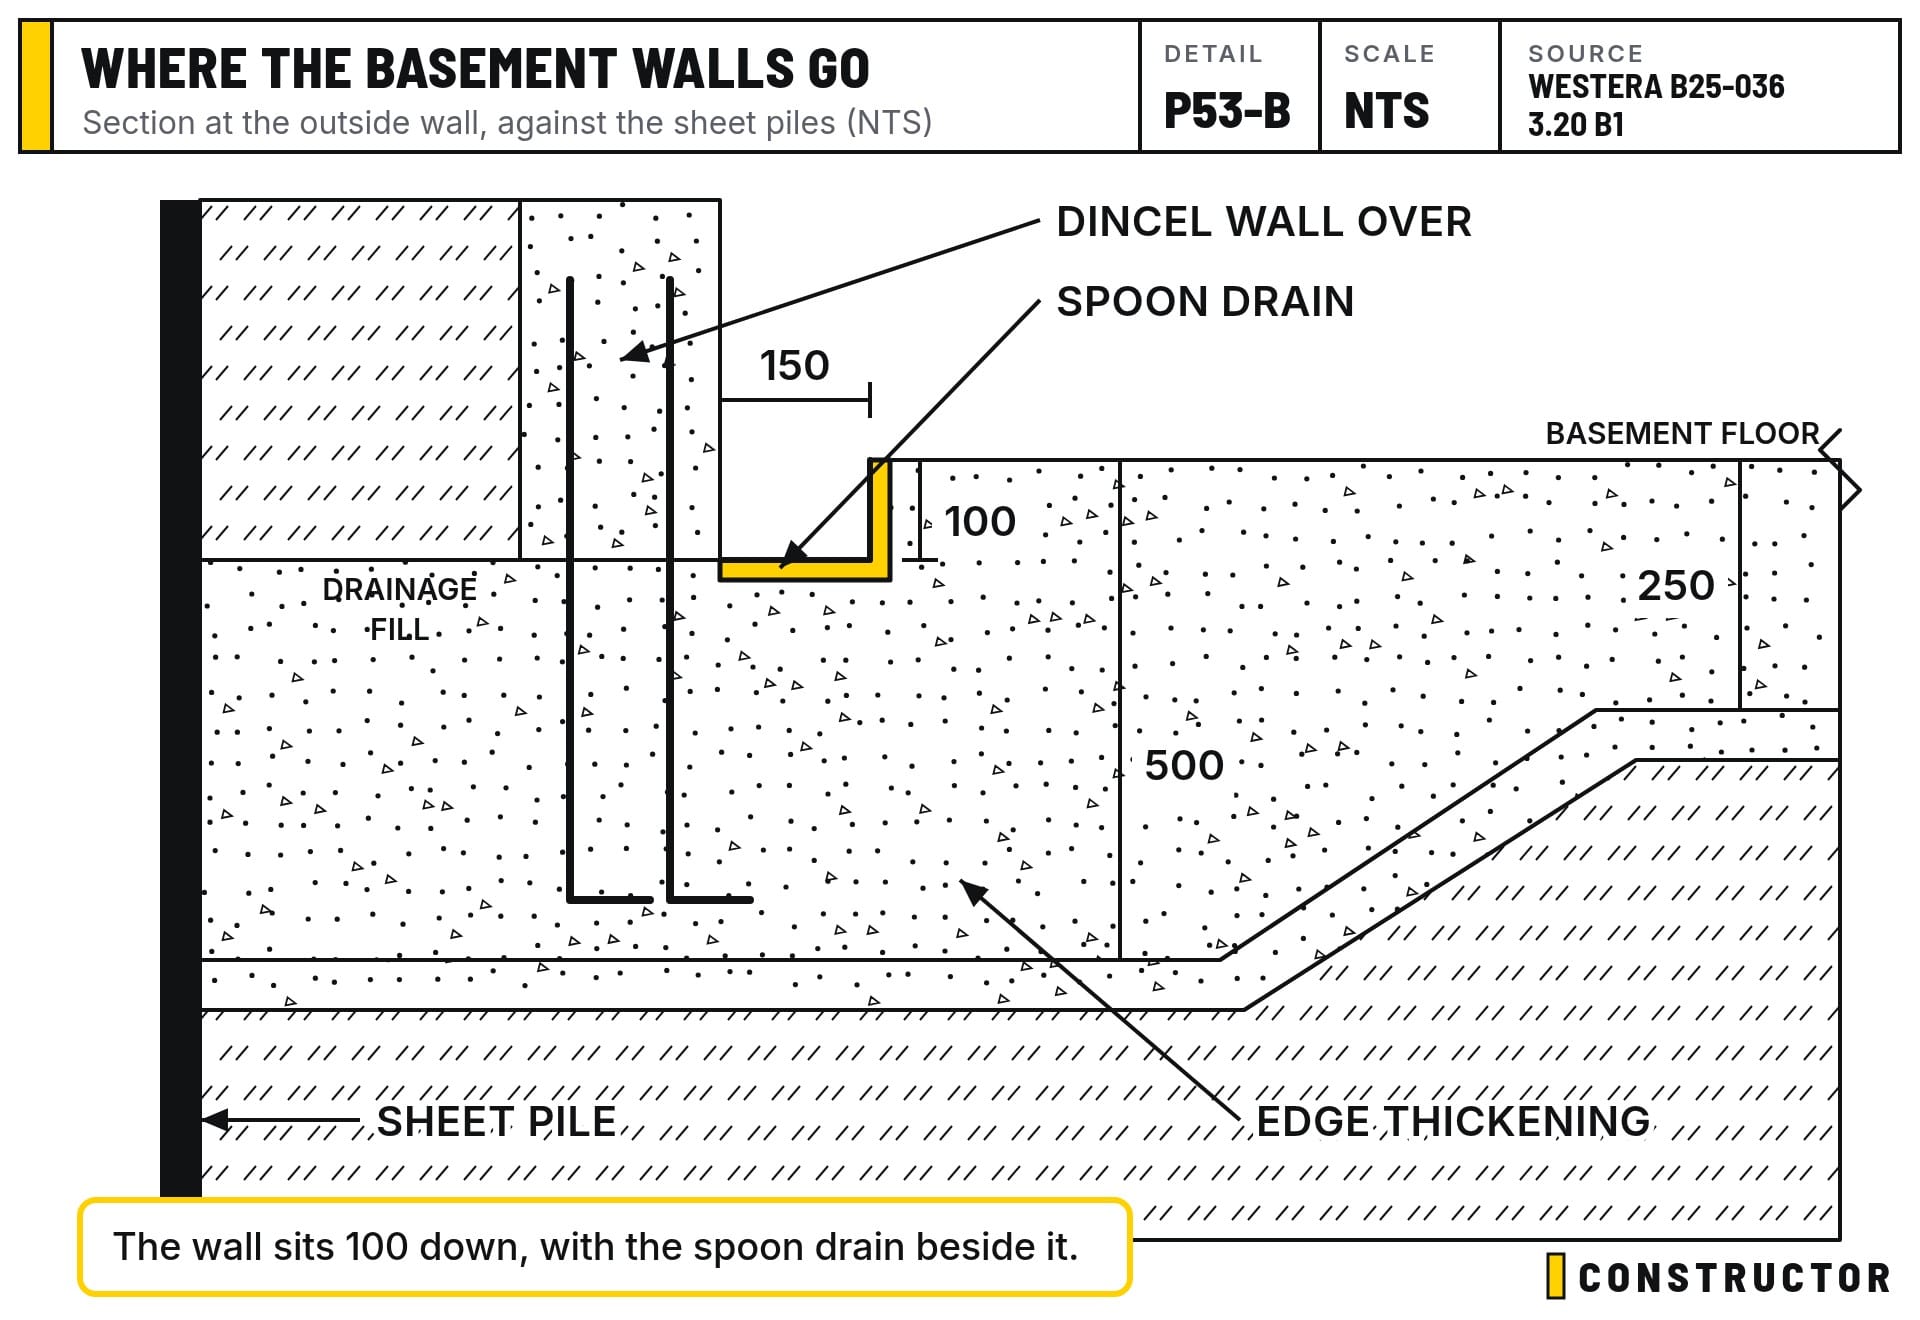
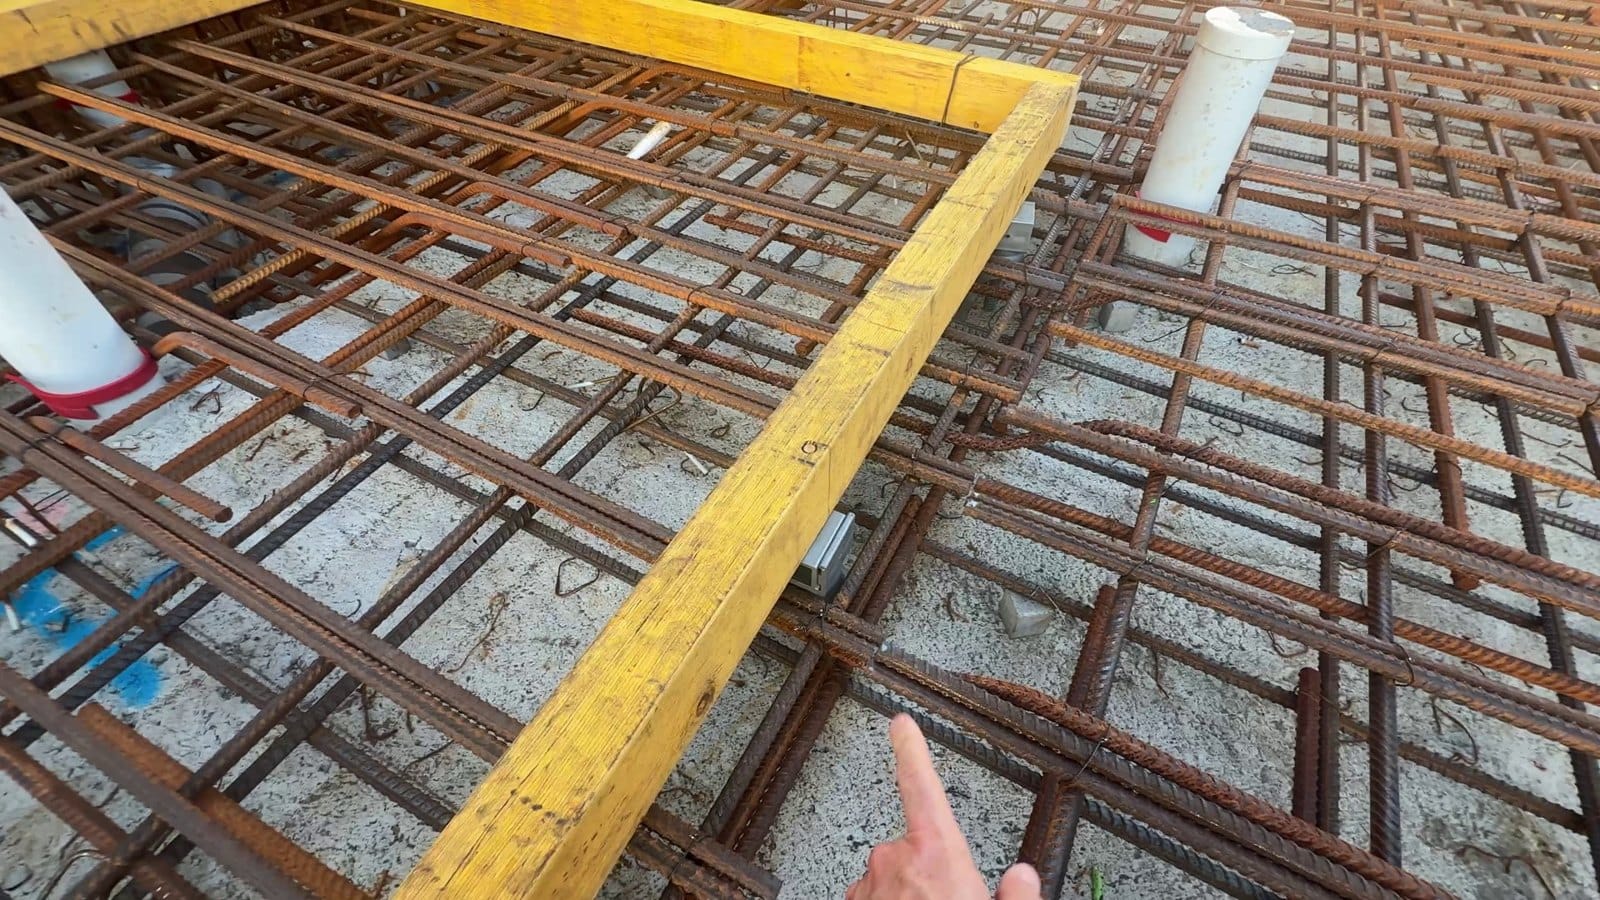
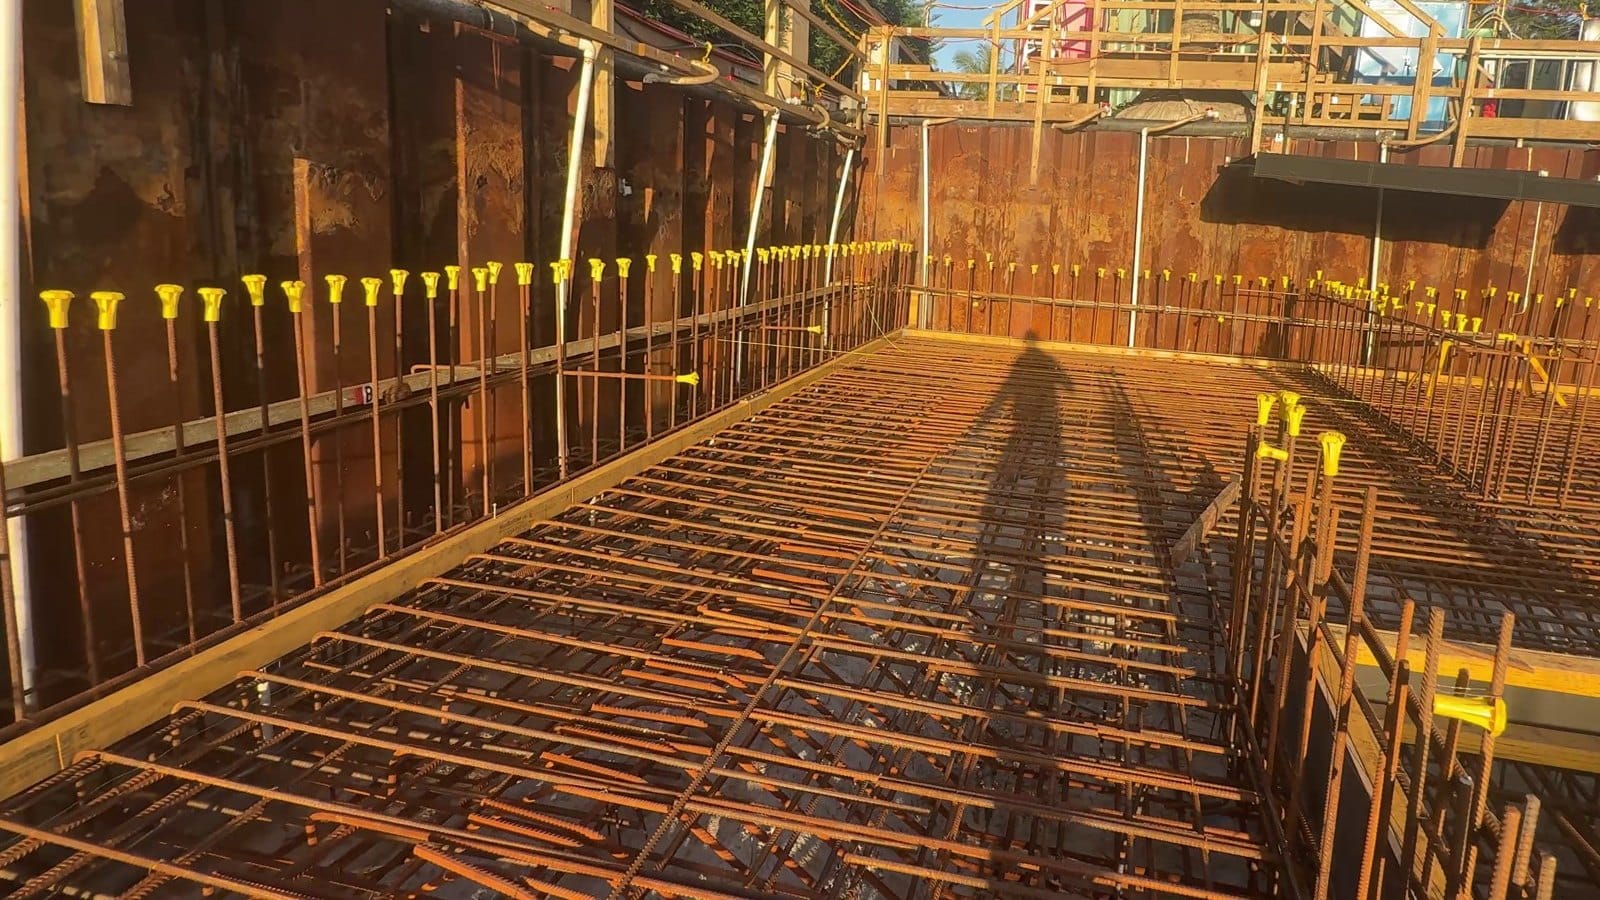
Drains run right around the basement. That's what's formed up along the edge. Along the outside walls, the slab steps down 100 mm. The basement walls go in the step, with a spoon drain (150 mm wide, 100 mm deep) beside them. The yellow caps are on bar caps, the 16 mm starter bars for the walls. A lacer bar holds them straight for now and comes out later.
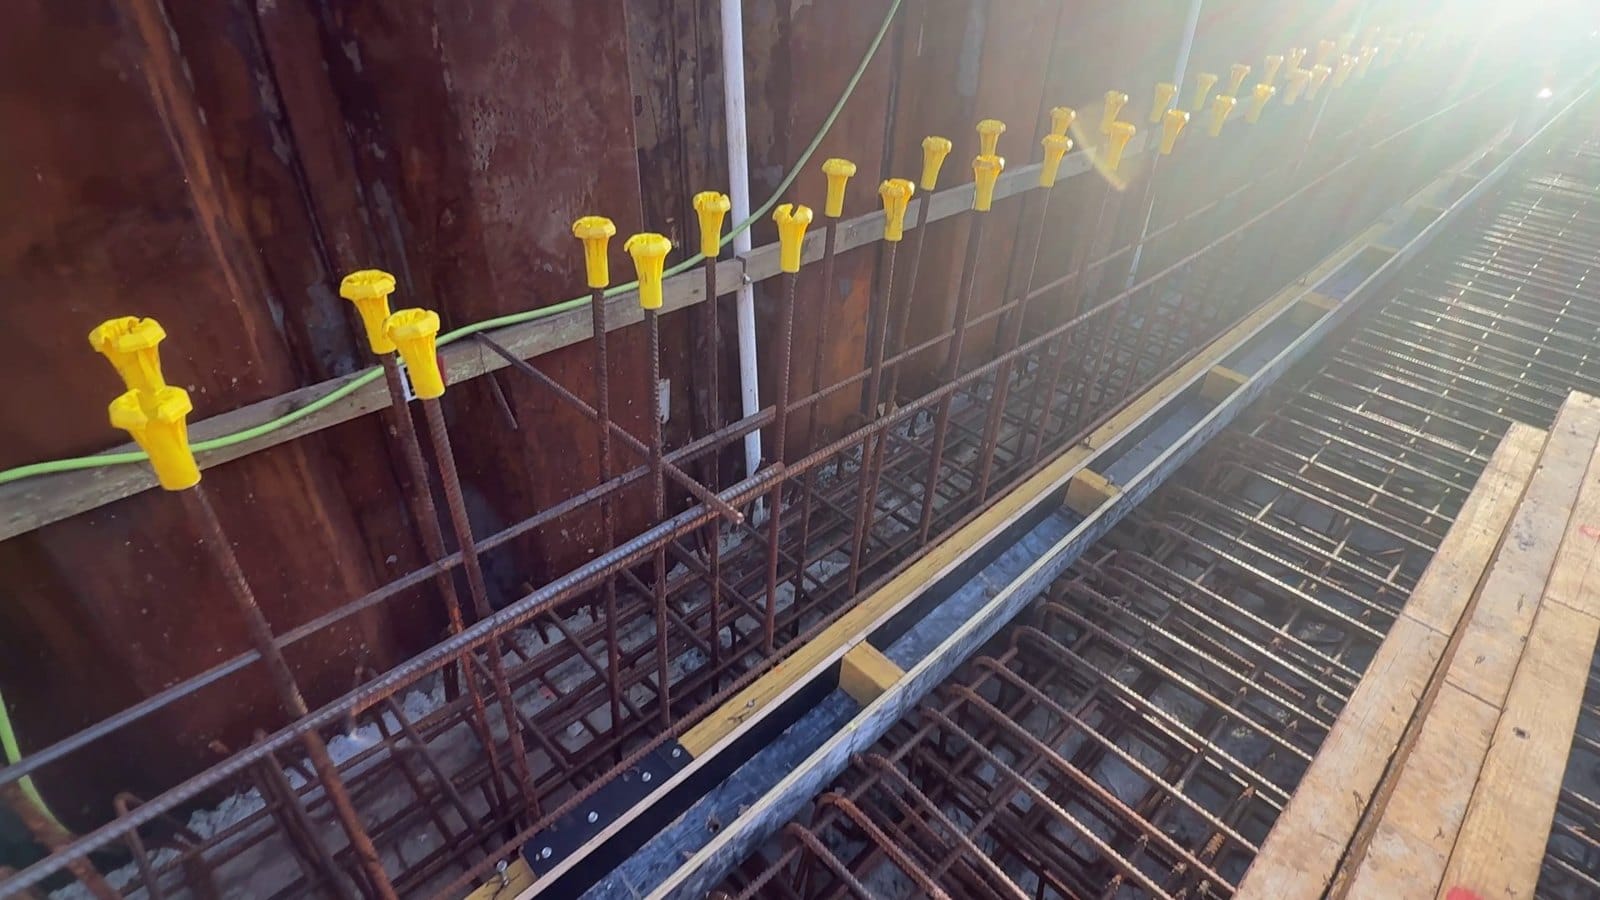
The dewatering spears will be cut off and capped when the dewatering is turned off.
The car wash area
There's a point for the car wash. We've put conduits at the four corners to mark where we want the fall, and laid it out parallel with the edge so it all falls one way. The conduits are just set-out points and come out later.
Columns and thickenings
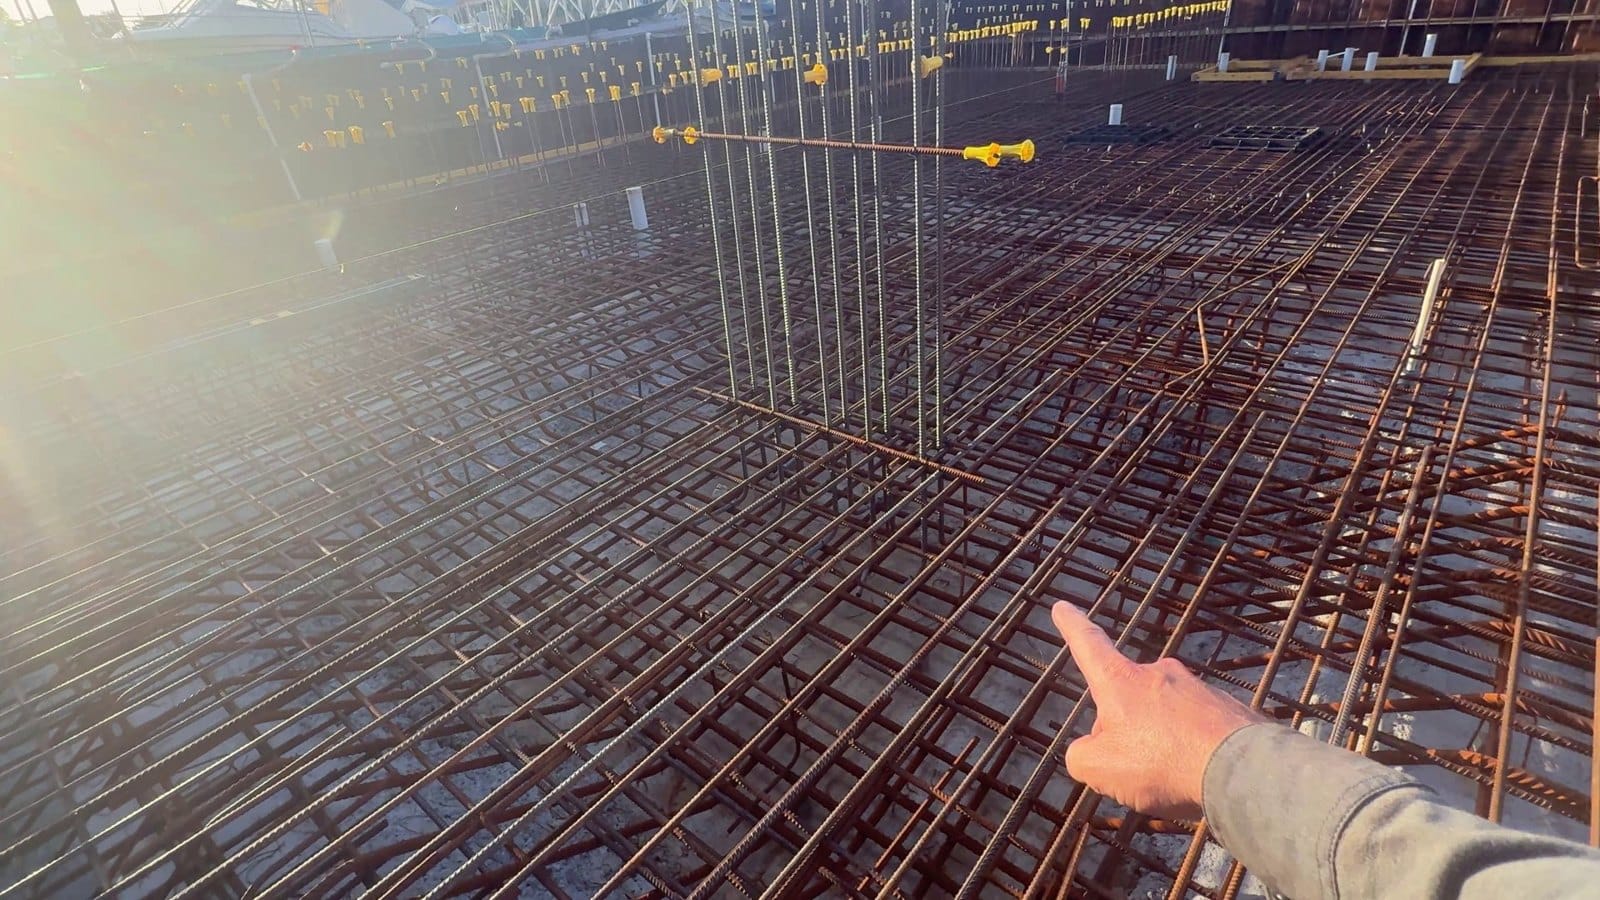
These are the structural columns for the basement (the ligatures hadn't been supplied yet). Now you can see why there was a thickening in earlier videos (Post 51): it's where a column lands, to spread its load into the slab. Extra concrete and heavier steel, the 24 mm bars. All the bars are deformed bars: the ripples help the concrete grip them.
Waterstops and the tank lids
There are two kinds of waterstop. The red one goes around all the pipes, and we tidy it up before the pour. The other is a bentonite strip, put in this morning. It's soft, like plasticine: keep your hands wet to shape it. It gets a cement slurry over it before the pour.
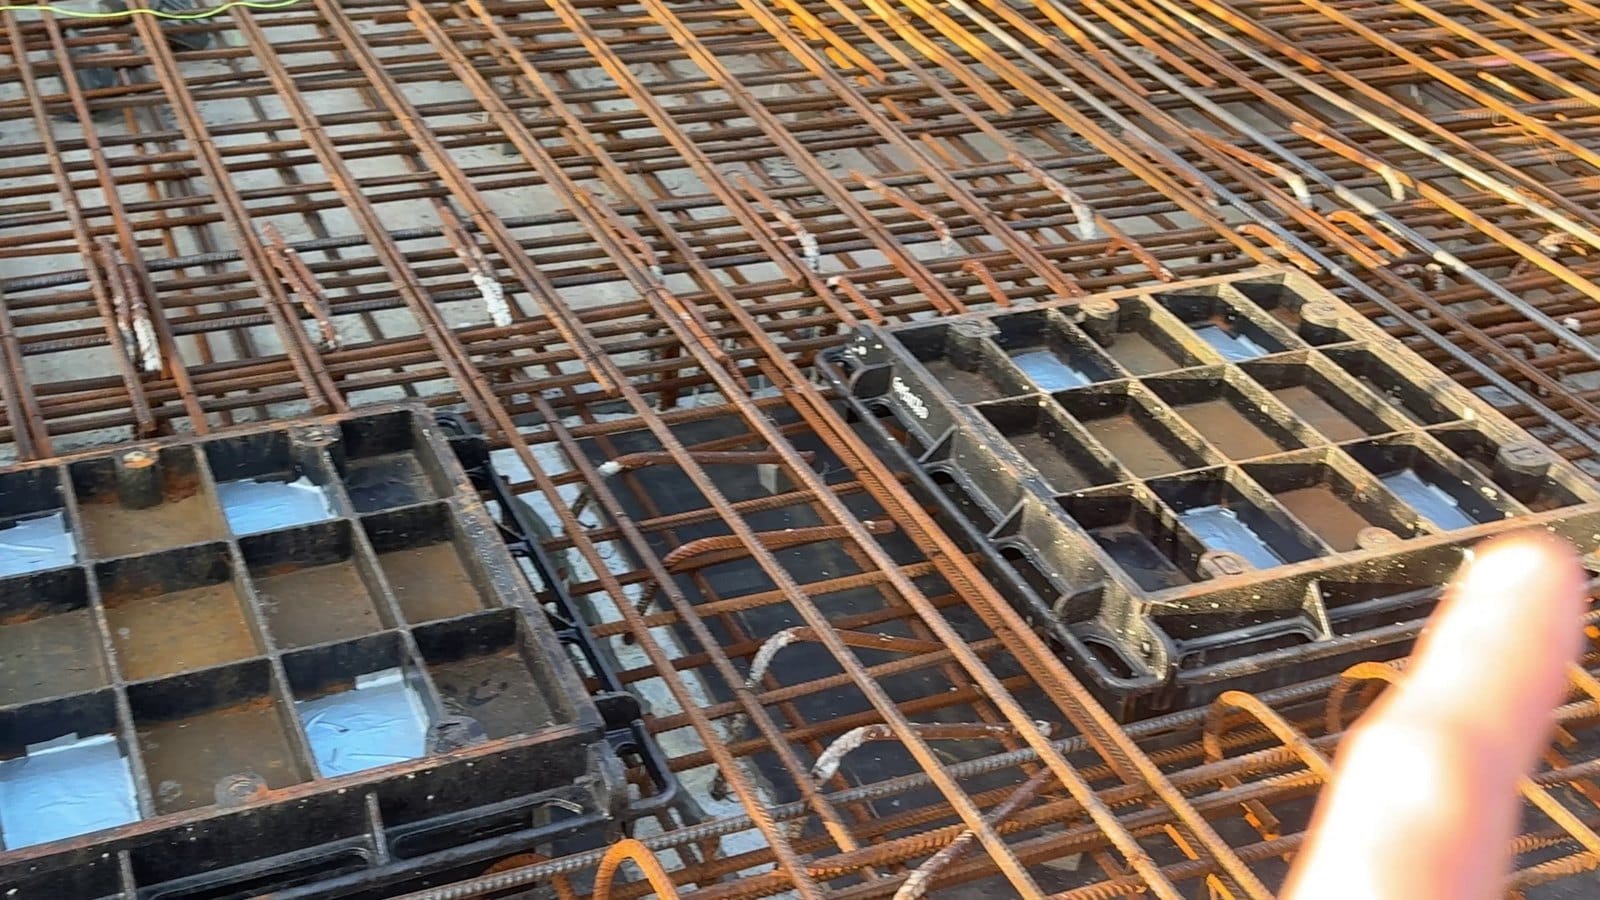
The Gatic lids are the way into the sewer and stormwater tanks (Post 50). The holes are taped up and the concrete goes around them. There are overflow points for rainwater tanks too, and I think the overflow goes to the sewer to keep it charged, since it won't get much use.
Set downs, walls and the lift pit
All the starters mark where the walls go: about 120 linear metres of them. One wet-area set down, 40 mm deep (the engineer approved the extra depth) so the floor can fall to the wastes, has the steel cut. (On your own job, if a set down is deeper than the drawings allow, get the engineer's approval in writing before the pour.) The supplier didn't send bars bent for the set down, so instead of waiting for a resupply, the bars were cut to form it. The black material is the lagging from the last video, which lets the pipes cope with settlement.
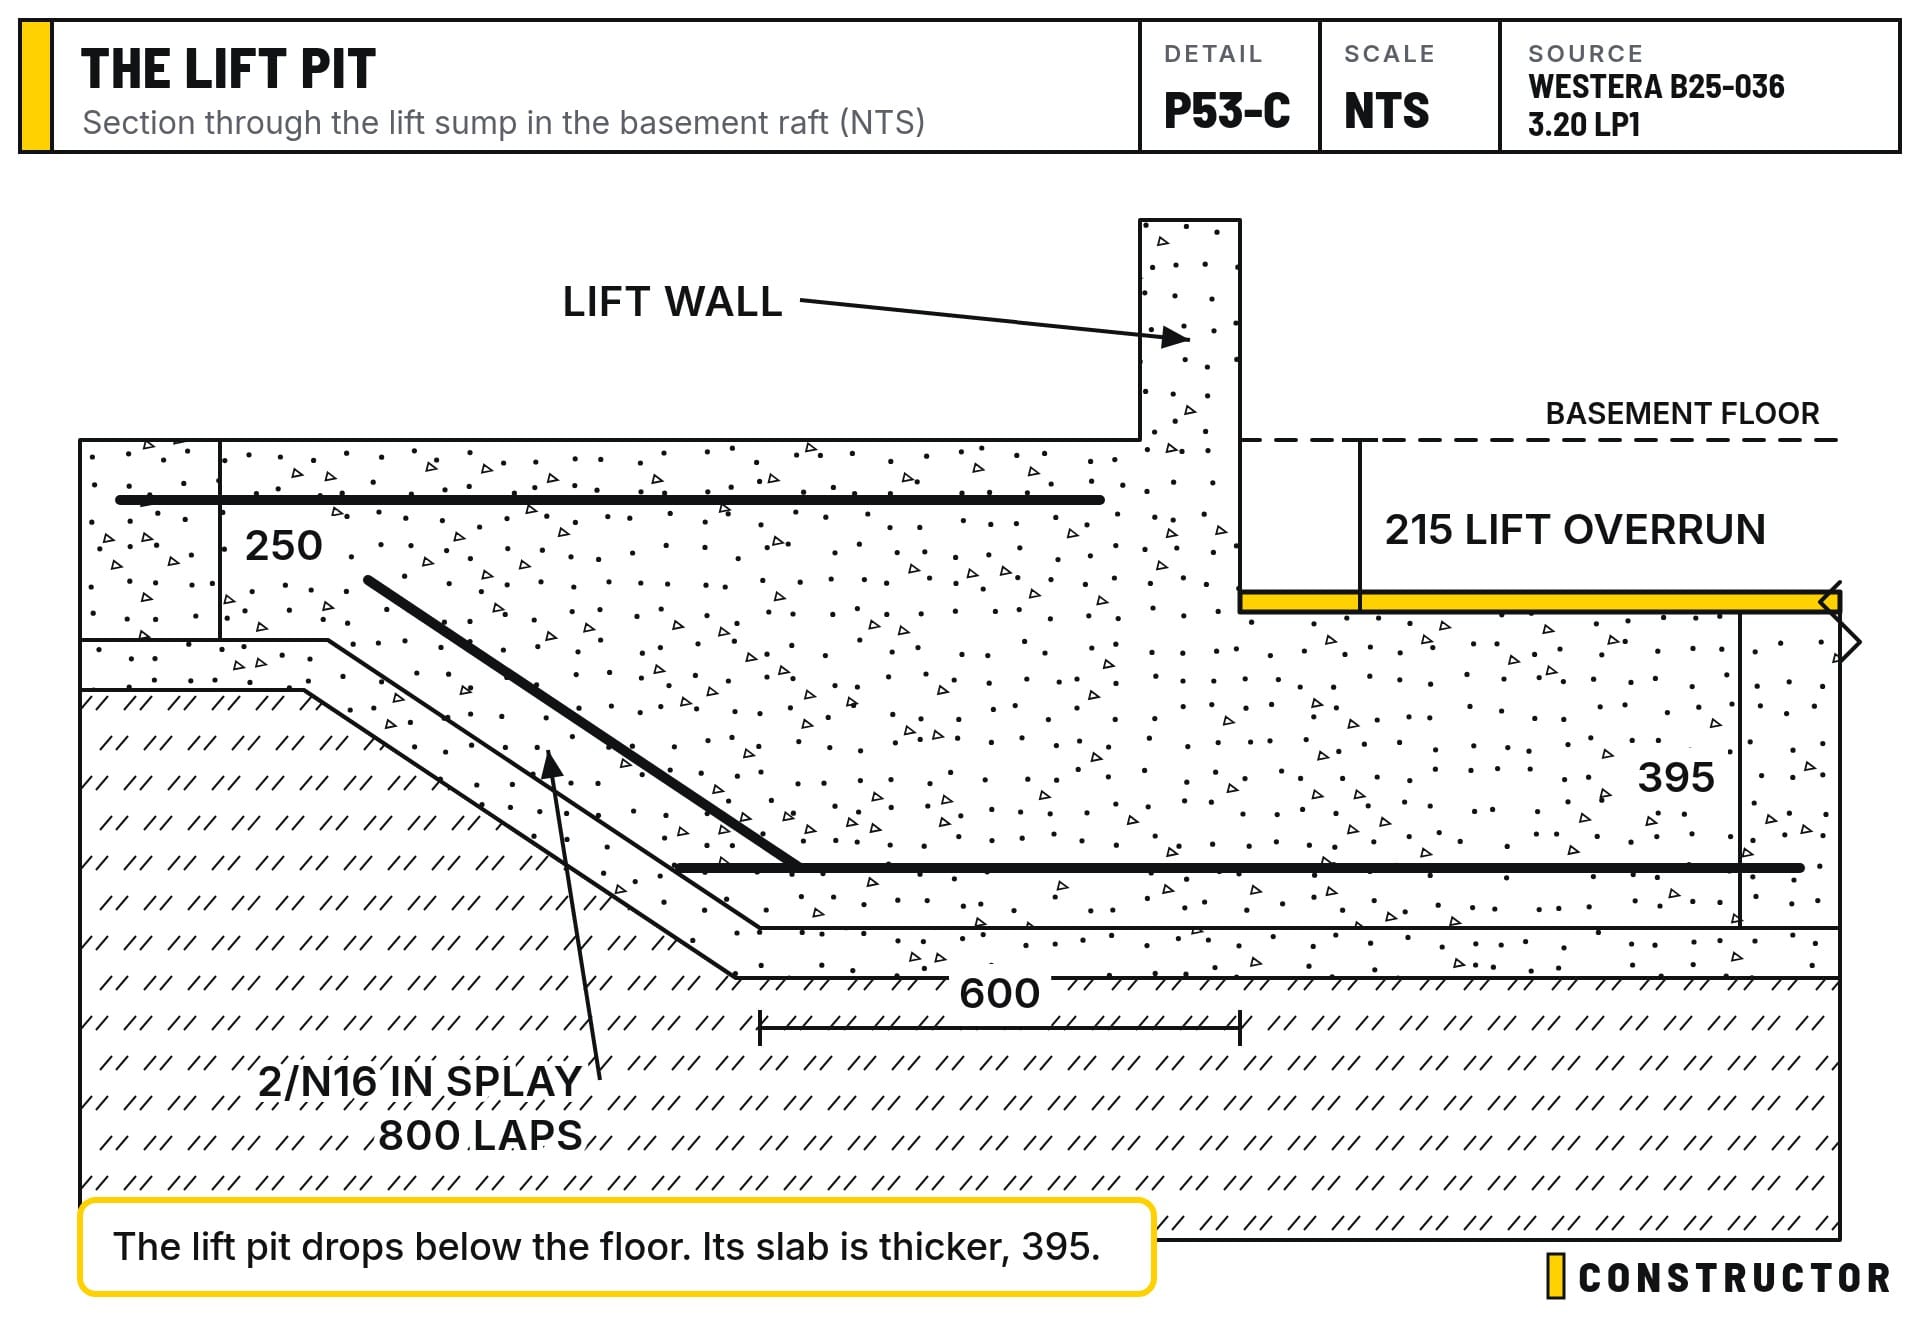
The lift pit is a 215 mm set down. It's only a shallow lift. Its slab is thicker than the rest, 395 mm, and the steel follows the 1 in 1.5 splays down into it.
There's a curved internal wall, already formed. The workshop driveway comes down over here, onto support walls, with a drainage grate across the bottom. Once the walls are built, backfilled and waterproofed, it'll be filled with gravel.
Okay to pour
The engineer has inspected all four layers and the starter bars and signed off. We've done our own quality checks. The concreter is happy, and everything is booked. The pump arrives early to set up, and the first truck turns up at 6:30 on Monday.
If you're doing this on your own house, our C5 Pre-Pour Slab Inspection Checklist has the whole list. After the pour, the C6 Post-Pour Slab Inspection Checklist picks up from there.

C5 - Pre Pour Slab Inspection Checklist
$119.00 AUD
Last updated 28 Oct 2026 · Revision 4 · Free updates for life
Checklist Type: Major (Base Stage)
Form Factor: Fillable, print-ready PDF (A4, 30 pages)
When to use: Base stage: after the slab is prepped, before concrete is poured
A 95-point pre-pour slab checklist. Check setbacks, boxing, membrane, pipes and steel after the slab is prepped and before concrete is poured, while fixes are still simple.
✓ Authorship verified on the blockchain · View certificate
I know I ramble, but hopefully you saw something interesting.