
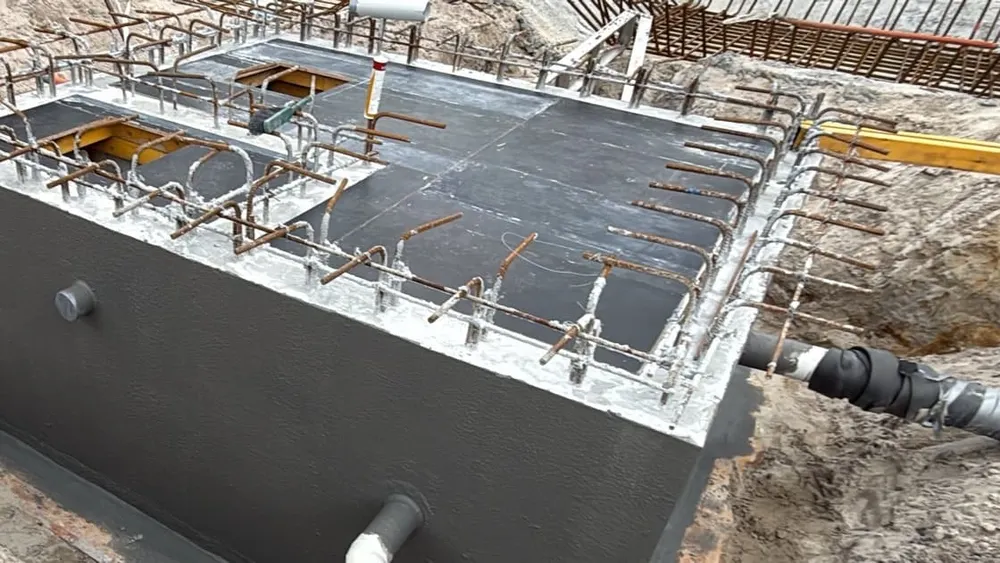
Good morning. Today's a crane day: our little flying excavator is coming down into the basement. The tanks are also fully waterproofed now, so I'll show you what went on them, and then how we got the sand back in around them. There are two videos this time.
The flying excavator
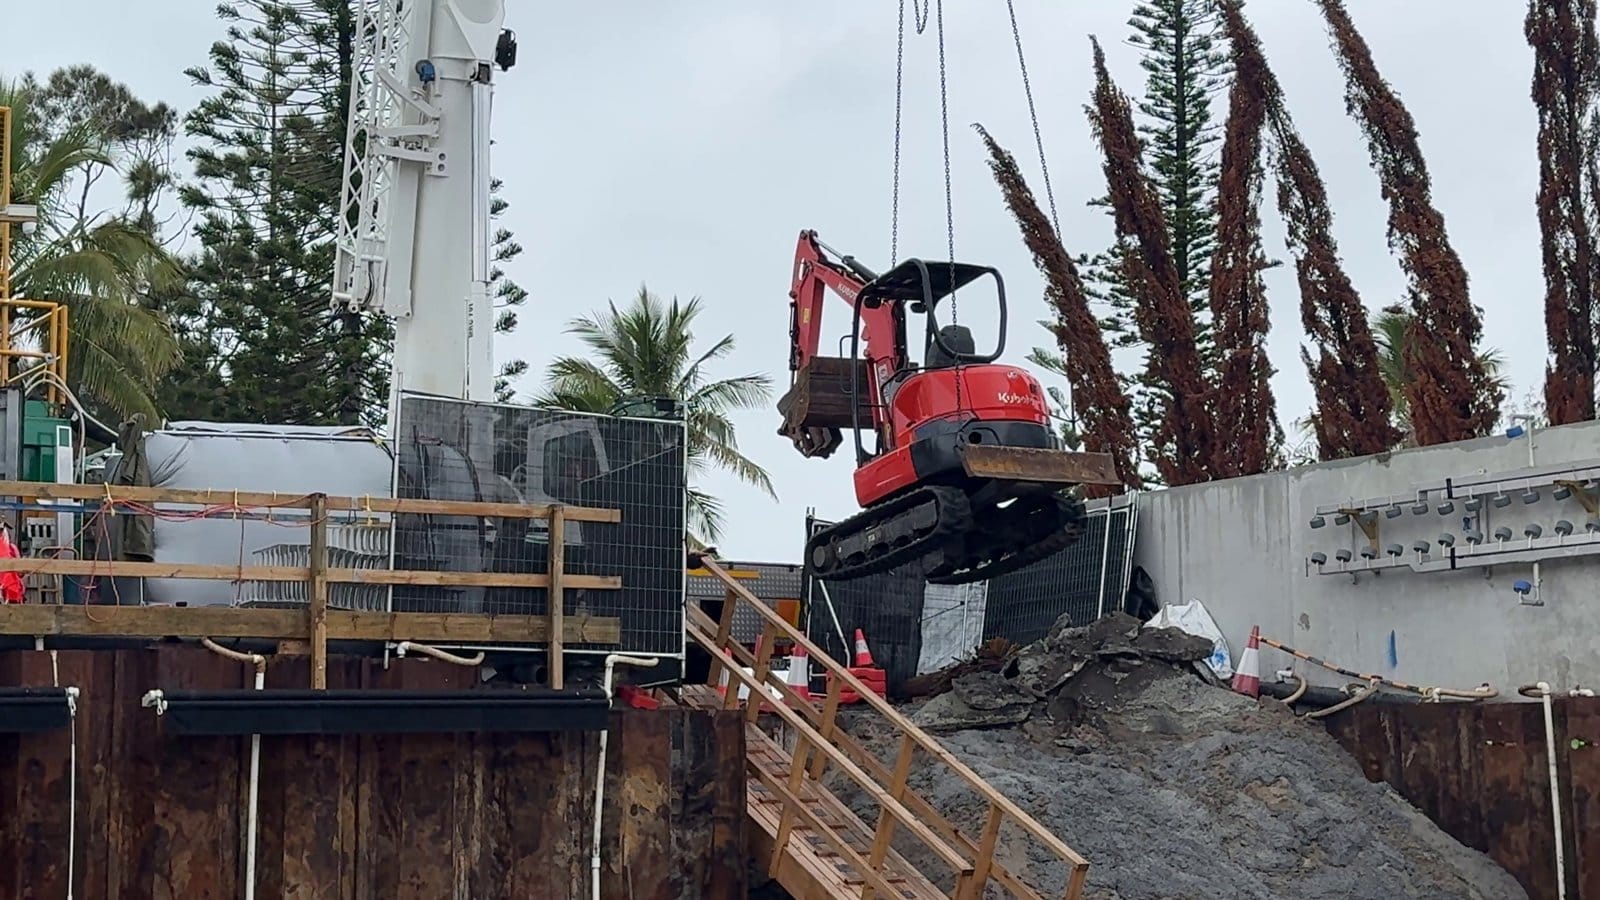
It's a 70-tonne crane. If you look at the very top of the boom, there's a little wind vane, because wind limits what a crane can lift. Getting a crane to site when it's raining is hard work, but the weather here normally breaks mid-morning, and it did.
The first lift was the 3-tonne excavator, going for a joy ride down into the basement. It's down there to peel off the concrete washout and help with the backfill. Next down was a 3 m³ skip from the front of the site.
The dogman is the person who guides the lift. He's on a two-way radio with the crane operator in the cab, calling every move: slew left or right, up or down. Once the load is down, he unlatches the chains from the excavator's lift points.
Again, not very exciting. We don't like exciting. We like boring and predictable, because that means everyone is safe. Slow is good and safe is good.
Making the most of the crane
While the crane was here, the dewatering company brought a truck with an IBC: one of those 1,000 litre tanks, this one full of treatment chemical. The crane slewed round and lifted it up on top of the dewatering gear (Post 40 explains the treatment plant). It was organised that way on purpose, to get the most out of the crane.
This crane company has a two-hour minimum. Some companies have a three-hour minimum, and that's the main reason we use this one. They're local, and most of our lifts take an hour or less.
The tanks, fully waterproofed
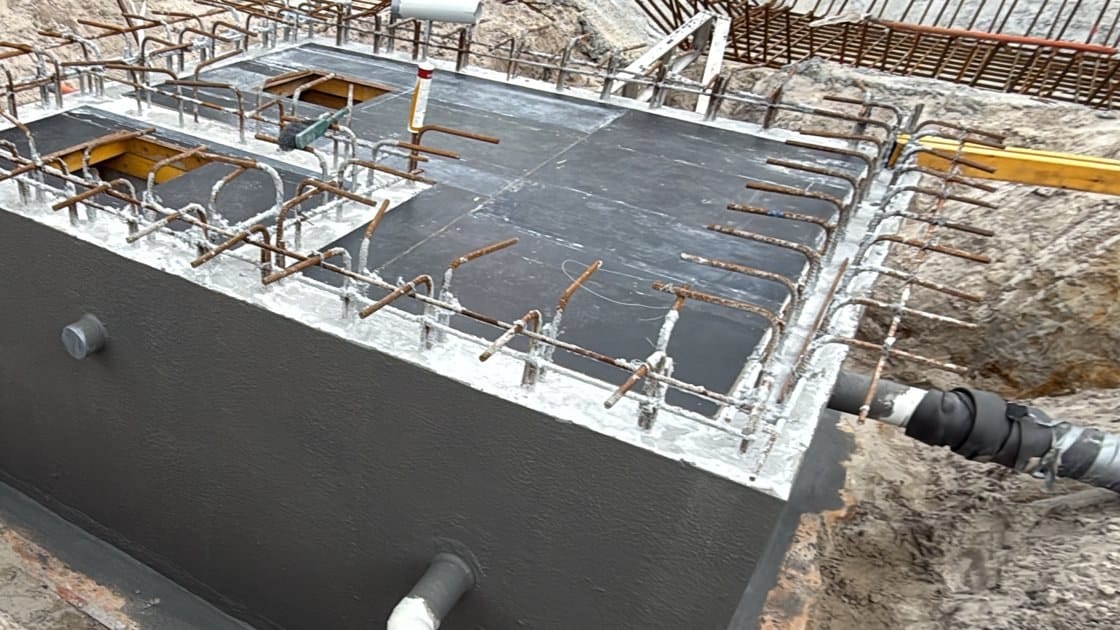
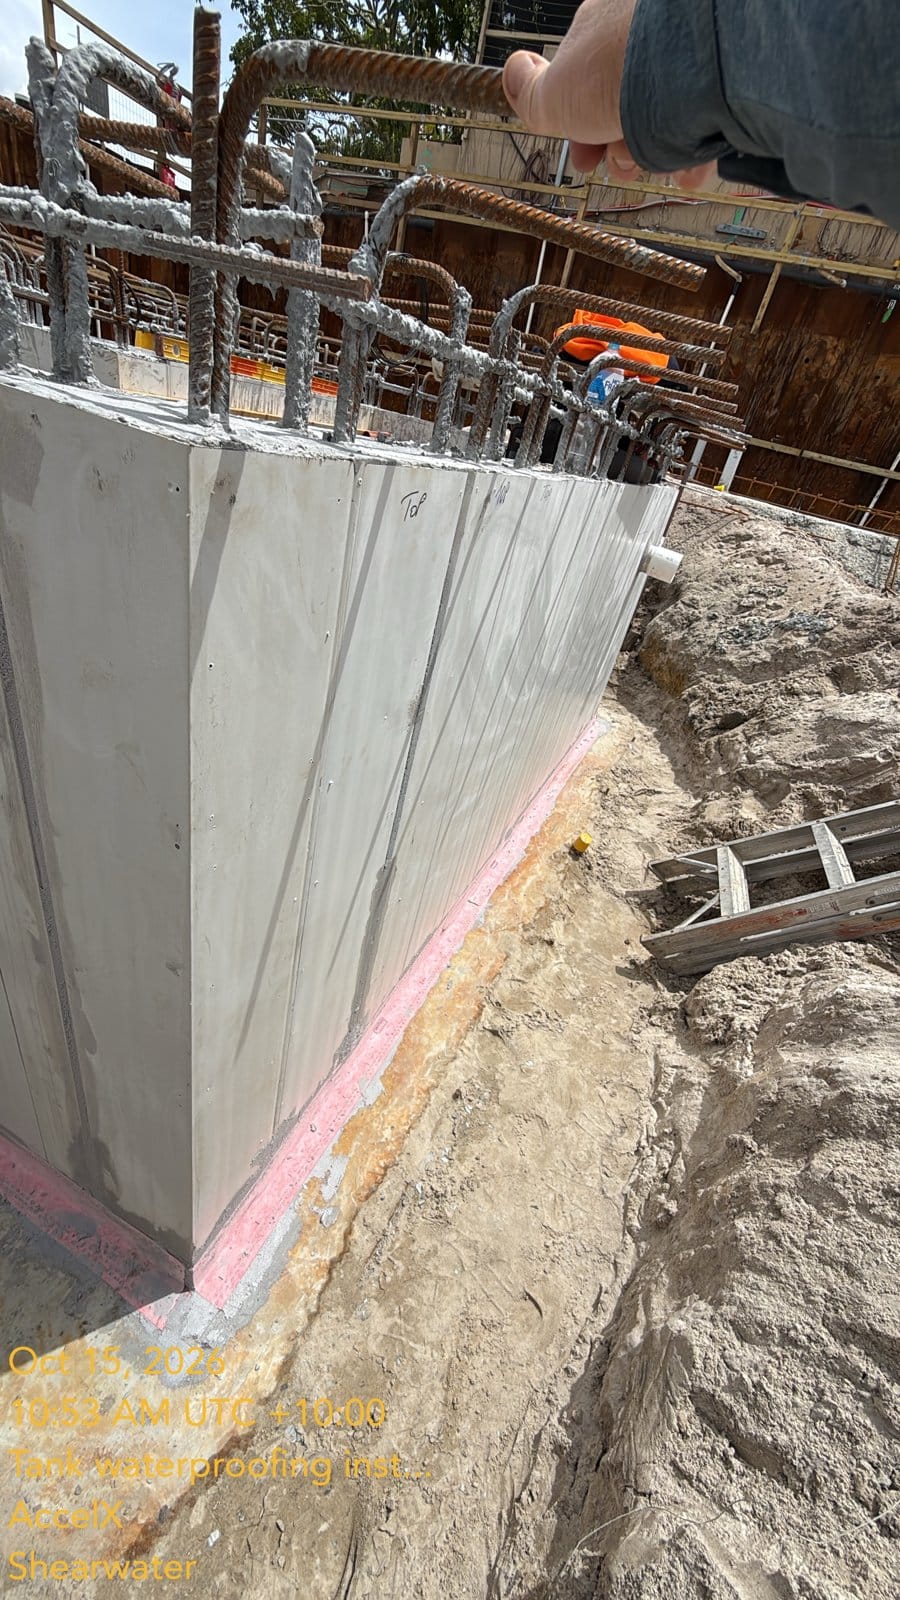
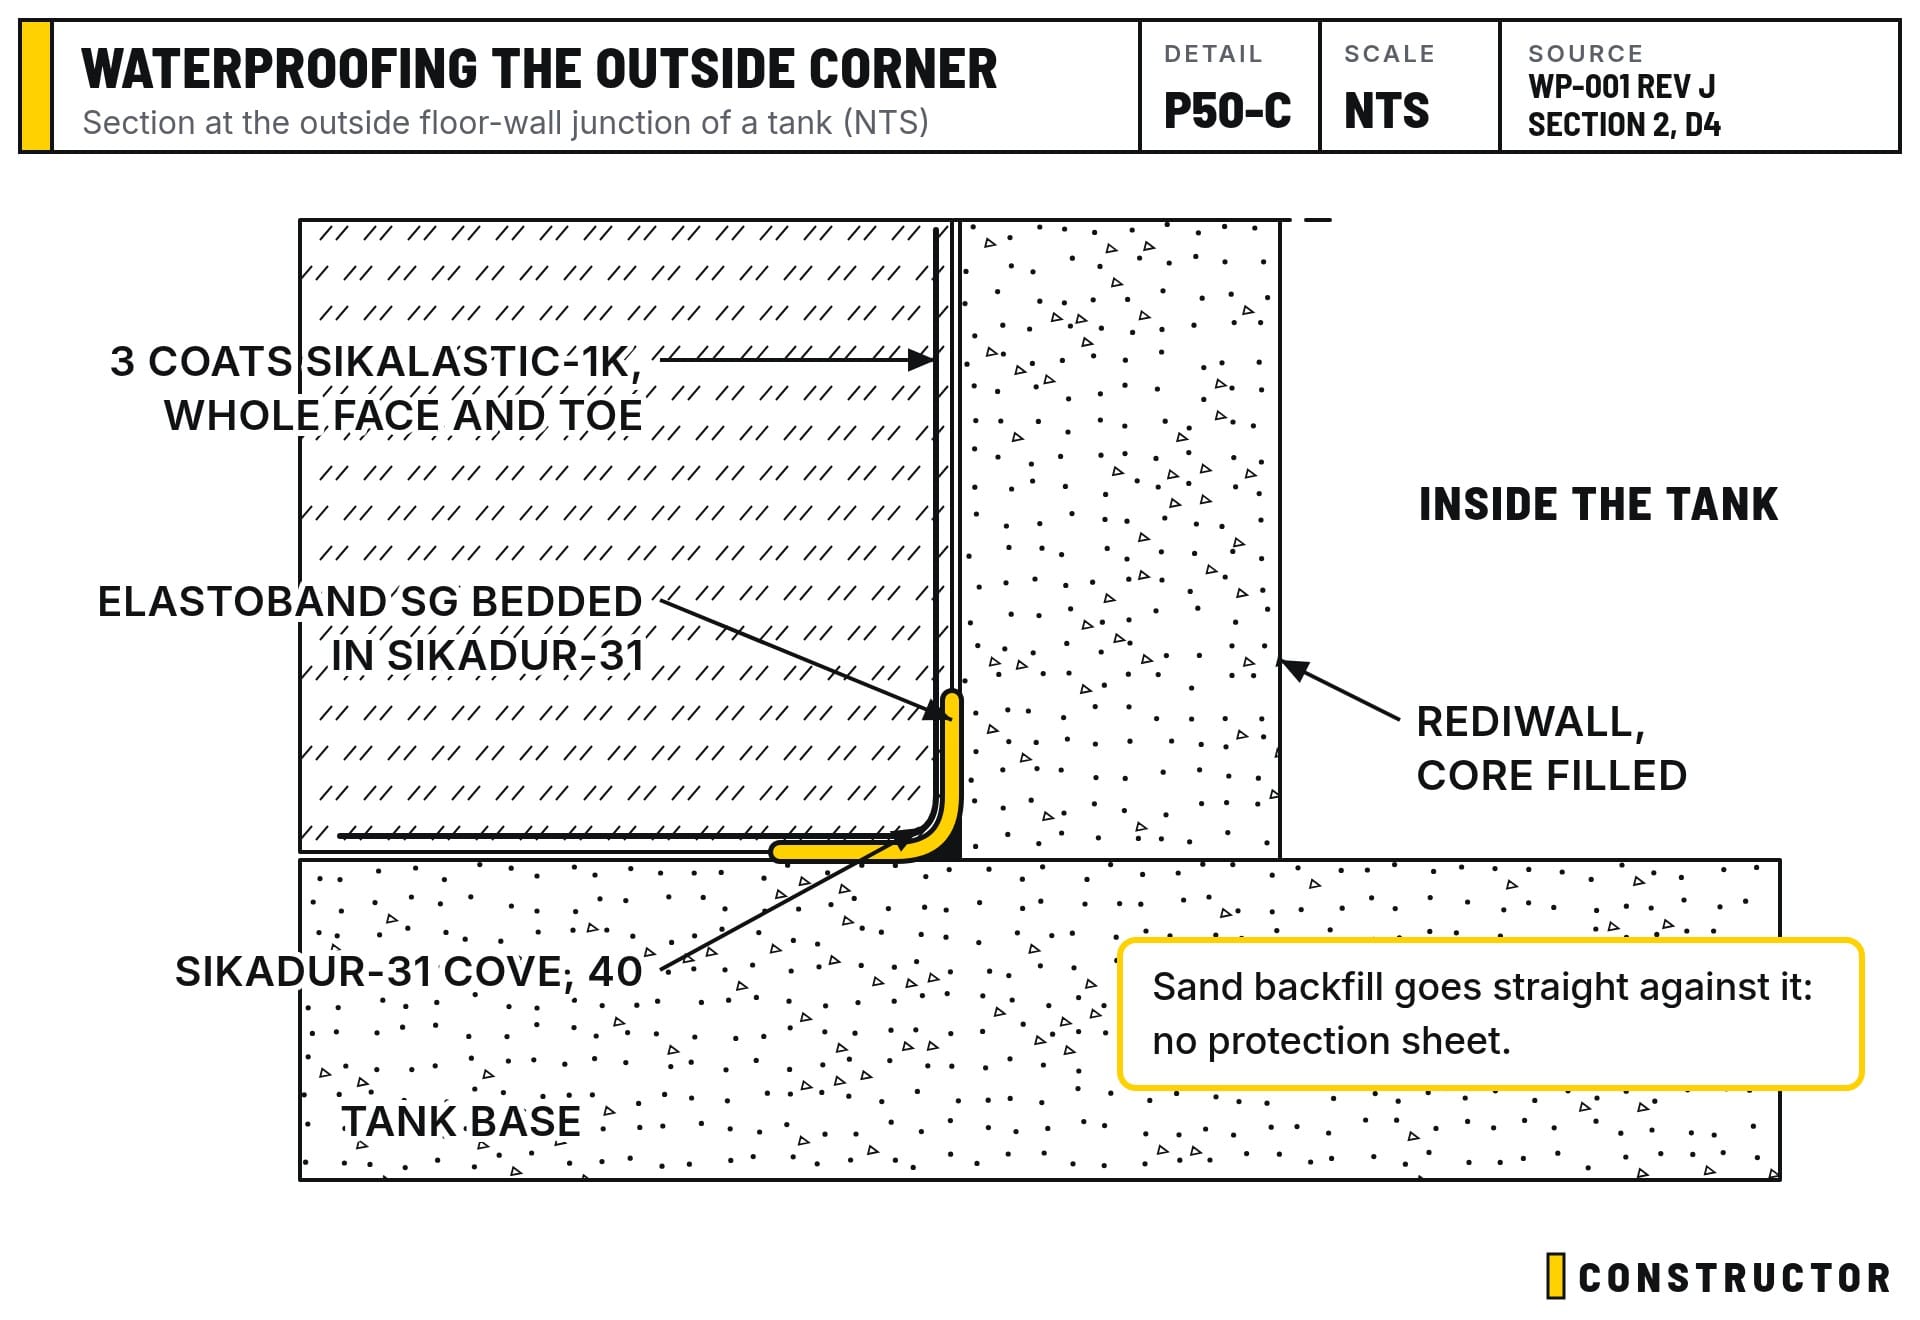
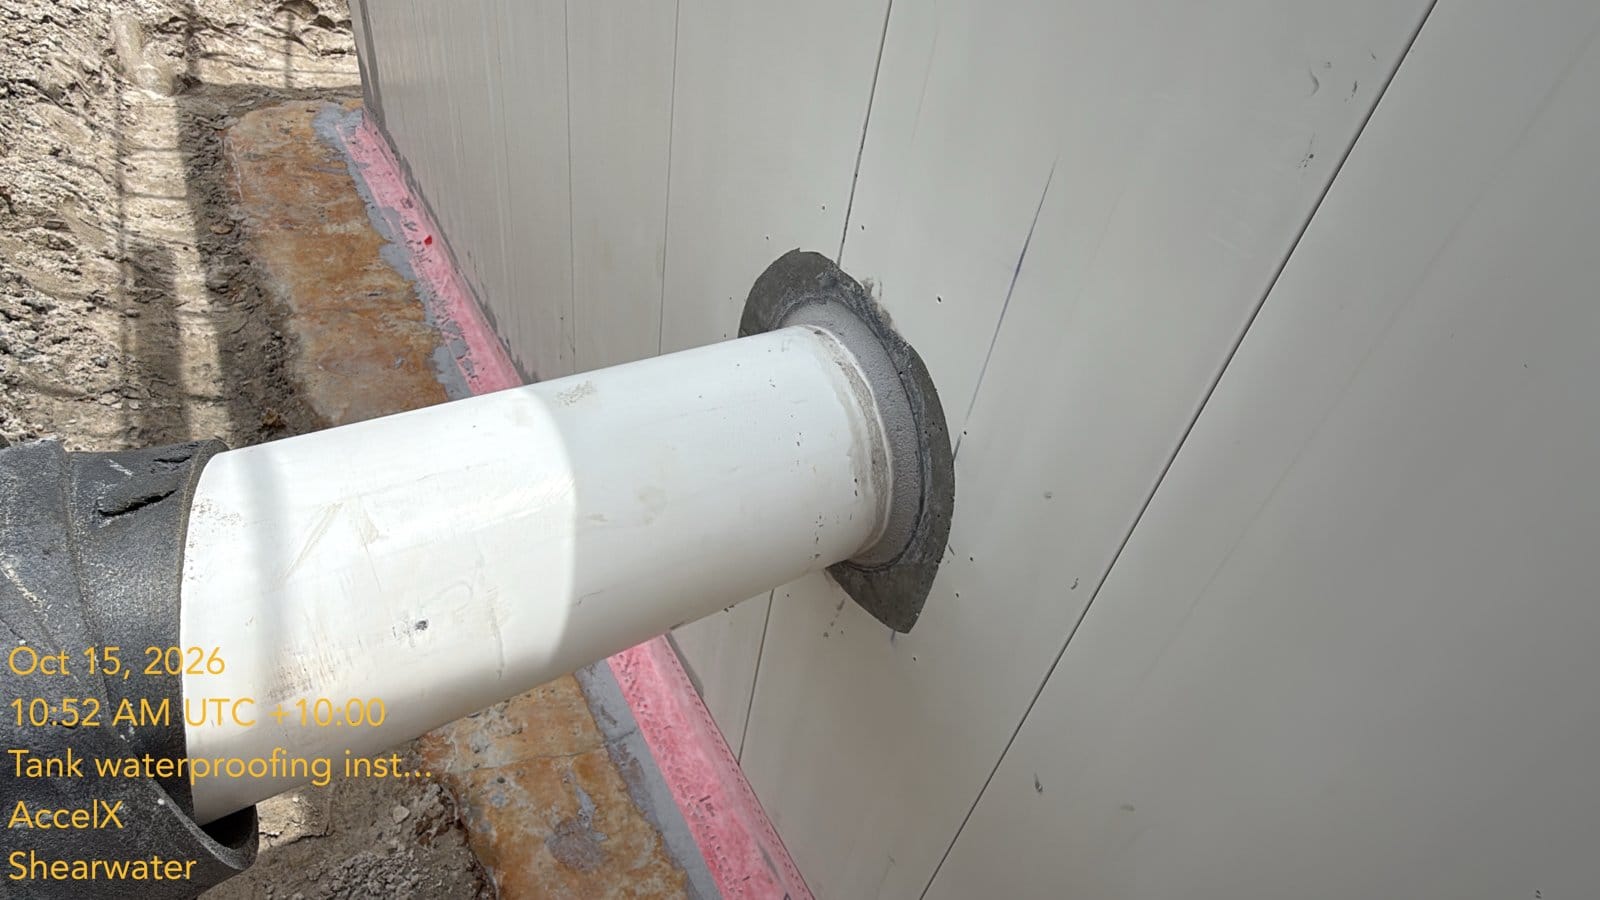
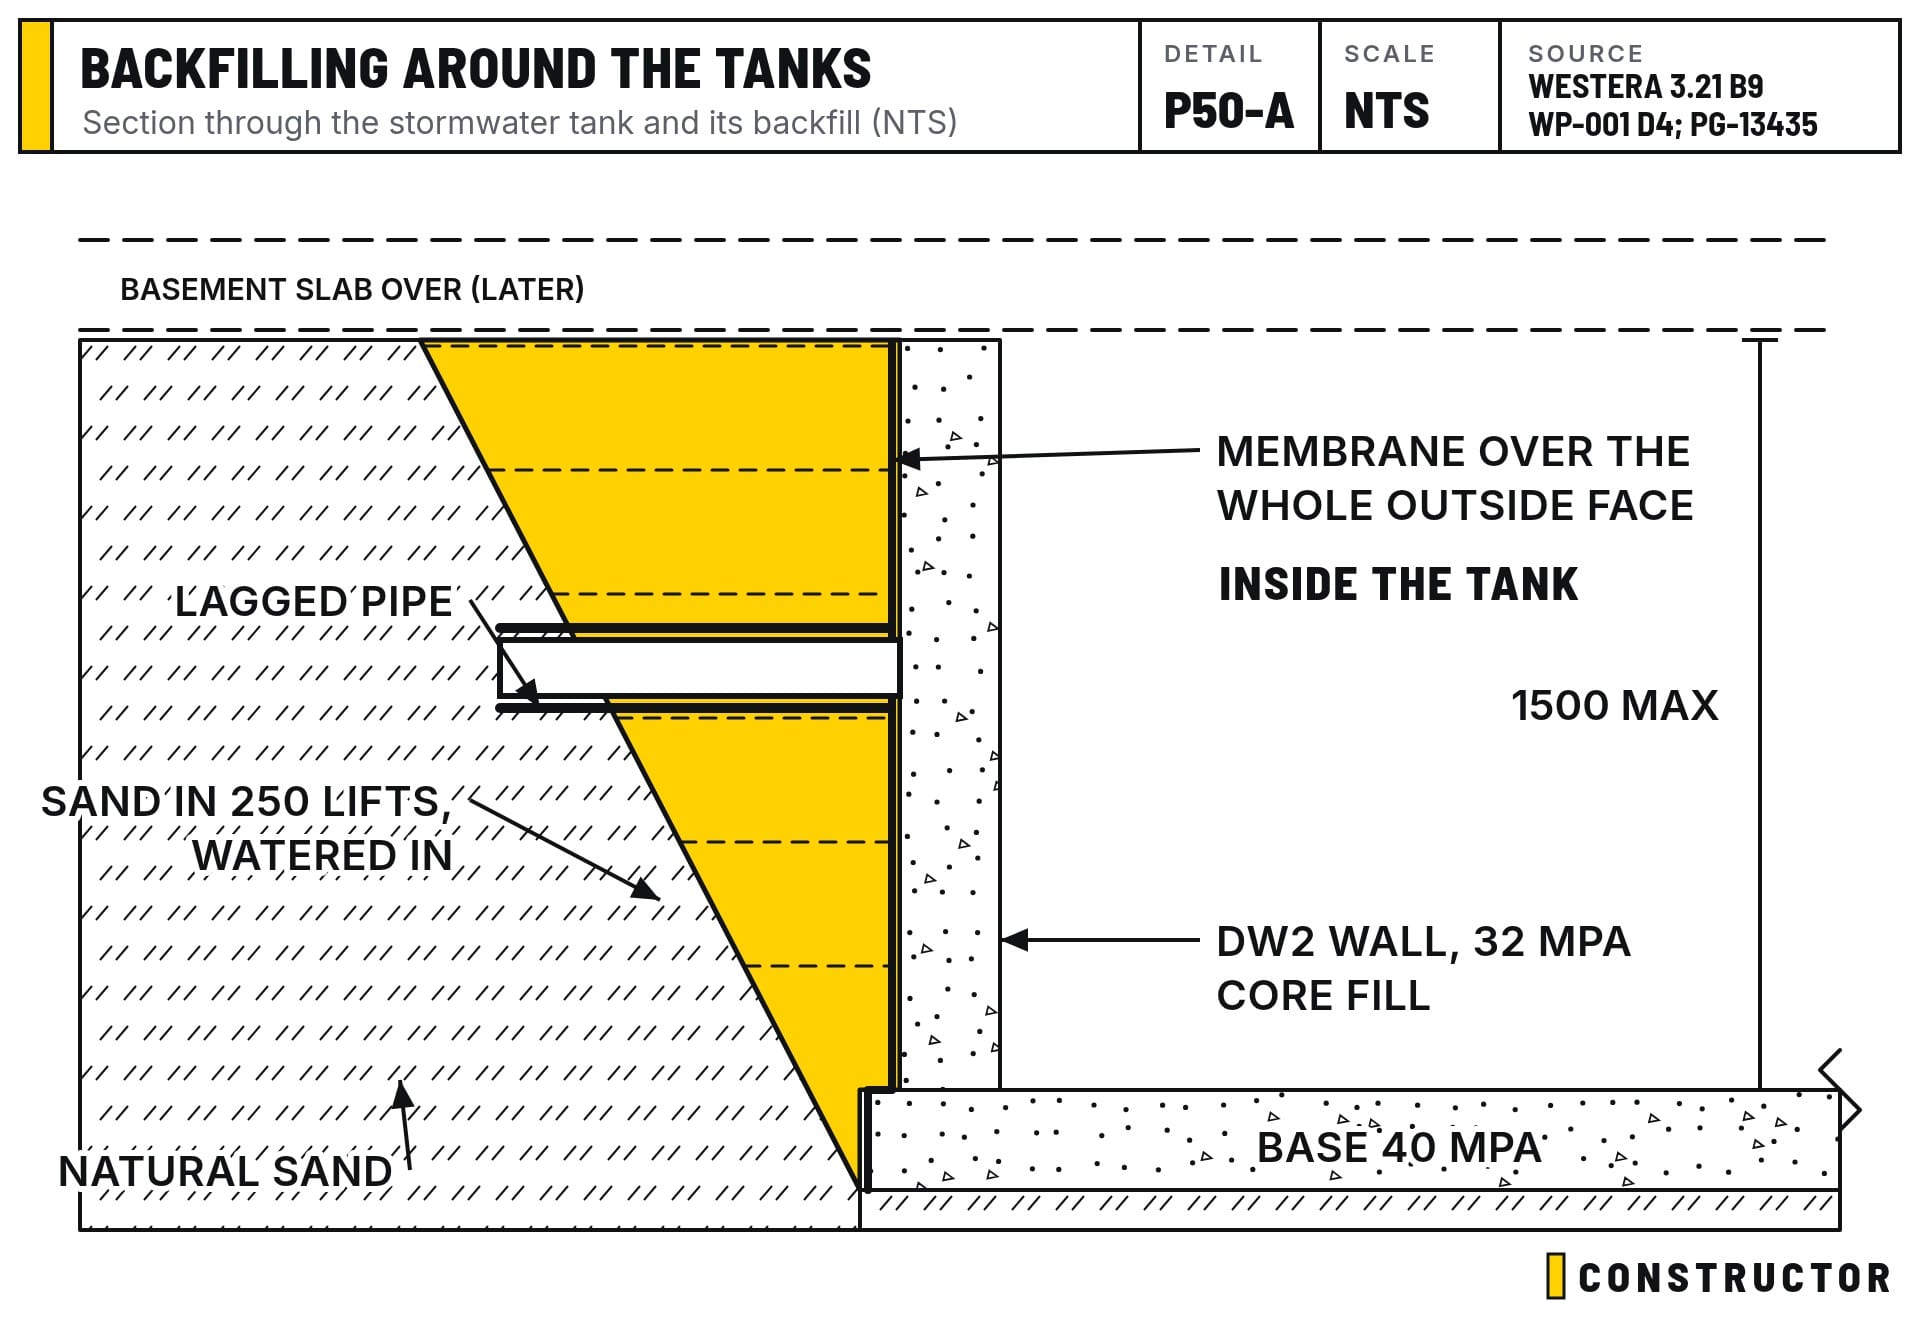
The outside of the tanks is now fully waterproofed. Here's what went on:
- Epoxy first. Sikadur-31 CF Normal epoxy goes around every pipe and along the floor-wall junction, formed into a cove.
- The band. A flexible band (WPA Elastoband) is bedded into the epoxy at the junction. The band gives the joint some flexibility, although the slab comes out past the tanks and everything is tied into the main slab, so I don't expect any movement here.
- The membrane. Three coats of Sika 1K (Sikalastic-1K), rolled on over the whole face and lapped onto the epoxy and the band.
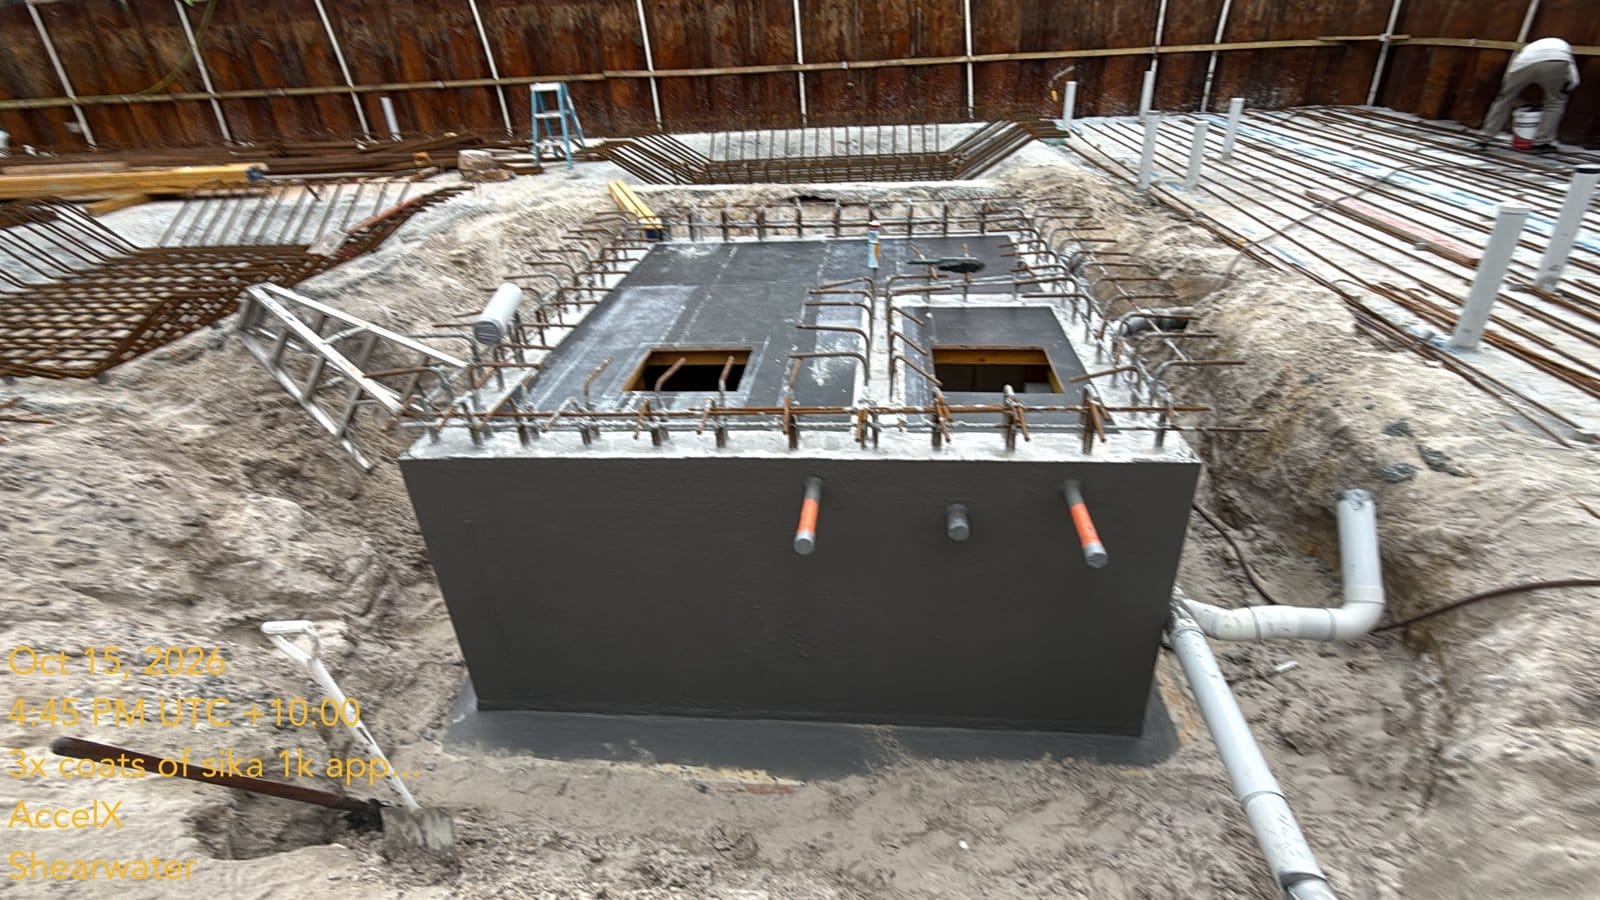
Lagging the pipes
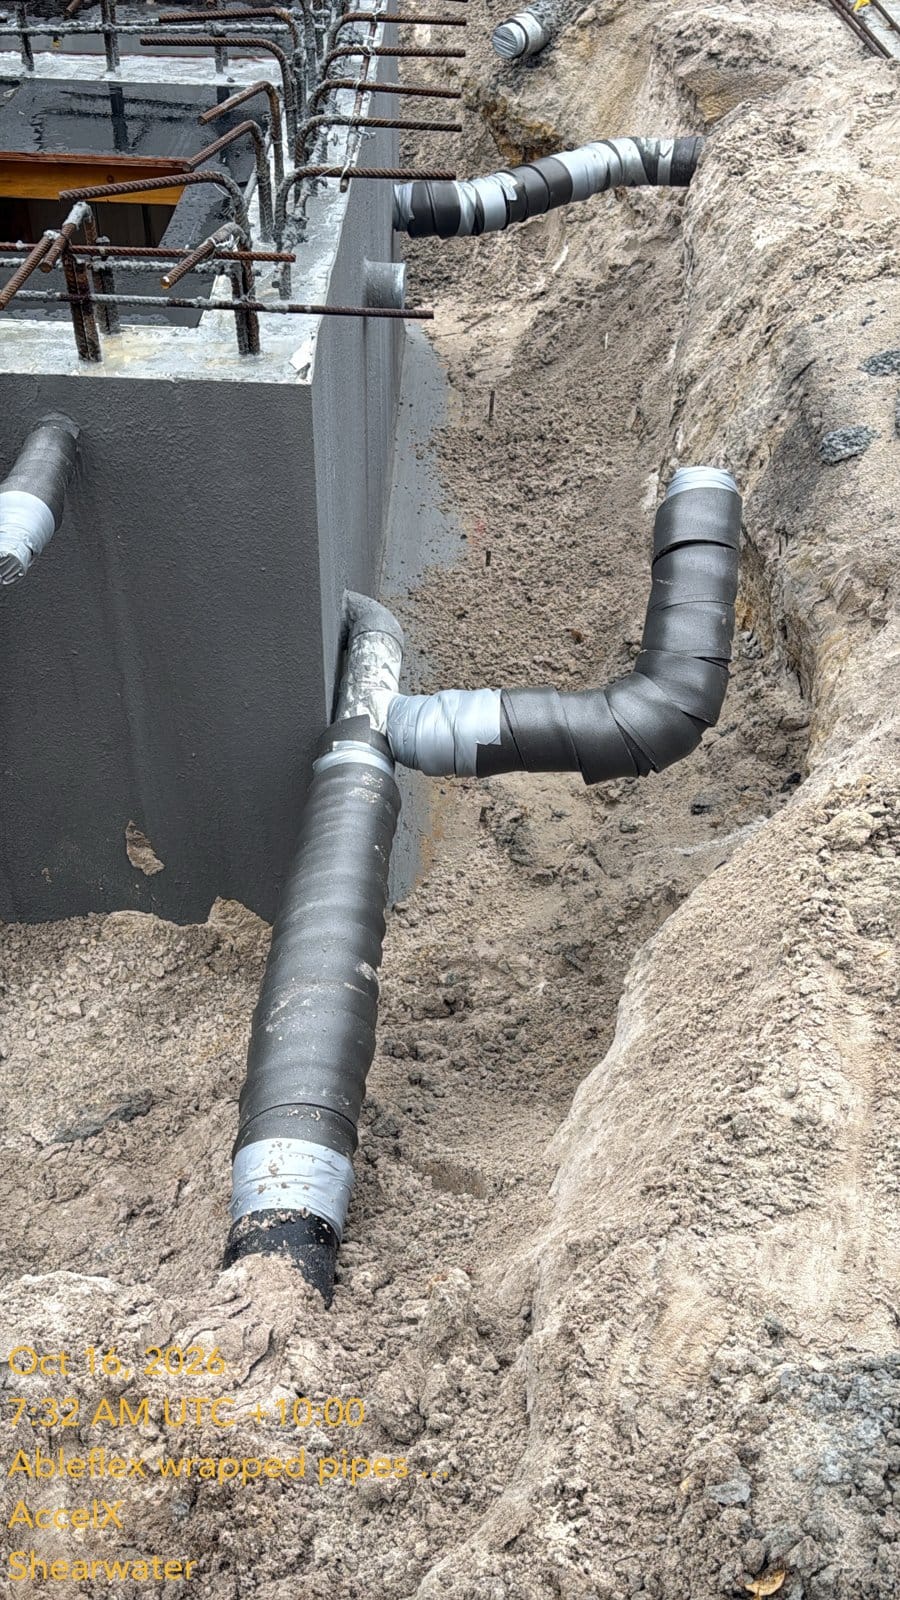
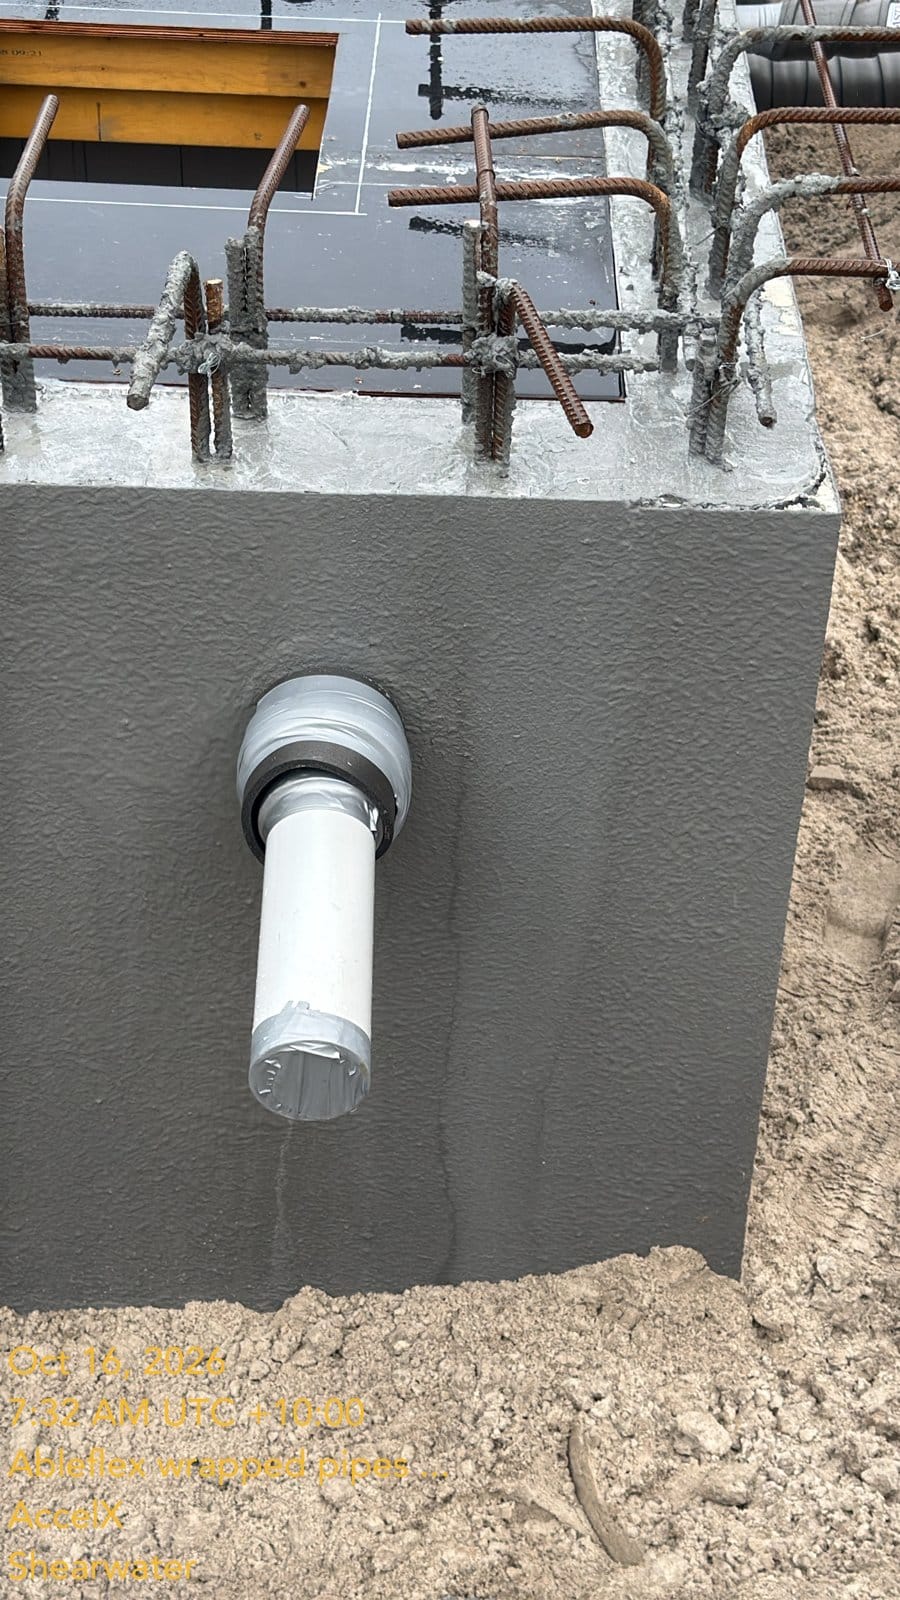
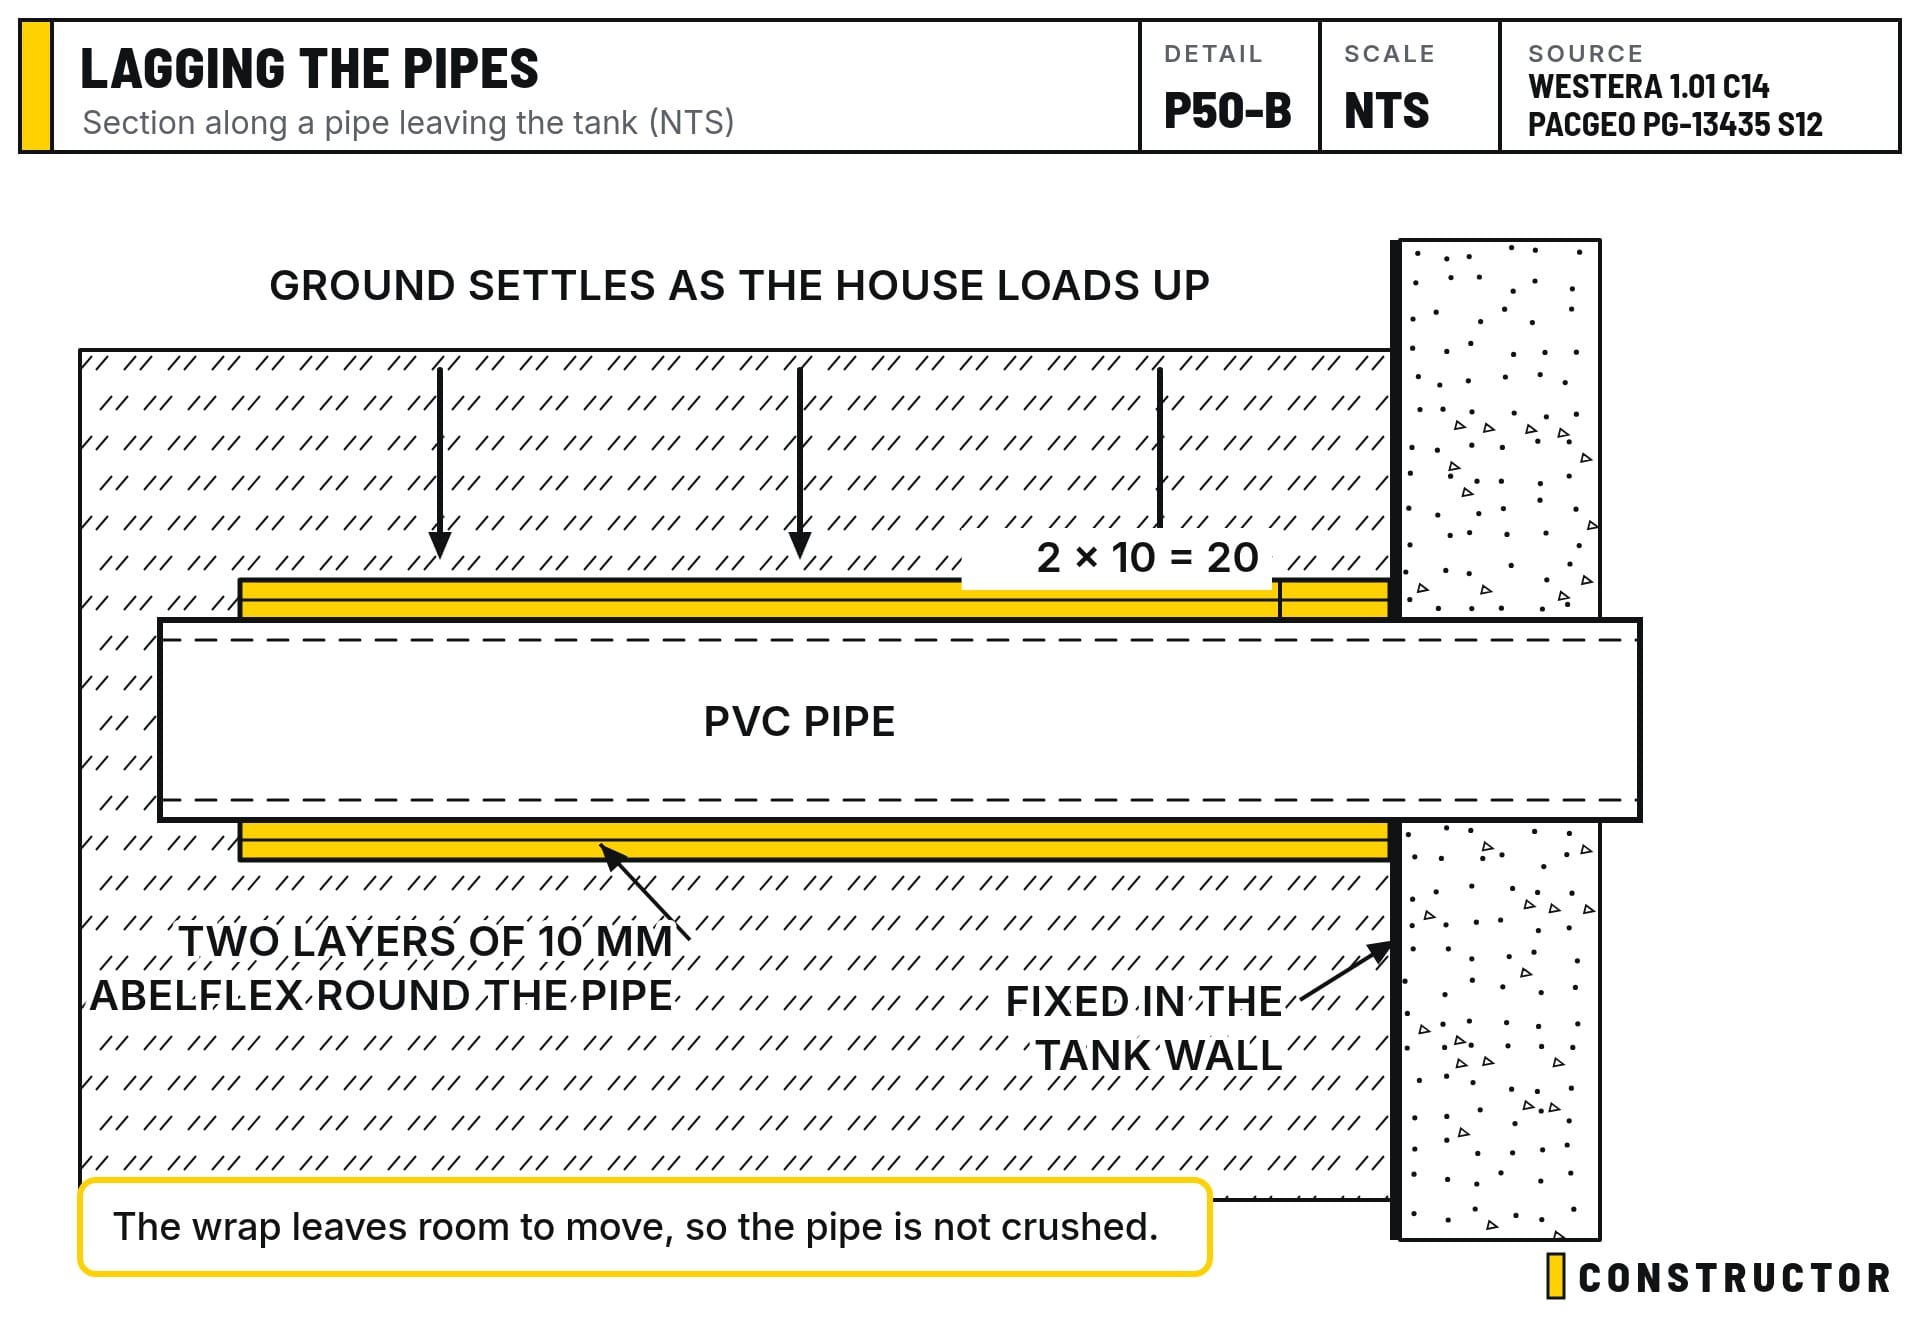
We've finished the lagging. Every pipe leaving the tanks is double-lagged: two layers of 10 mm Abelflex wrapped around it. That gives 20 mm to allow for settlement, so when the house loads the ground and pushes down, it doesn't crush the pipes. The pipes are anchored where they pass through the tank walls, and everything is meant to move together, which is why they're wrapped.
The numbers back this up. The geotechnical report calculates settlement under the footings in the order of 15 mm. Westera's notes also say that wherever service pipes pass through concrete, you need to allow for movement.
The plumber can't come back until Monday. So this area gets backfilled now, and we'll dig up this point and one on the other side for him then.
Backfilling around the tanks
This morning the crew got in with shovels and rakes and pulled the sand in around the sides of the tanks. The sand goes back in 250 mm lifts, watered in as we go, so it settles and compacts. That's in line with the geotechnical report, which asks for fill placed in layers of about 250 mm and compacted.
Concrete washout
This is the washout from the concrete pumps. With our limited access we can't keep washing out down here. The slab has to keep going, and you can't wash concrete out on top of a finished slab. So we're now using washout bags, which I'm affectionately calling concrete pump nappies, up at street level. This lot gets broken up by the excavator and goes into the skip. Another machine comes this afternoon, and on Monday I'll pull this sand out.
The skip came in by crane too, as a special flying bin. You can order these if you ask for them. And of course it started raining.
Backfilling by kibble
We weren't sure the sand would flow, because it had been raining. So we had the crane crew clear a hole through the middle, so the excavator could get through. The backup plan was to back-load with the excavator and then hand-cart the sand all the way around.
It worked out better than that.
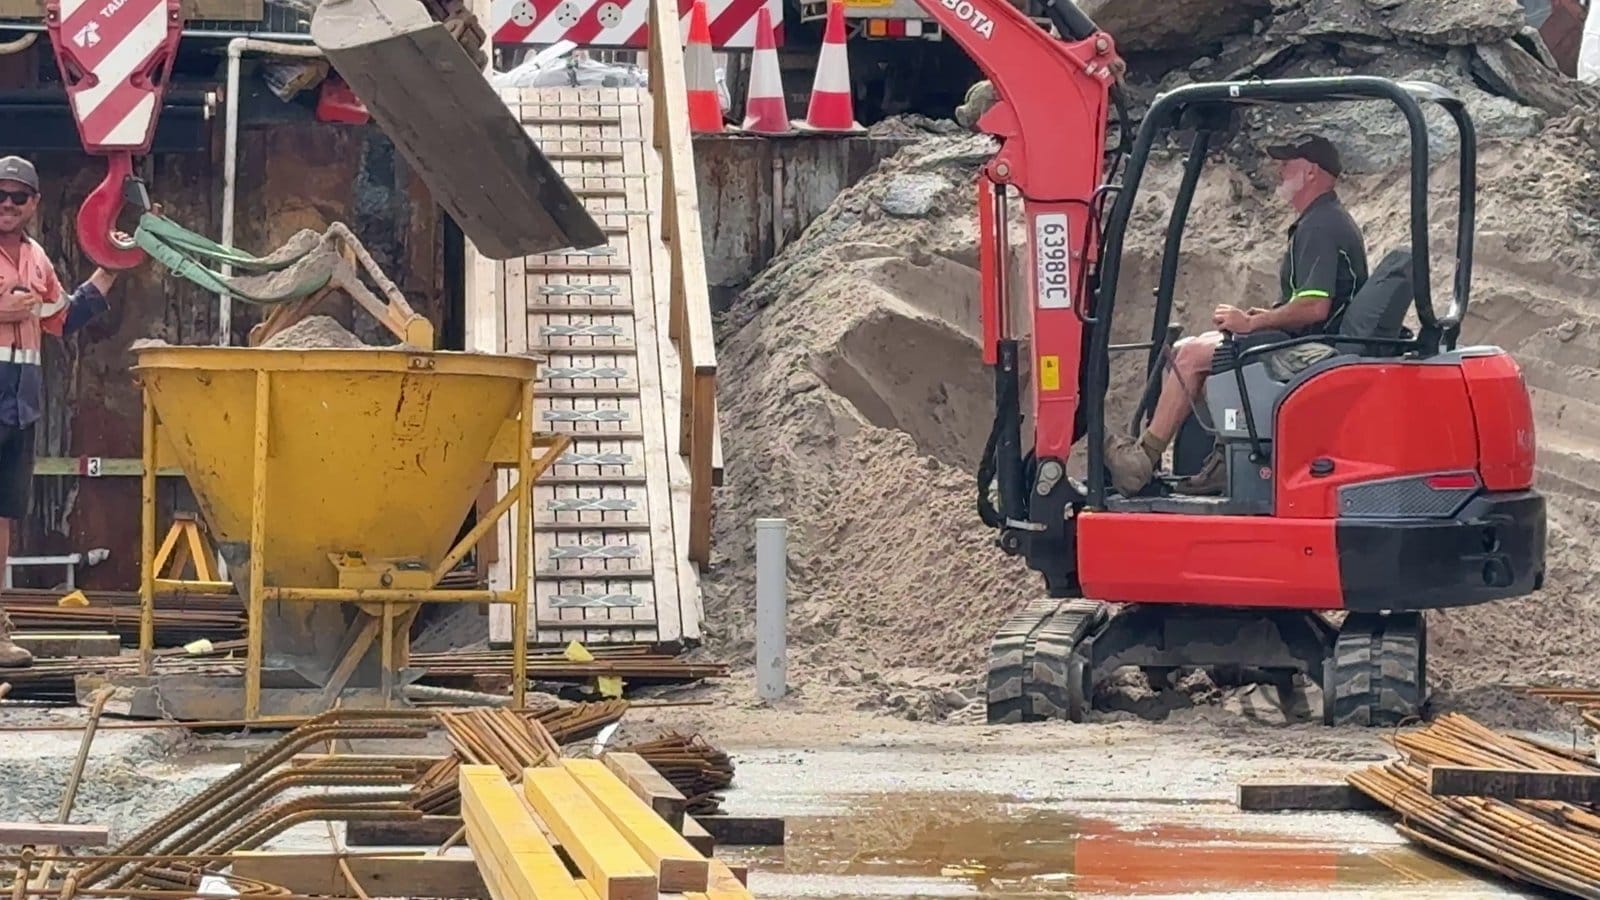
The excavator fills the kibble with sand, then the crane lifts it out to the back of the tanks and releases the chute to place the sand. That's a lot faster than us doing it by hand.
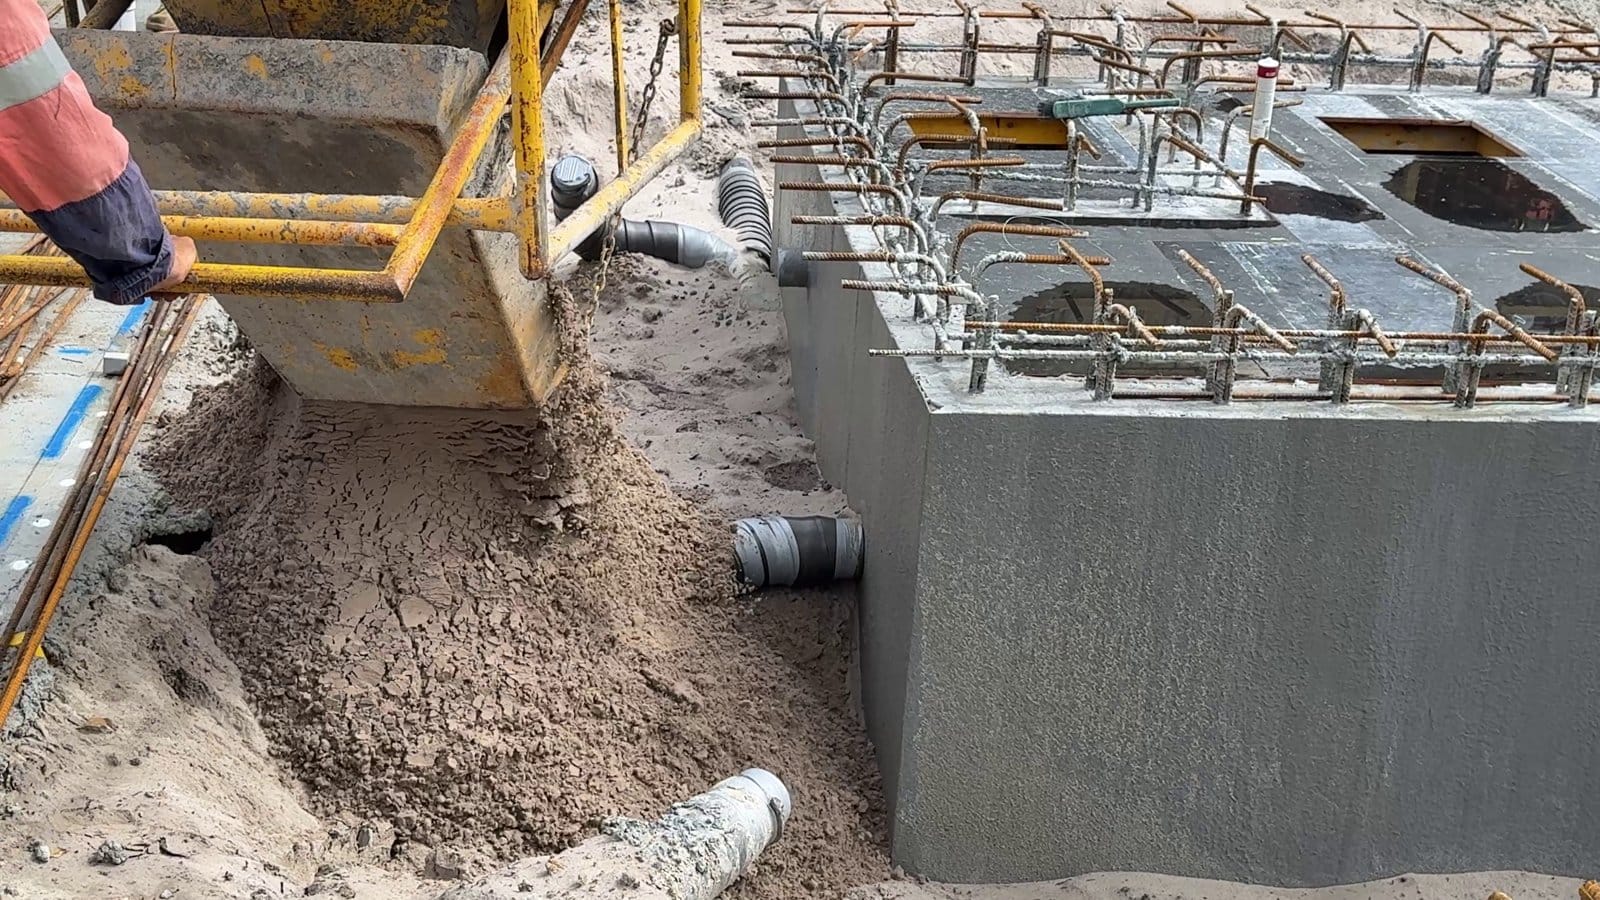
Each kibble load is only 0.6 of a cubic metre. But if you've ever shifted garden soil or mulch by hand, you'll know a cubic metre is bigger than you think. I once made my wife barrow four cubic metres of mulch, more than 15 years ago, and I still haven't heard the end of it. If you're married or getting married, I strongly suggest shifting four cubic metres together as a bonding experience.
Then the process repeats.
Next
- Monday: the plumber is back to finish the connections we've left exposed.
- Pull out the washout sand and keep the slab steel moving.
- The waterstop on the tank wall tops (Post 49), then the basement slab goes over the tanks.

