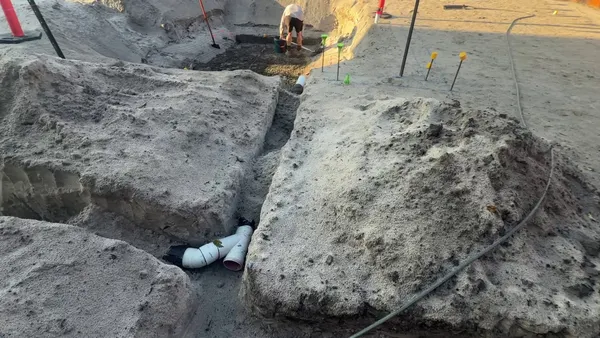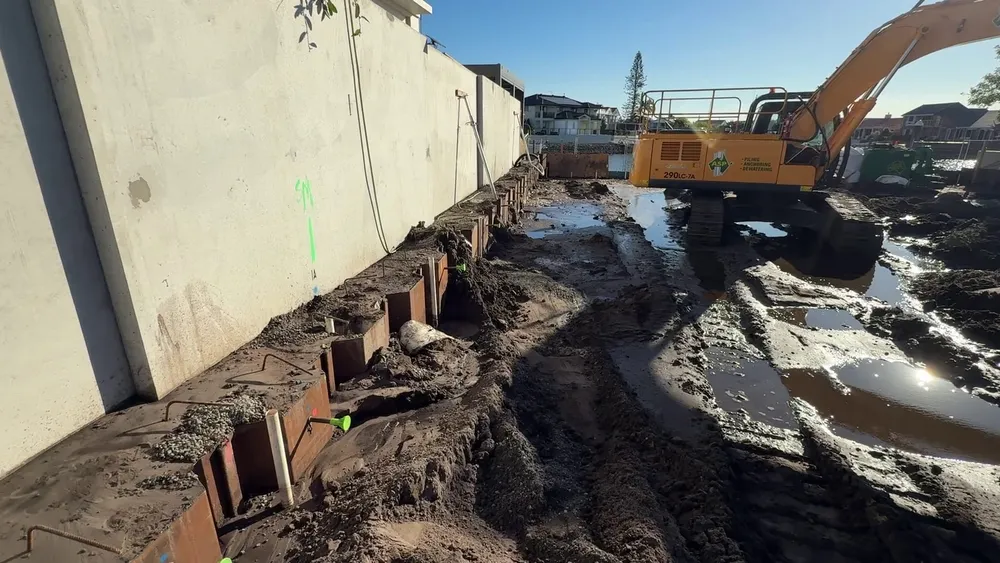
Day four of the dewatering install, and every spear is in. This is a walk around the site to show where it's at, what we've done to protect the new boundary fence, and why the site looks like a mud bath.
The spears are in
All the spears are installed, one in every second pan of the sheet piling. (The process for a single spear is in Post 37.) Next, they all get connected to the header pipe, the pipe gets primed, and water is run through to clear it before testing.
The connections have to be tight. The pump works by suction, so any air leak in the header or the spear connections means less suction pulling water out of the ground.
Pinning the sheet piles to the footing
Since the last update, we've drilled and fixed 17 steel dowels, 24 mm in diameter, through the sheet piling and 150 to 200 mm into the boundary footing. That's heavier than the 10 mm masonry anchors I mentioned in Post 36.
The sheet piles are 5 mm steel. We hired a magnetic drill for a couple of hours: it clamps onto the steel with a magnet and drills a clean, oversized hole through the sheet. Great fun, but I wouldn't buy one, because you'd start putting holes in everything. Then we drilled into the footing behind and set the dowels in a chemical anchor (a fischer product). Any engineered chemical anchor works the same way, as long as it's installed to get the bond strength it's designed for.
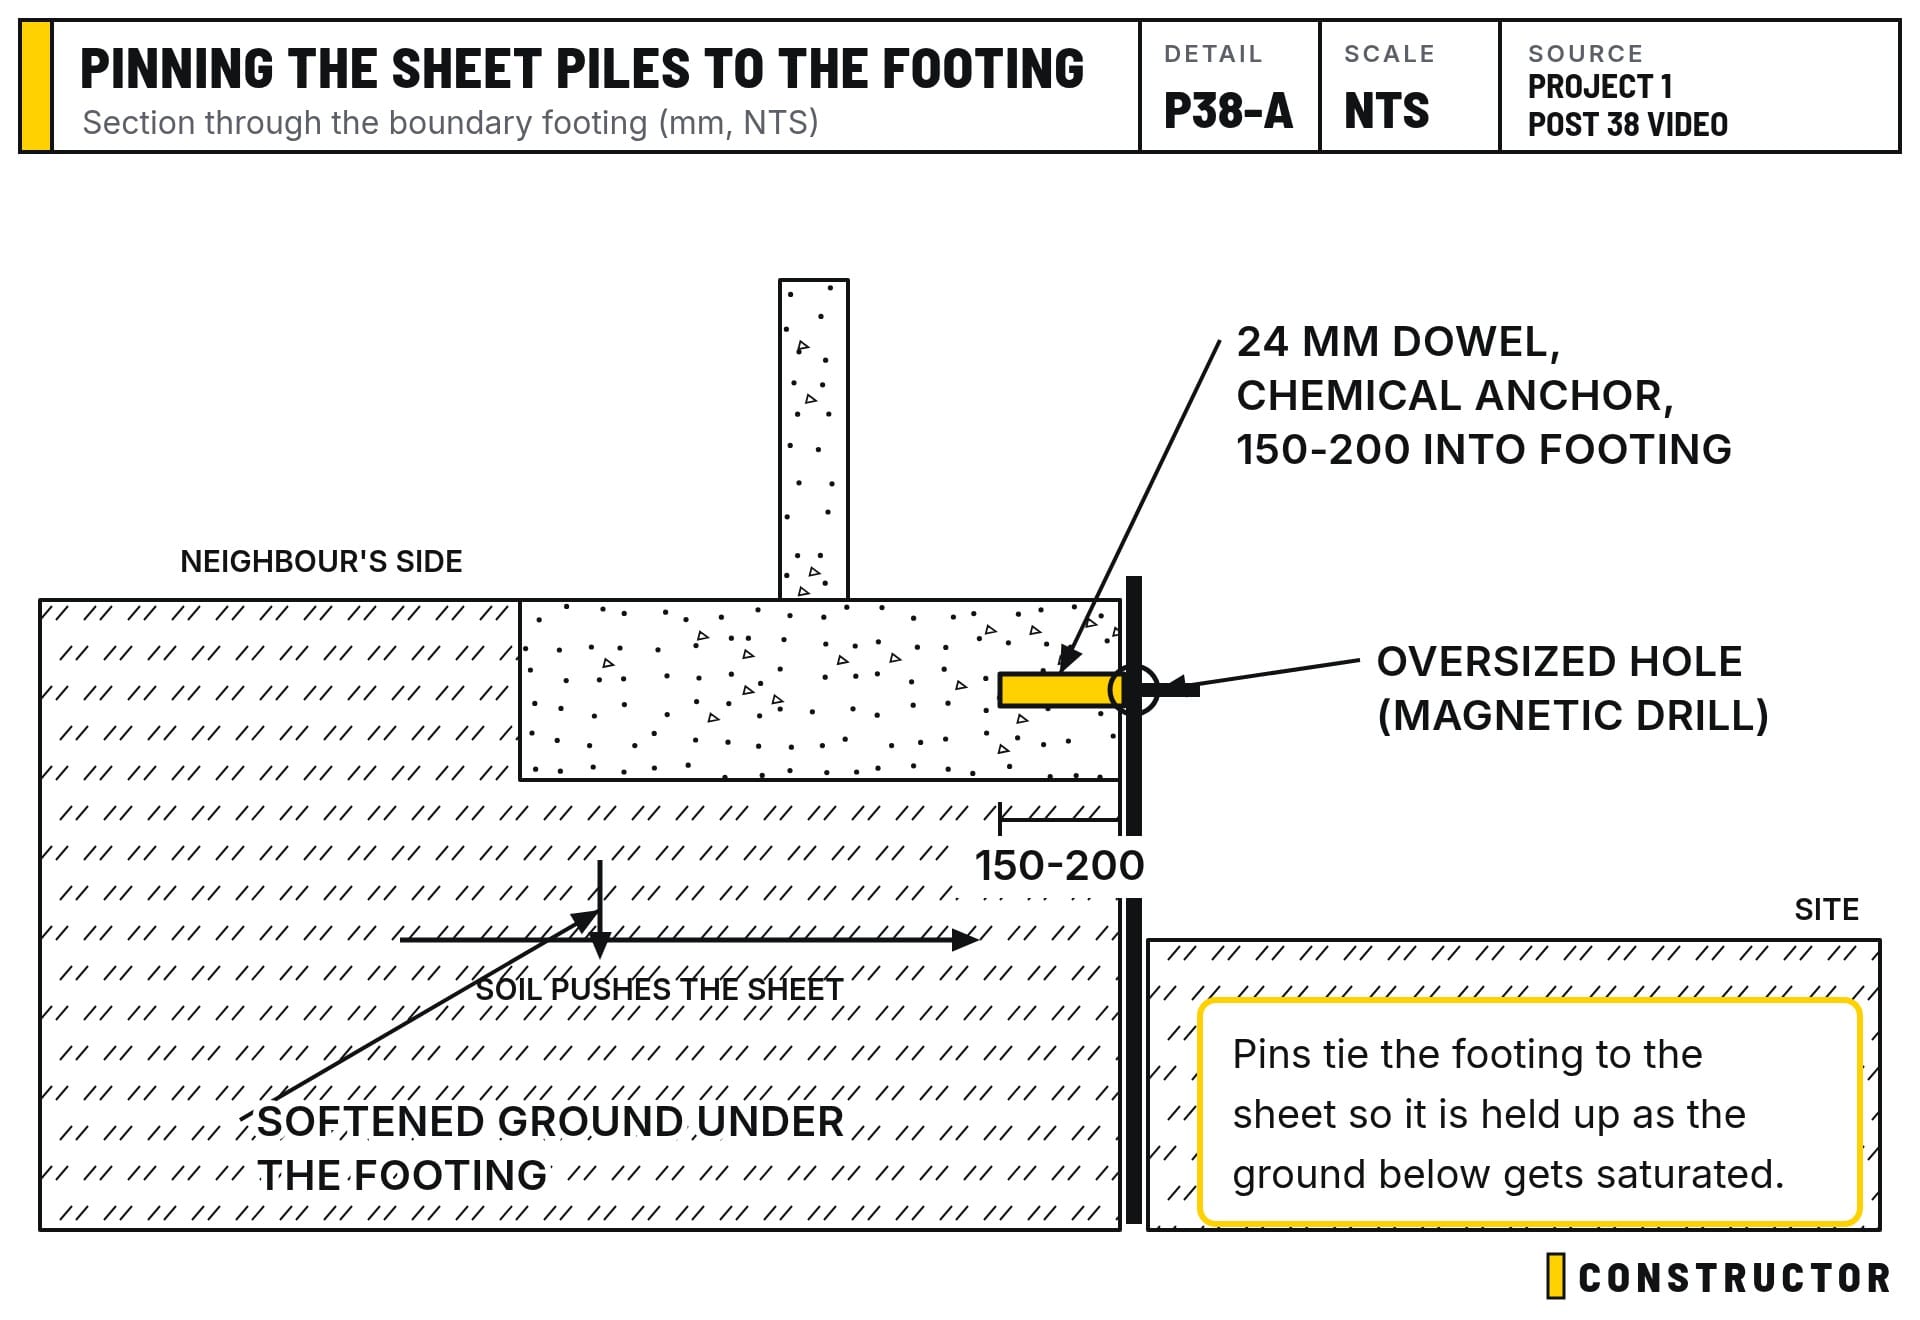
Why pin them? The jetting and pumping are saturating the ground. When the ground on one side of a sheet pile loses pressure, the sheet wants to move towards the low-pressure side. As we dig the basement, the soil behind the sheet will push it towards the hole, and the boundary footing sits right against it. The dowels tie the footing to the sheet piling, so the sheets help hold the footing up if the ground underneath it softens.
In hindsight, the fence panels should probably have waited. We could have poured the footing, kept temporary fencing up, and stood the panels after the dig. But that would have been painful too: with the excavation in, the panels would have had further to lift, the excavator probably couldn't have reached, and we'd have needed a crane. That would mean more delay. So we took a calculated risk getting the footing and fence in early, and now we're doing what we can to avoid rework.
Monitoring three kinds of movement
We're tracking three things:
- The sheet piles, for any horizontal movement towards the dig.
- The footing, for any movement up or down.
- The fence panels, for any lean or rotation.
All three are measured against the fixed points and levels set up in Post 36.
Four days of sludge
All the water on site is seawater. A pump draws it from the canal to jet the spears in and flush them, and a lot of it ends up spread across the site. Near the canal end the ground is especially silty, which is no surprise.
A safety point: around each new spear, the ground is very weak. Depending on the soil, a hole can collapse back in on itself, so don't walk close to fresh spear holes.
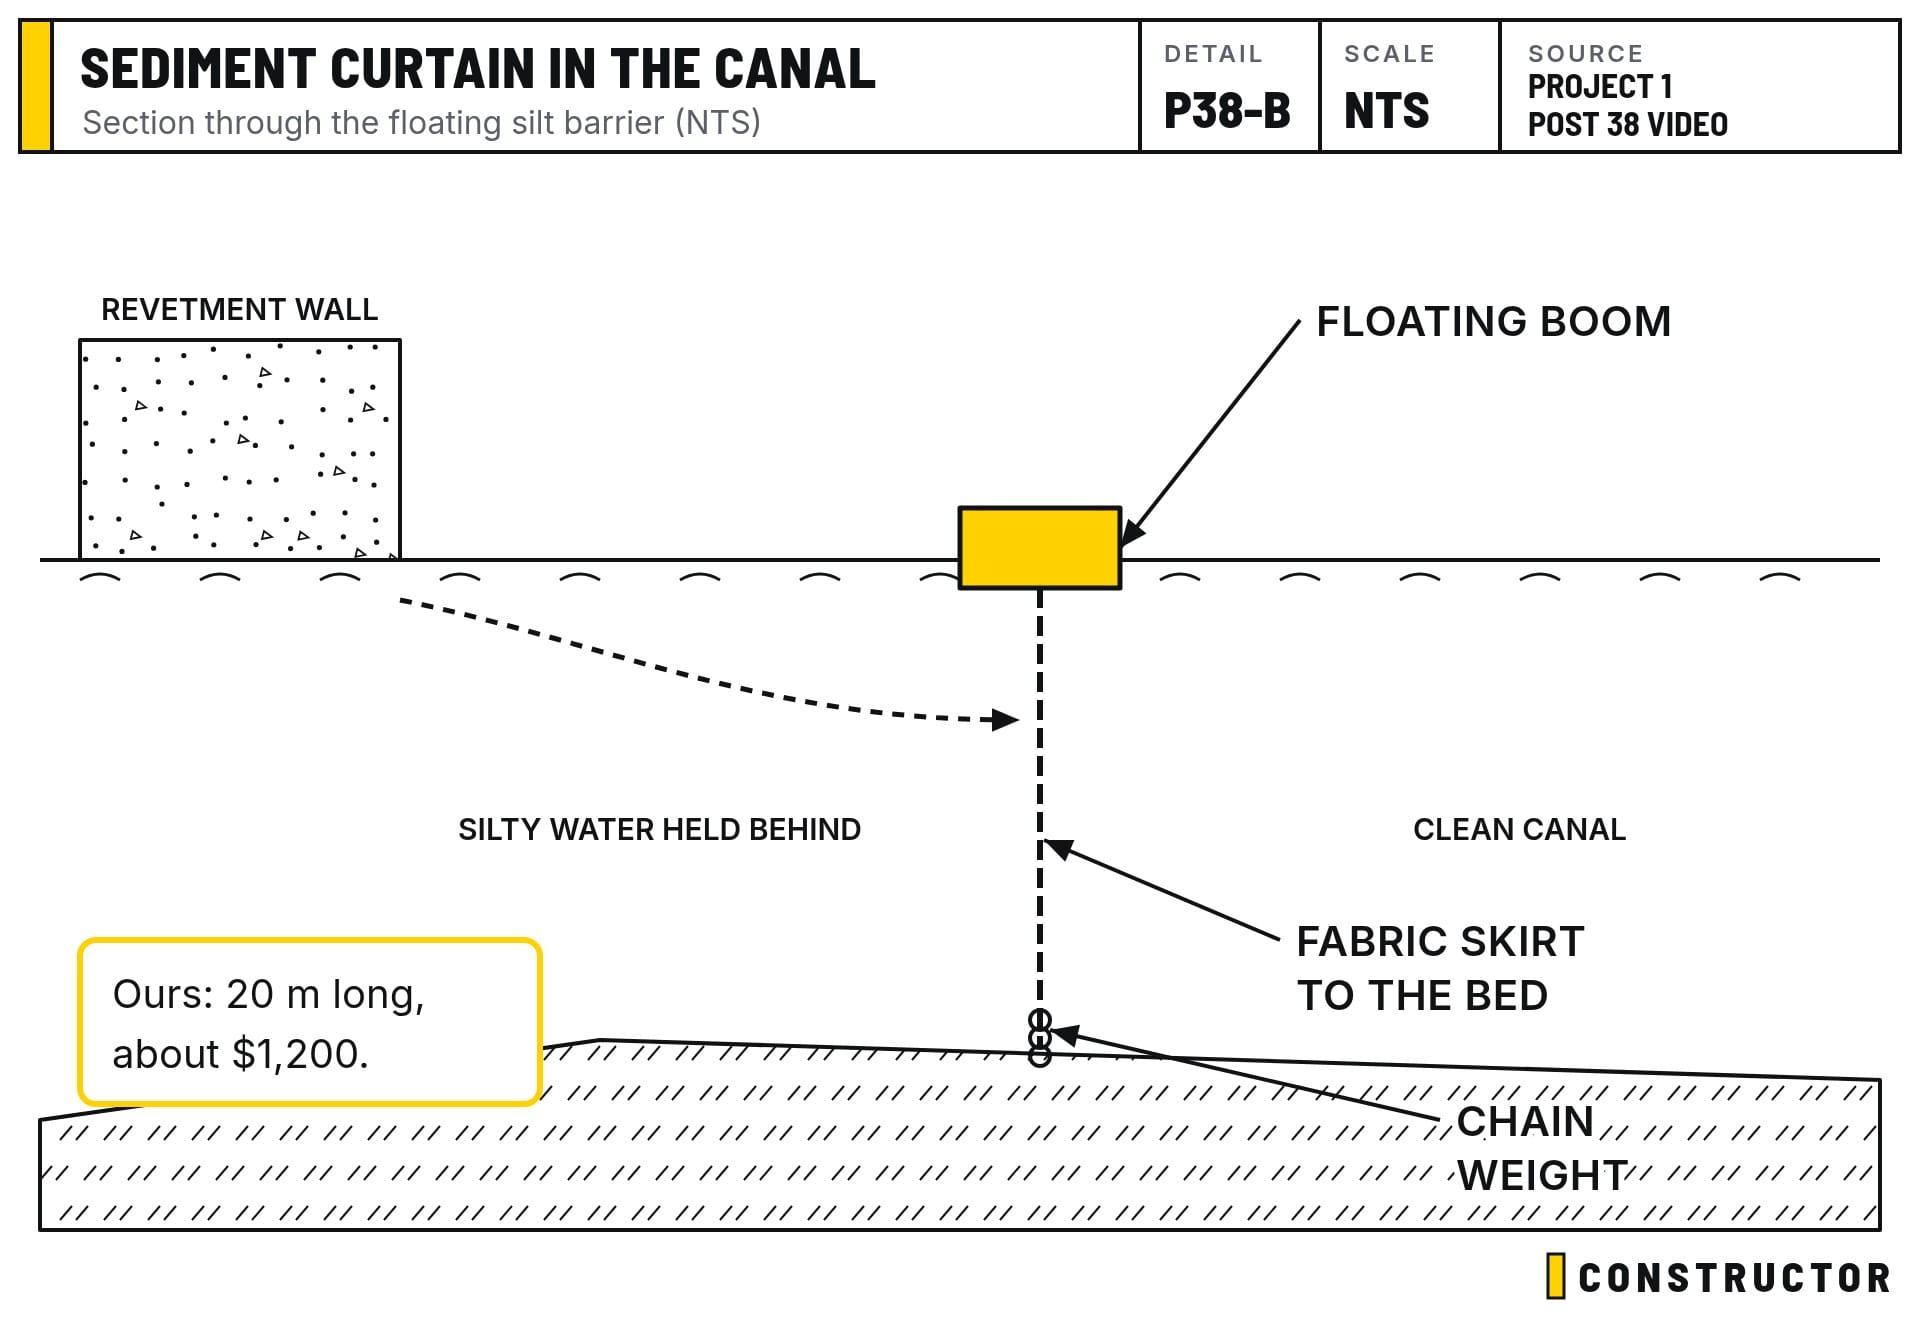
We dug the sediment fence down along the boundary to keep the washout water inside the site. At the back, the sediment curtain went in before the jetting started. It's a floating boom with a fabric skirt hanging down to the canal bed, weighted with a chain along the bottom. Silty water stays behind it. Ours is 20 m long and cost about $1,200. You can get them in different lengths.
Next, we need to get rid of the standing water. This fine sediment holds water rather than letting it drain. Excavated soil that's full of water is harder to dig, heavier to cart and costs more to dispose of. So we'll rip up parts of the site to help it drain before the bulk dig.
The tiles for next door
We also picked up the tiles for the neighbour's path. We couldn't get the exact tile size, but we found the exact colour in 1,500 x 750 mm slabs, and they're being water-jet cut down to 596 x 596 mm (Post 35 explains why).
The first water-jet cutter had trouble with its equipment, so we got some good tiles out of it and moved the rest to a second cutter. Before laying, we'll hone the cut edges so they all match, and check the overall sizes so they're consistent.
What's next
We'll start setting tiles next door and reinstall the neighbour's pool pump and air-conditioning once the tiles are down. Then we wait for the bulk excavation, hopefully with little or no movement in the fence, and finish the tiling after that.