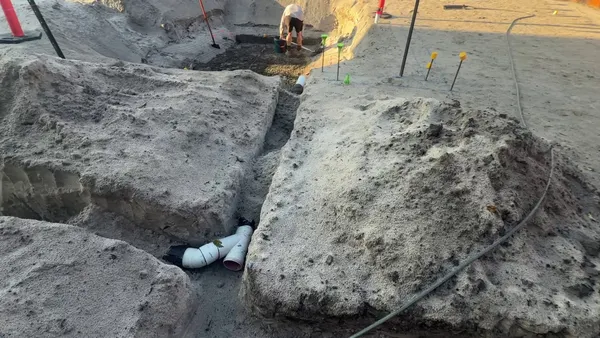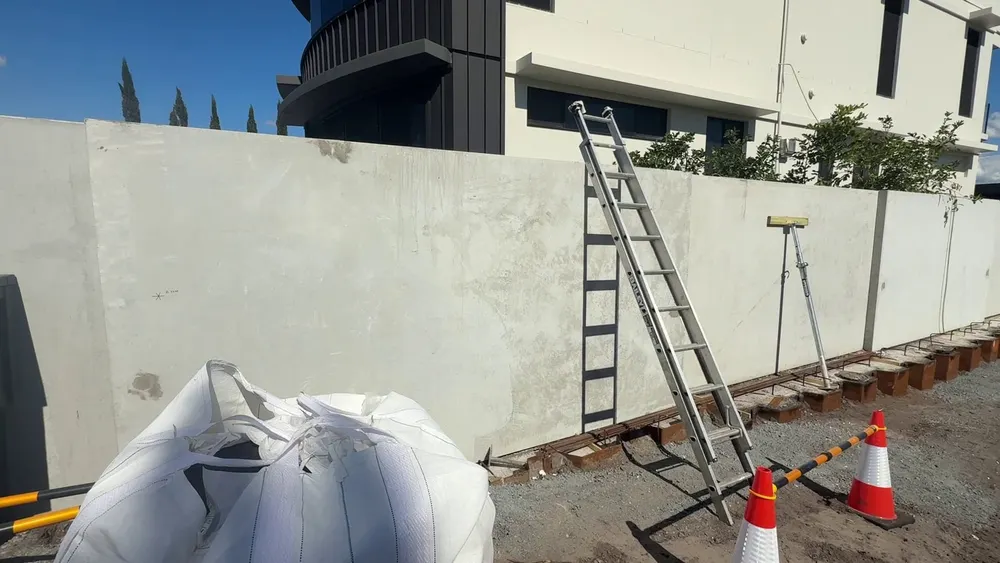
Good morning. Some time has passed since the last update. Nothing major has gone wrong, but a lot of the work right now is behind the scenes: project and construction management, contract administration, chasing quotes and sorting out contractor issues. It can look like not much is happening when there's a lot of paperwork going on. I'll start posting about that side of the job soon, because it's a big part of any build.
The fence is finished
The tilt-panel fence is fully installed and the contractor has finished their work. As part of finishing, they patched the lifting and bolt holes. The patching isn't great, but it isn't bad either. We'll go over the whole wall with a patching compound and feather it out before the coating goes on.
It's worth repeating from Post 34: if you have tilt panels, deal with the form release agent before painting. Either wash the panels with detergent and a scrubbing brush and let them weather for three to six months, or roll on a solvent product from the paint supplier that breaks the release agent down, then wash and let them dry fully. Then paint to the manufacturer's instructions. Skip this and the paint peels.
Cutting the sheet piles down
We've hired oxy-acetylene gear and gone through a few bottles cutting the sheet piling down to where we need it. It's been seven or eight days of cutting so far. The sheets are only 5 mm thick, but it's still slow going over a long run. The bulk bags of soil have been moved out of the way, ready to be lifted over the fence.
A new finish for the jetty
The carpet is off the jetty. Underneath is an aluminium plate walkway, and all the old carpet glue will be ground off.
The plan is a stone carpet: small stones bound in epoxy, laid over the top and lightly honed when it's finished so the stones aren't so sharp underfoot. It looks good and gives very high slip resistance, which matters on a wet jetty. A penetrating sealer will go over the top, so when the birds leave their mark, the owner can pressure clean it off.
Rebuilding next door's path
Most of the last three weeks has gone into the remedial work on the neighbour's side, where the sheet piling and pre-drilling disturbed their path and tiles.
Infill pours. We hired a mixer, set up a mixing station on a tarp and went through about 80 bags of 20 kg premix concrete. The infills where we cut the fill back to the new fence all have reinforcement and Abelflex isolation strips (the lesson from Post 34).
Air conditioners. Three outdoor air-con units had to come out of the way. We got two out. The third doesn't work, and that matters: before an air-con can be disconnected, the refrigerant gas has to be pumped back into the unit, which needs the unit to run. If it can't run, a licensed refrigeration technician has to recover the gas another way. So we'll work around that one for now.
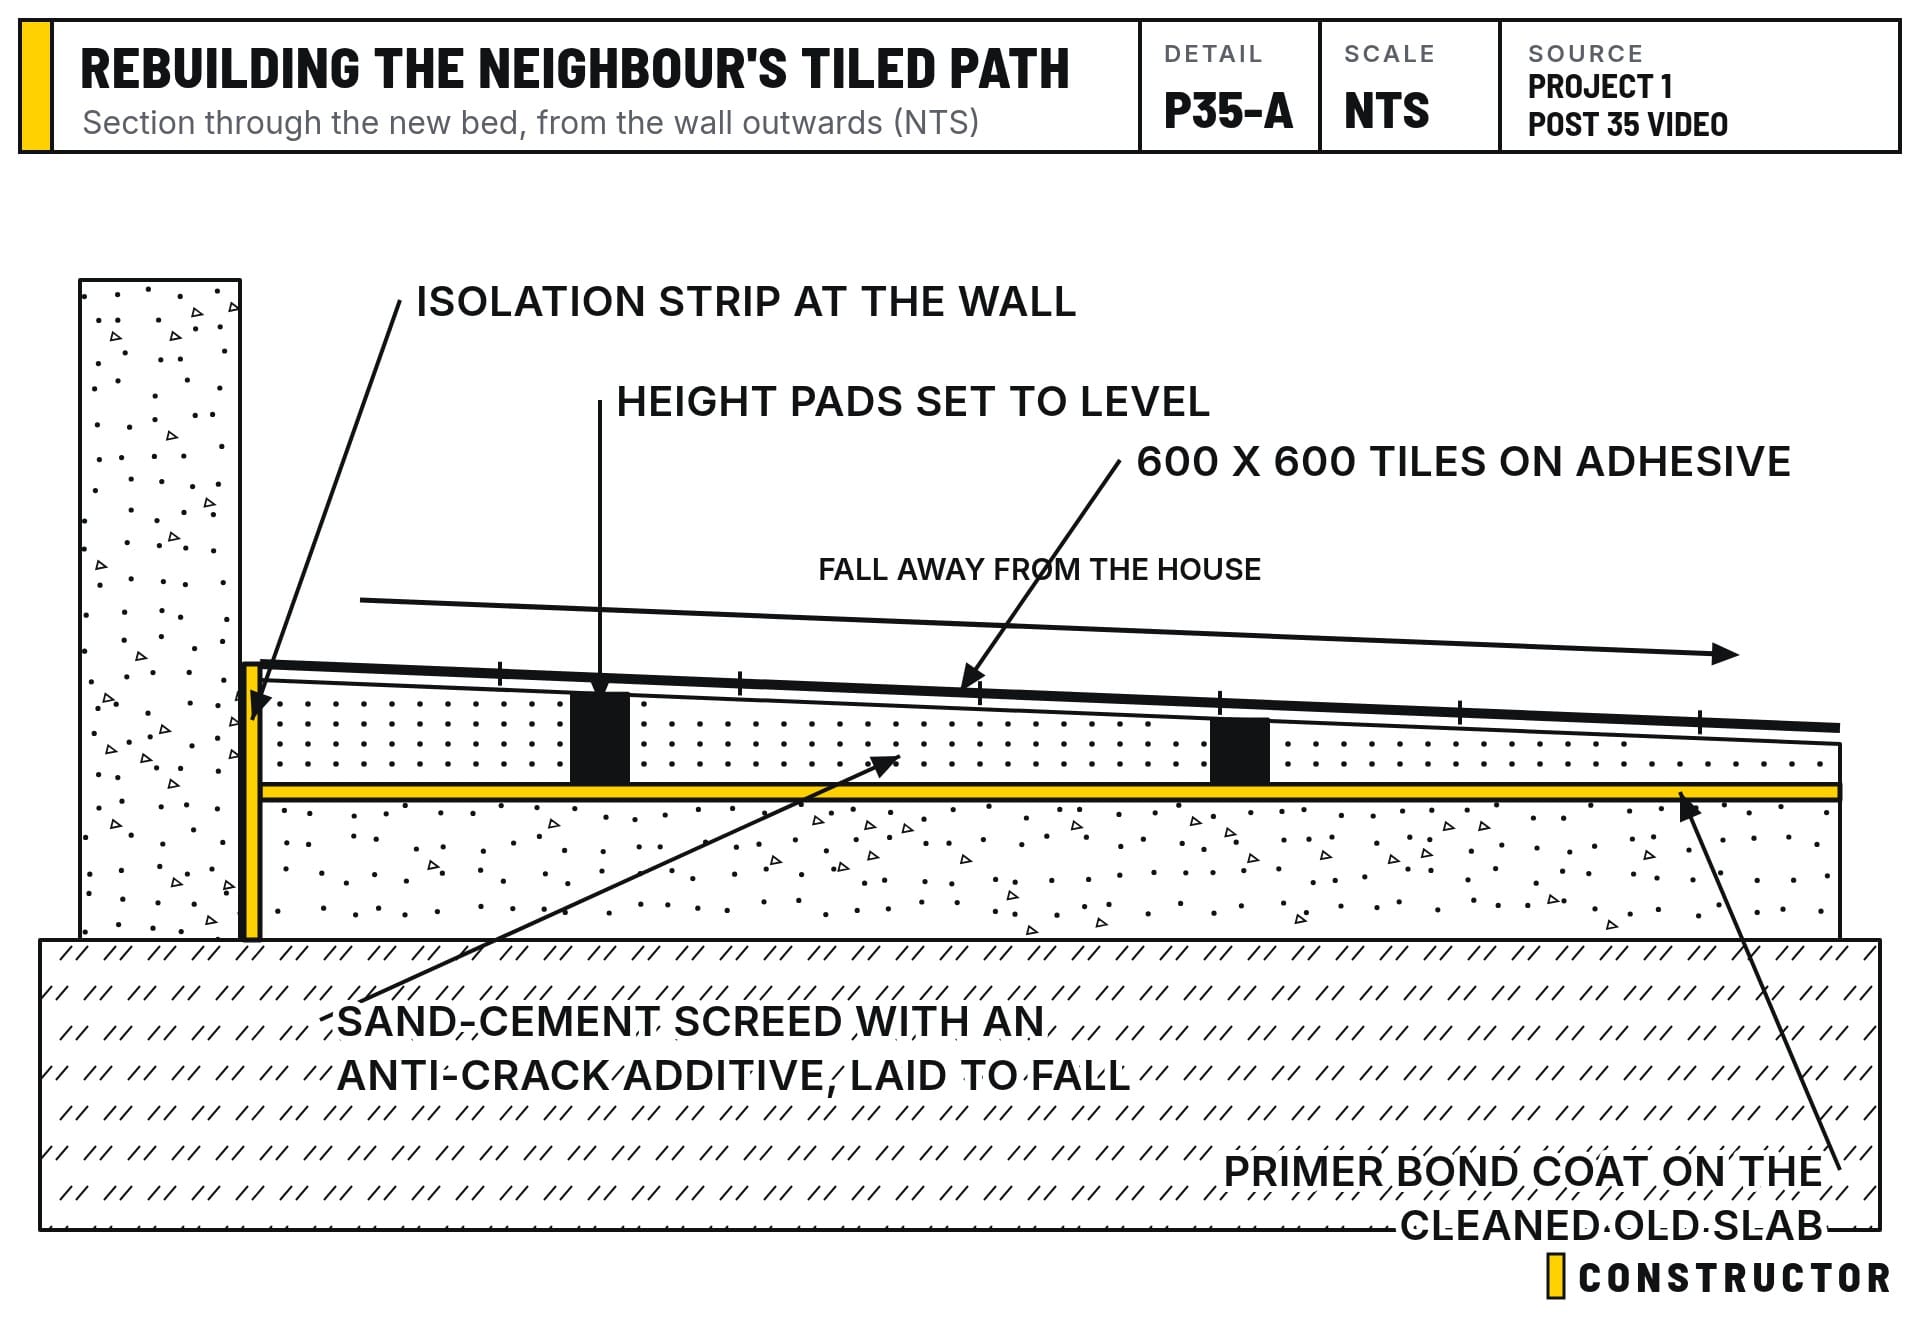
Preparing the old slab. We jackhammered up the remaining old tiles, scraped up the old adhesive, then vacuumed and pressure cleaned the slab to get rid of the laitance (the weak, powdery skin on old concrete). Then we rolled on a coat of primer. It can be used as a waterproofing layer, but here it's a bond coat that binds the surface so the new bed has something solid to grip.
Building it back to fall. Height pads are set to level, and a grid is built out from them to screed to. The mixer comes back, the area is filled with a sand-cement screed (with an additive from the tile supplier to stop it cracking) and screeded off the grid so everything falls away from the house. Then the tiles are reset.
Cutting tiles to match
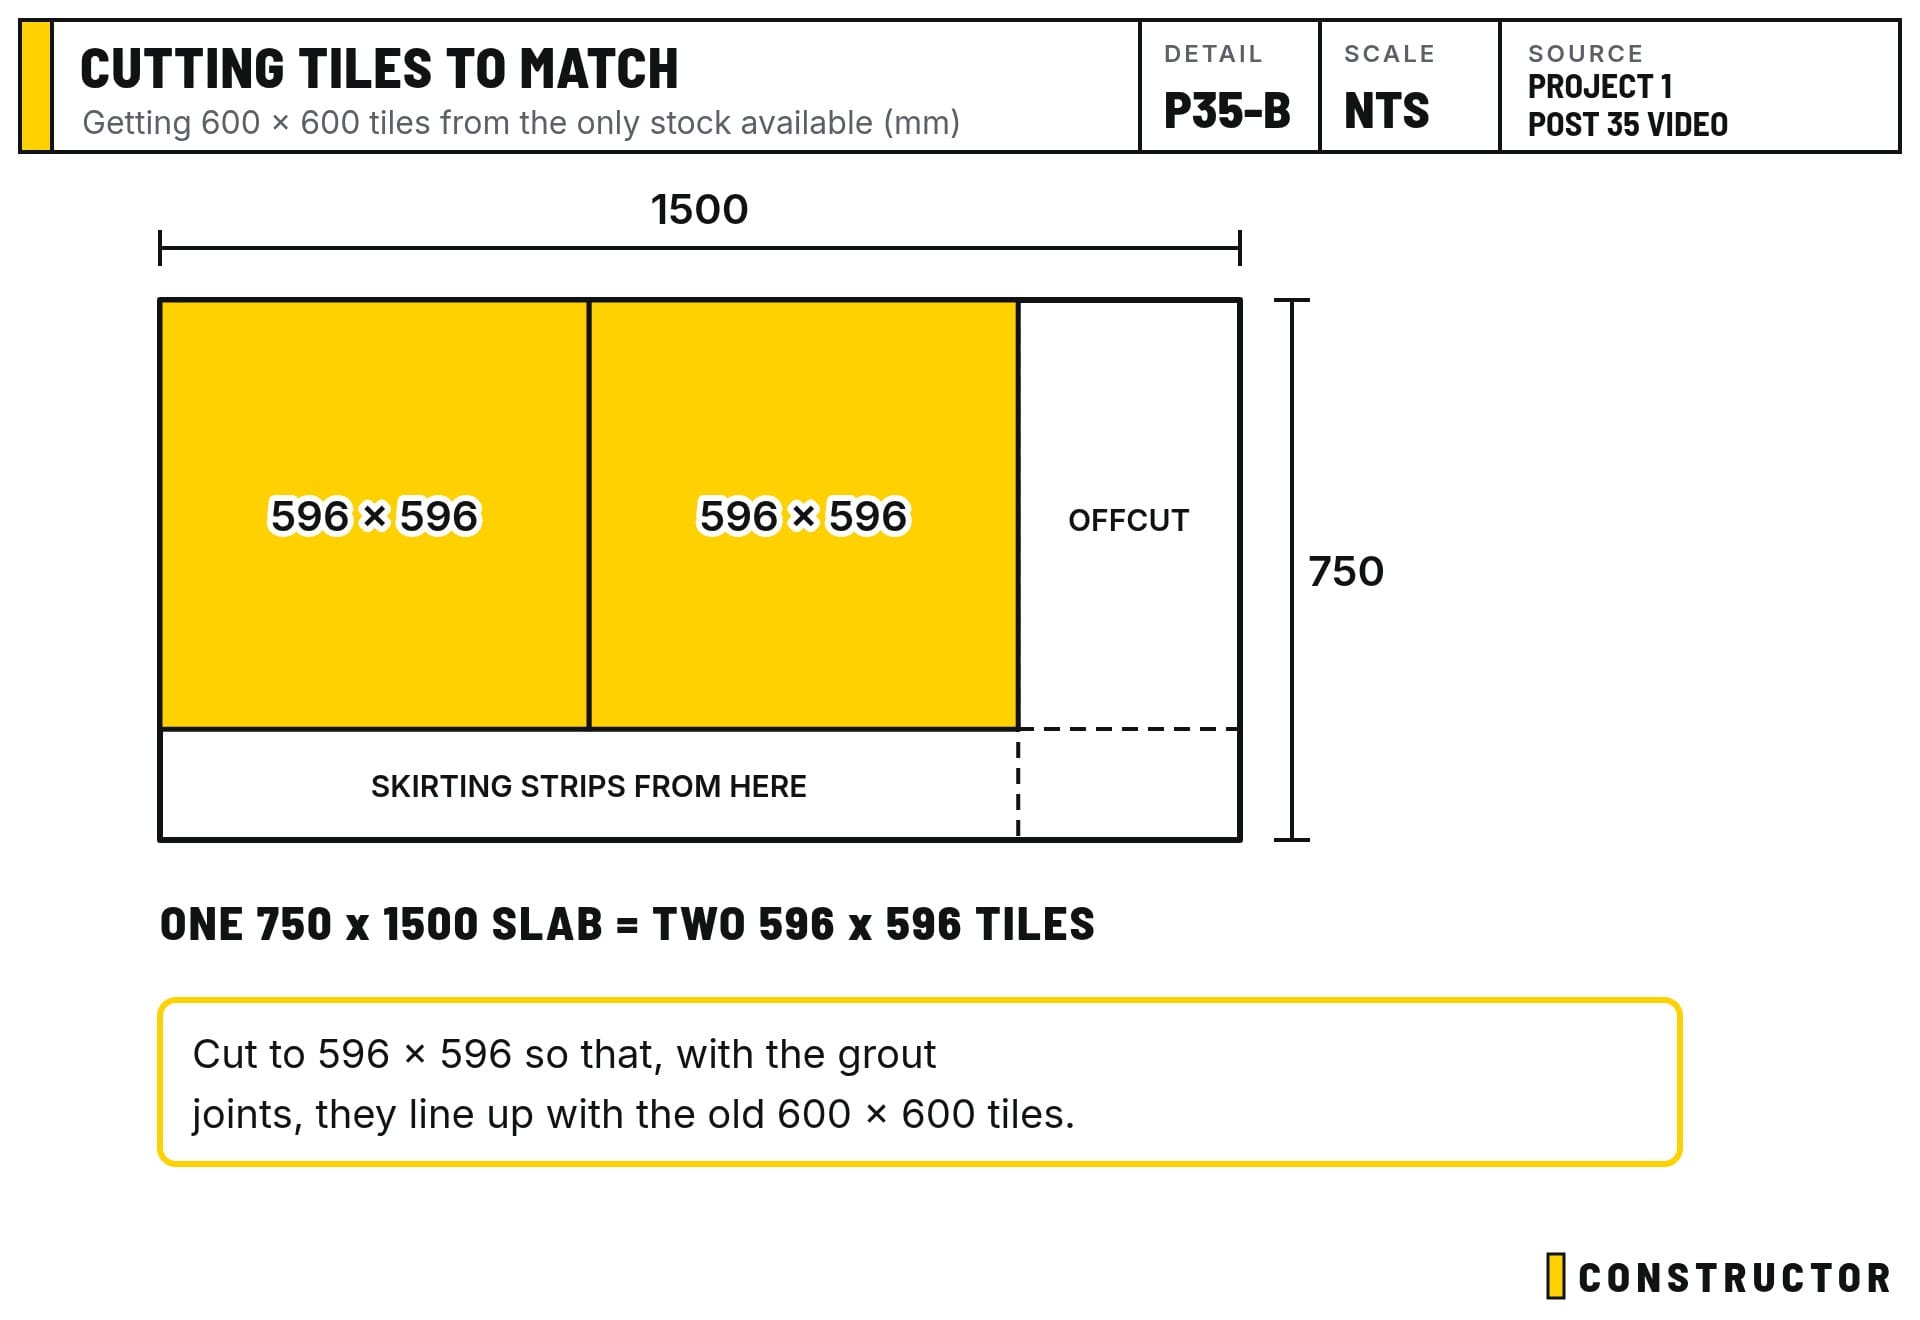
The original tiles were 600 x 600 mm. We couldn't get them anymore. The closest we could find (and I didn't even expect to find these) were 750 x 1500 mm slabs of the same look. So we bought a big tile cutter and we're cutting each slab down to two 596 x 596 tiles, so that with the grout joints they line up with the existing 600 x 600 grid. The offcuts become skirting tiles.
Dewatering and the next dig
The dewatering contractor has added conditions after the contract was signed, which we weren't aware of, so we're working through that with them (or without them) to get a quick install and get the job moving.
The excavator is booked for this Friday to take out the next 300 mm or so. When it's here, it will also lift the neighbour's trees back over the fence. They need to go back soon: even with the arborist's soil conditioner and watering, they're not looking happy. Once they're in, we'll set up the irrigation, even if it's temporary, and see how they recover. If they don't, we'll replace them.
The short version
The fence is done, the sheet piles are being cut back, and the neighbour's path is being rebuilt properly, layer by layer. Getting a job like this started is painful, but it's getting there. It should start looking like real progress soon.