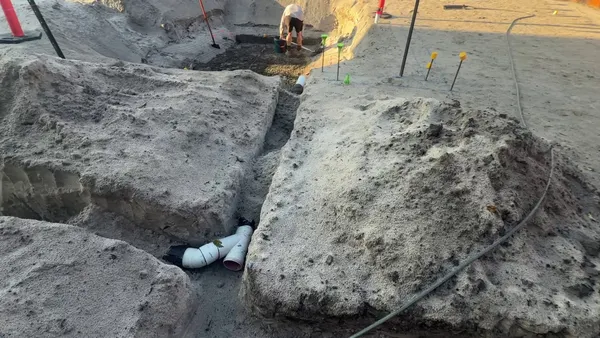
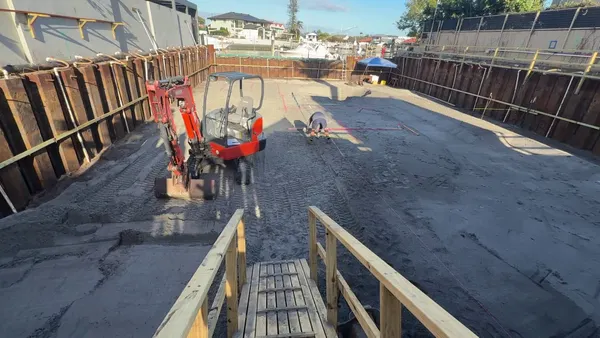
Good afternoon. Here's the end-of-week update. Since the blinding slab went down, the steel has started arriving and the tanks are formed.
Craning in the steel
So far we've had three crane lifts. Before the first one, I measured from where the crane can set up, which depends on where its outriggers can go, out to the middle of the platform. It's about 23 m, so we need a 40-tonne slew crane, the next size up from a Franna. The steel truck parks on the road and the crane lifts the steel straight off it and down onto the platform.
About 18 tonnes of steel is on site now: the A and B layers. The basement slab is up to 600 mm thick and has four layers of reinforcement:
- A layer. The bottom bars, running one way.
- B layer. The bottom bars running the other way, on top of A.
- C and D layers. The same again near the top of the slab.
The bars are mostly between 16 and 24 mm.
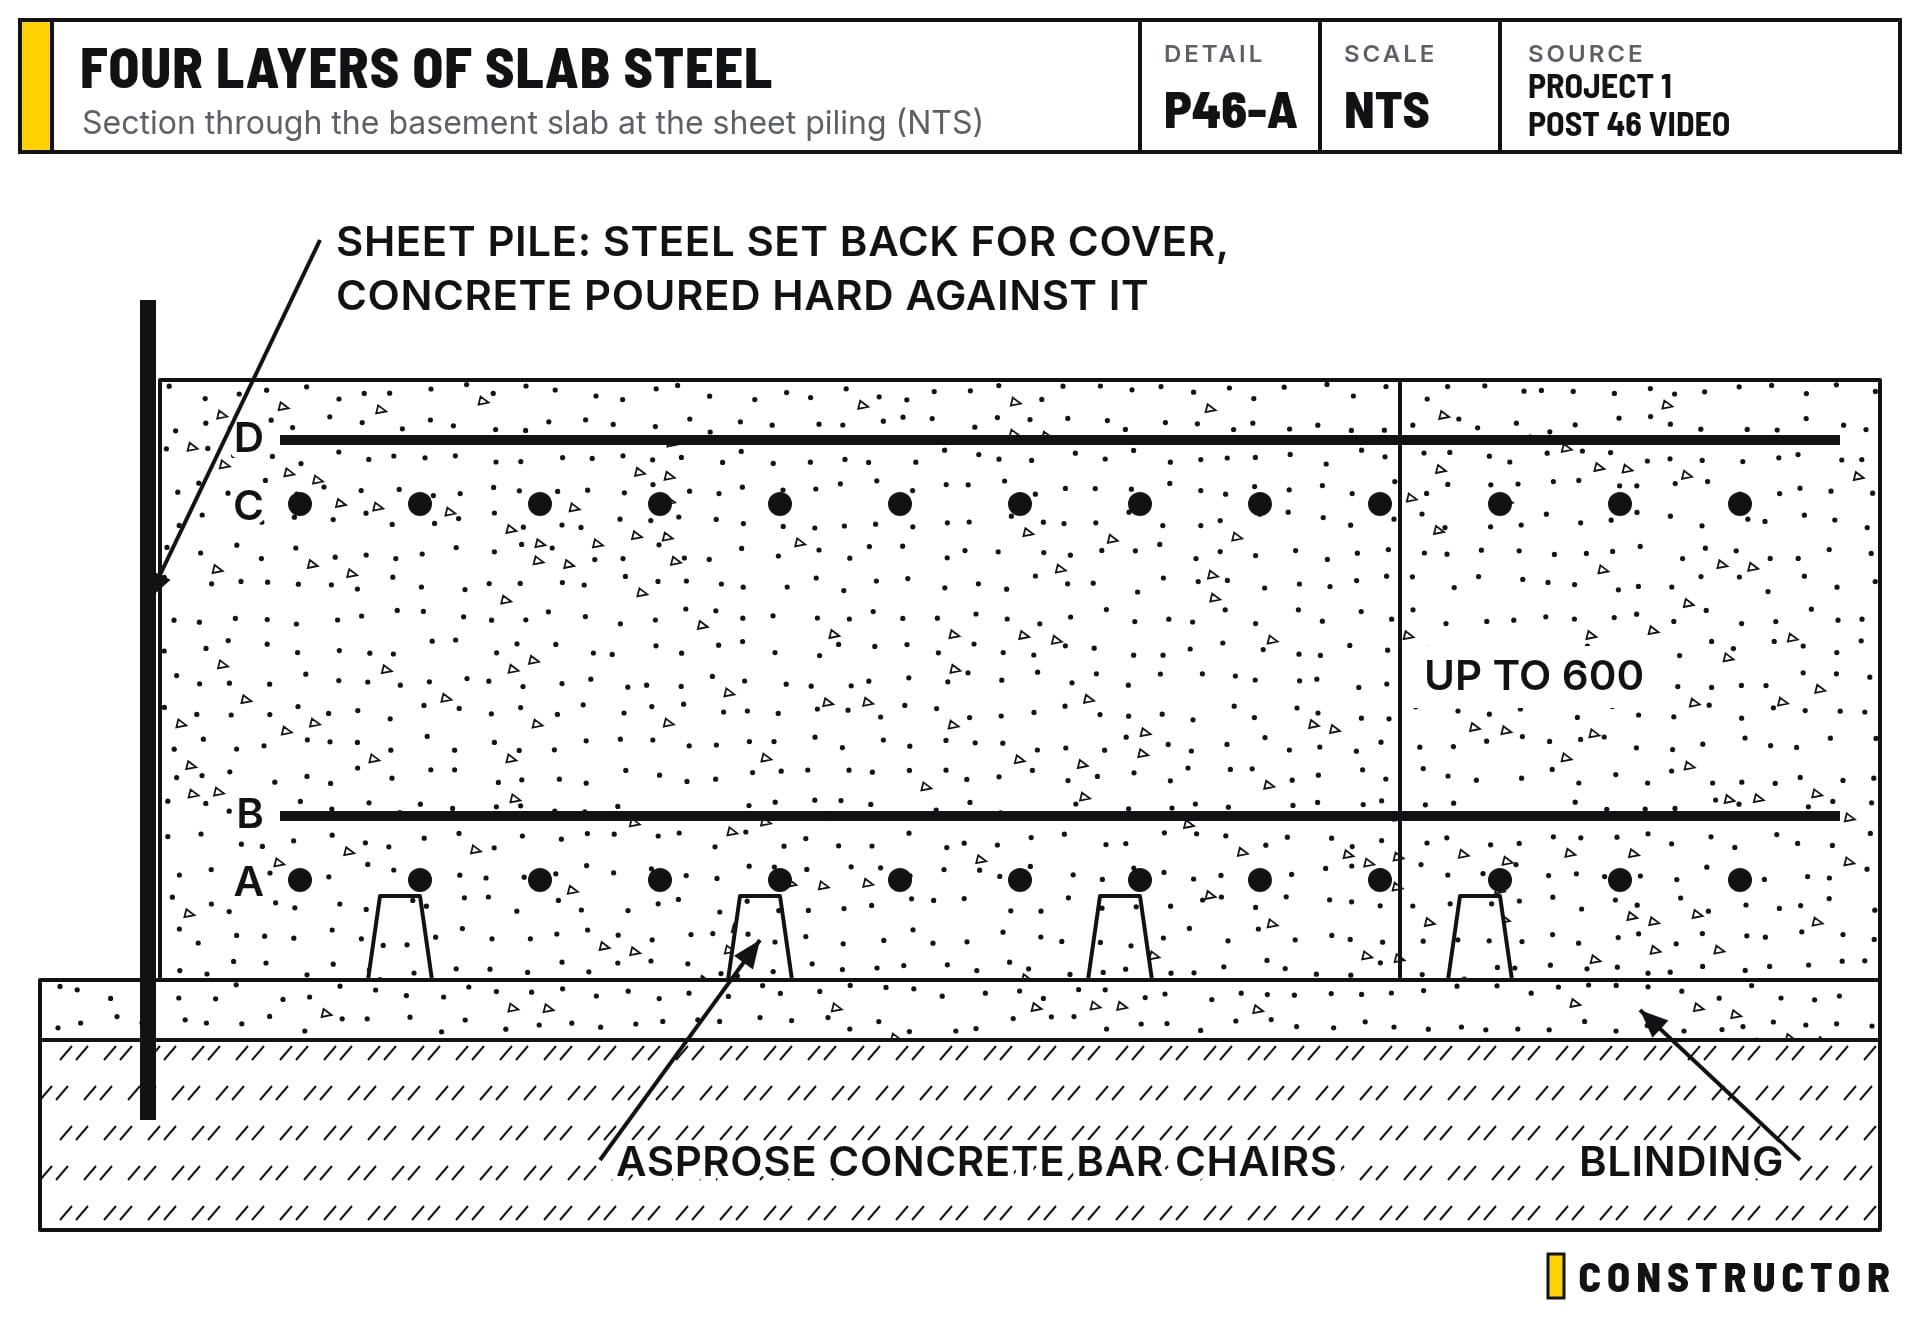
The small concrete blocks under the bottom bars are Asprose bar chairs. The engineers nominate concrete chairs here rather than plastic ones, I think because of their compressive strength. Elsewhere in the job we'll use rubber-tipped bar chairs, which barely show on the underside of off-form concrete ceilings.
The column starter bars are forming up too. All the reinforcement is set back from the sheet piling so it has cover, while the concrete itself is poured hard up against the piles. Once the slab is down, the surveyor comes back to re-mark the grid lines on the slab, and the timber profiles come off the sheet piling to be reused for bracing.
When things go wrong
- Too-long bars. The steel was placed but not checked very well to start with. The A-layer bars hadn't been scheduled correctly by the supplier, and they were too long. They touched the sheet piles, so there was no cover. They all had to come out again. The supplier is sending new steel and collecting the old. As usual with these problems, the supplier won't pay for the labour: four people lost a day putting it in and taking it out, plus another 40-tonne crane at about $1,200. That's what it is. The main thing is to keep the job moving.
- Unrequested concrete. The supplier sent high early strength concrete for the last blinding and the tank slab, which nobody asked for. It was very sticky and hard to place. It took most of four hours of pump time to get about 6 m³ in, at a pump rate of around $7,500 for four hours.
The tank slab is down now. Like the blinding, it has the Xypex C-5000 admixture in it, since each pour came from a single truck.
The tanks are formed
The sewer and stormwater tanks are now formed in Rediwall. A few things to get right:
- Starter bars. The starters need to be spread far enough apart to fit the water stop, and they need to sit within the panel webs. That takes a bit of bending.
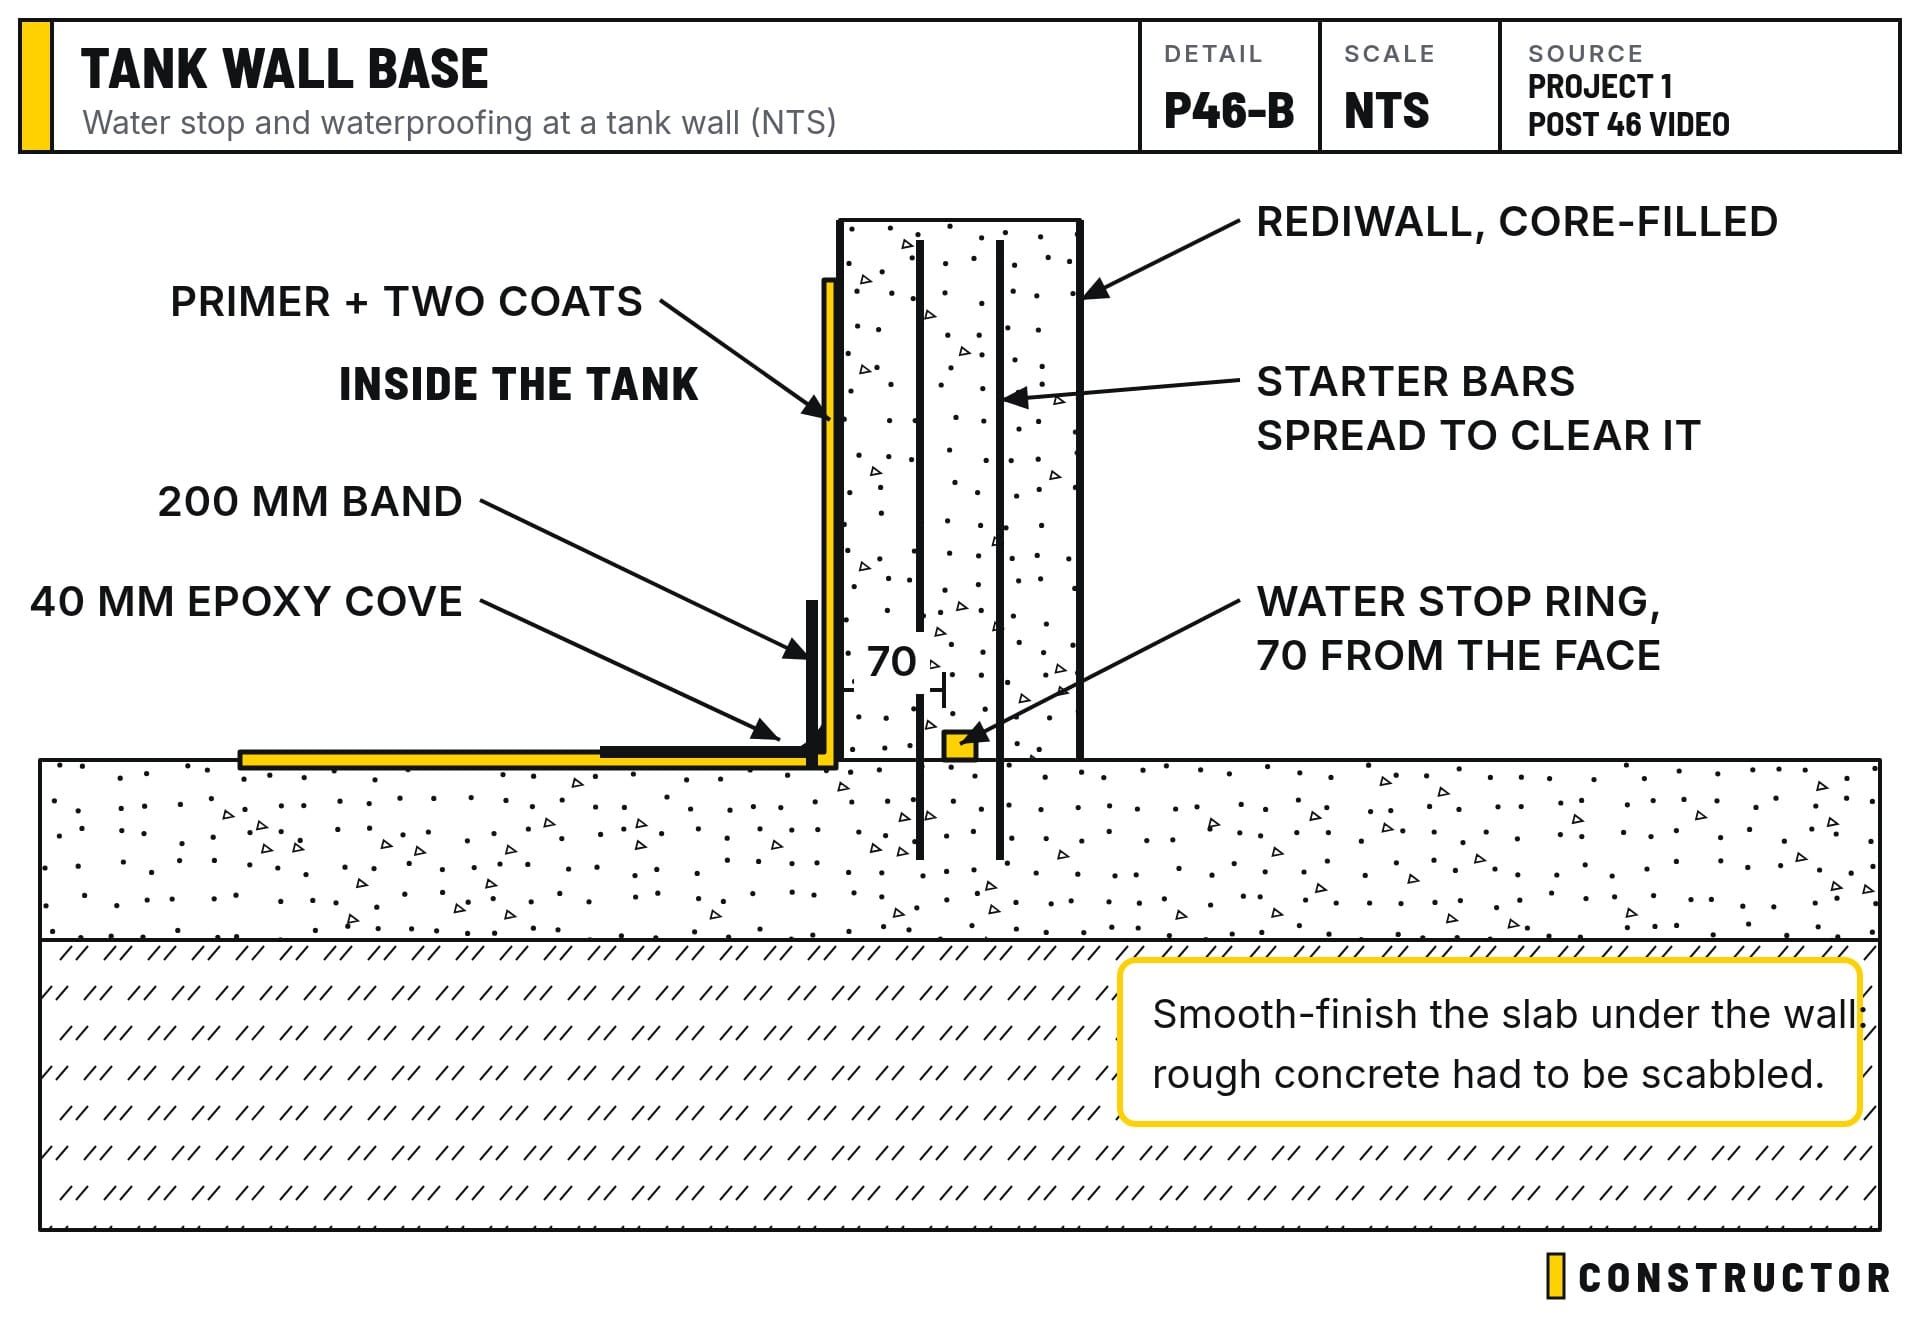
- The water stop. It's a strip about 15 mm wide, run in a continuous ring around the base of the wall core, with 150 mm laps. It needs at least 70 mm of cover to the face of the formwork.
- A smooth slab. The slab under the wall has to be smooth enough for the water stop to sit flat. Ours wasn't, so we spent an hour scabbling it. We've spoken to the concreter, because there's another 111 linear metres of 275 mm wall to go in around the basement.
Next, the plumber extends the 150 mm stormwater pipe and the sewer pipes into the tanks through the walls. Each pipe gets a double ring of water stop inside the wall cavity, and the PVC is abraded so the waterproofing bonds to it. Before core filling, ply goes over each penetration to stop the concrete escaping. The walls are braced plumb inside and out, then core filled, and they get about a day to dry.
The waterproofing system
All the products are ordered and coming down from Brisbane. It's a Sika system, because this is a hydrostatic structure:
- Primer.
- A 40 mm epoxy cove around every floor-wall joint.
- A 200 mm peel-and-stick band over the cove and joints, pressed on with a roller.
- Two coats of Sika 1K over the top, possibly sprayed rather than rolled, aiming for about 1 mm total thickness.
The inside of the tanks gets the same system. The sewer tank may need an extra protective layer on top, and we're confirming that compatibility chain with Sika. Stormwater is fine with 1K, but sewer can need special treatment.
Backfilling with a crane and a kibble
Once the tanks are waterproofed, they get backfilled with sand. The question is how to get the sand from one end of the site to the other with all the steel in the way. The answer: a bigger crane, probably 70 tonnes for the extra reach, plus a concrete kibble. The crane lowers our 3-tonne excavator into the basement, it loads the kibble, and the crane swings the kibble across to drop and pack the sand.
We won't blind the rest of the area. The steel just runs over the sand. The slab is 600 mm thick and has Xypex in it, so the blinding isn't a waterproofing layer. Before the main pour, another water stop goes on top, and the Gatic lids (600 x 600) go into the tank roofs.
Coordinating the steel
The biggest challenge right now is the steel deliveries. Another 18 tonnes arrives on Tuesday with another crane. Enough of the bottom layers has to be tied off to stack the new steel on top, without burying steel that belongs at the bottom. Every time that goes wrong, it's another $1,200 crane lift.
The plan from here:
- Monday: pump pipes into the tanks, then set the falls and water stops.
- Wednesday: core fill.
- Thursday and Friday: waterproof, then backfill with the crane and kibble.
- Then: the 14-tonne excavator comes back to clear the last of the fill, the final blinding goes in, and the steel fixers spend four to five days on the C and D layers.
There's also a rebate in the slab all the way around, where the 275 mm walls sit down into it as another waterproofing layer.
We're confirming wall heights before ordering the 275 mm Rediwall. With PVC formwork you order taller and cut it down, because you can't join it. It's much cleaner than blockwork. Blockwork is easier to brace and reinforce, but its cores are like sponges, so you wouldn't use it on a hydrostatic basement. With Rediwall, it can be hard to get horizontal bars in on bigger sections, which is why so many vertical bars are used.
The big goal
The basement slab is the most important slab on this project. The concrete foreman reckons there are about six good weeks until Christmas. The plan is to get the basement slab in, form and pour the columns, then get the ground floor slab on. That gives enough weight to switch off the dewatering. If we can do that by December, it'll be a very good Christmas.
I know I spoke fast in this one. I'll try to slow down next time.