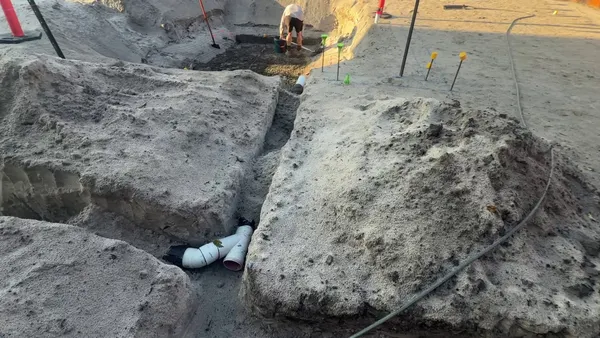
Good morning. This update was filmed after the crews had gone for the day. A lot of people don't like being on camera, so I film once they've left to respect their privacy.
Since the last update, we've demolished the rest of the old boundary fence, extended the footing and poured it, with the same reinforcement as the rest of the run. The tilt panels are up, and the garden on the neighbour's side is backfilled.
Why we held back the last panel
We deliberately left the last panel until all the others were standing, then had it measured to suit. That choice turned out to be right.
The crew standing the panels told us some of them weren't exactly the size they were meant to be. A few were out by 20 to 30 mm. Small errors like that add up along a run, so each panel has to "creep" a little to fit. If all the panels had been made at once, the last ones would have crept forward of the boundary, and that's not allowed. Measuring the last panel off what's actually built costs a bit more, but it means the fence finishes exactly where it should.
How the panels lock together
Each panel overlaps the next at the joint. The overlap has holes cast into it, and a bolt goes through both panels to tie them together.
At each joint there's also a void inside the panel, formed with polystyrene when it was cast. The starter bar coming up out of the footing slides into that void as the panel is lowered over it. Once the panels are plumb, the voids are filled from the top with high-strength grout. That locks each panel onto the footing. At the time of filming, not all the voids had been grouted yet.
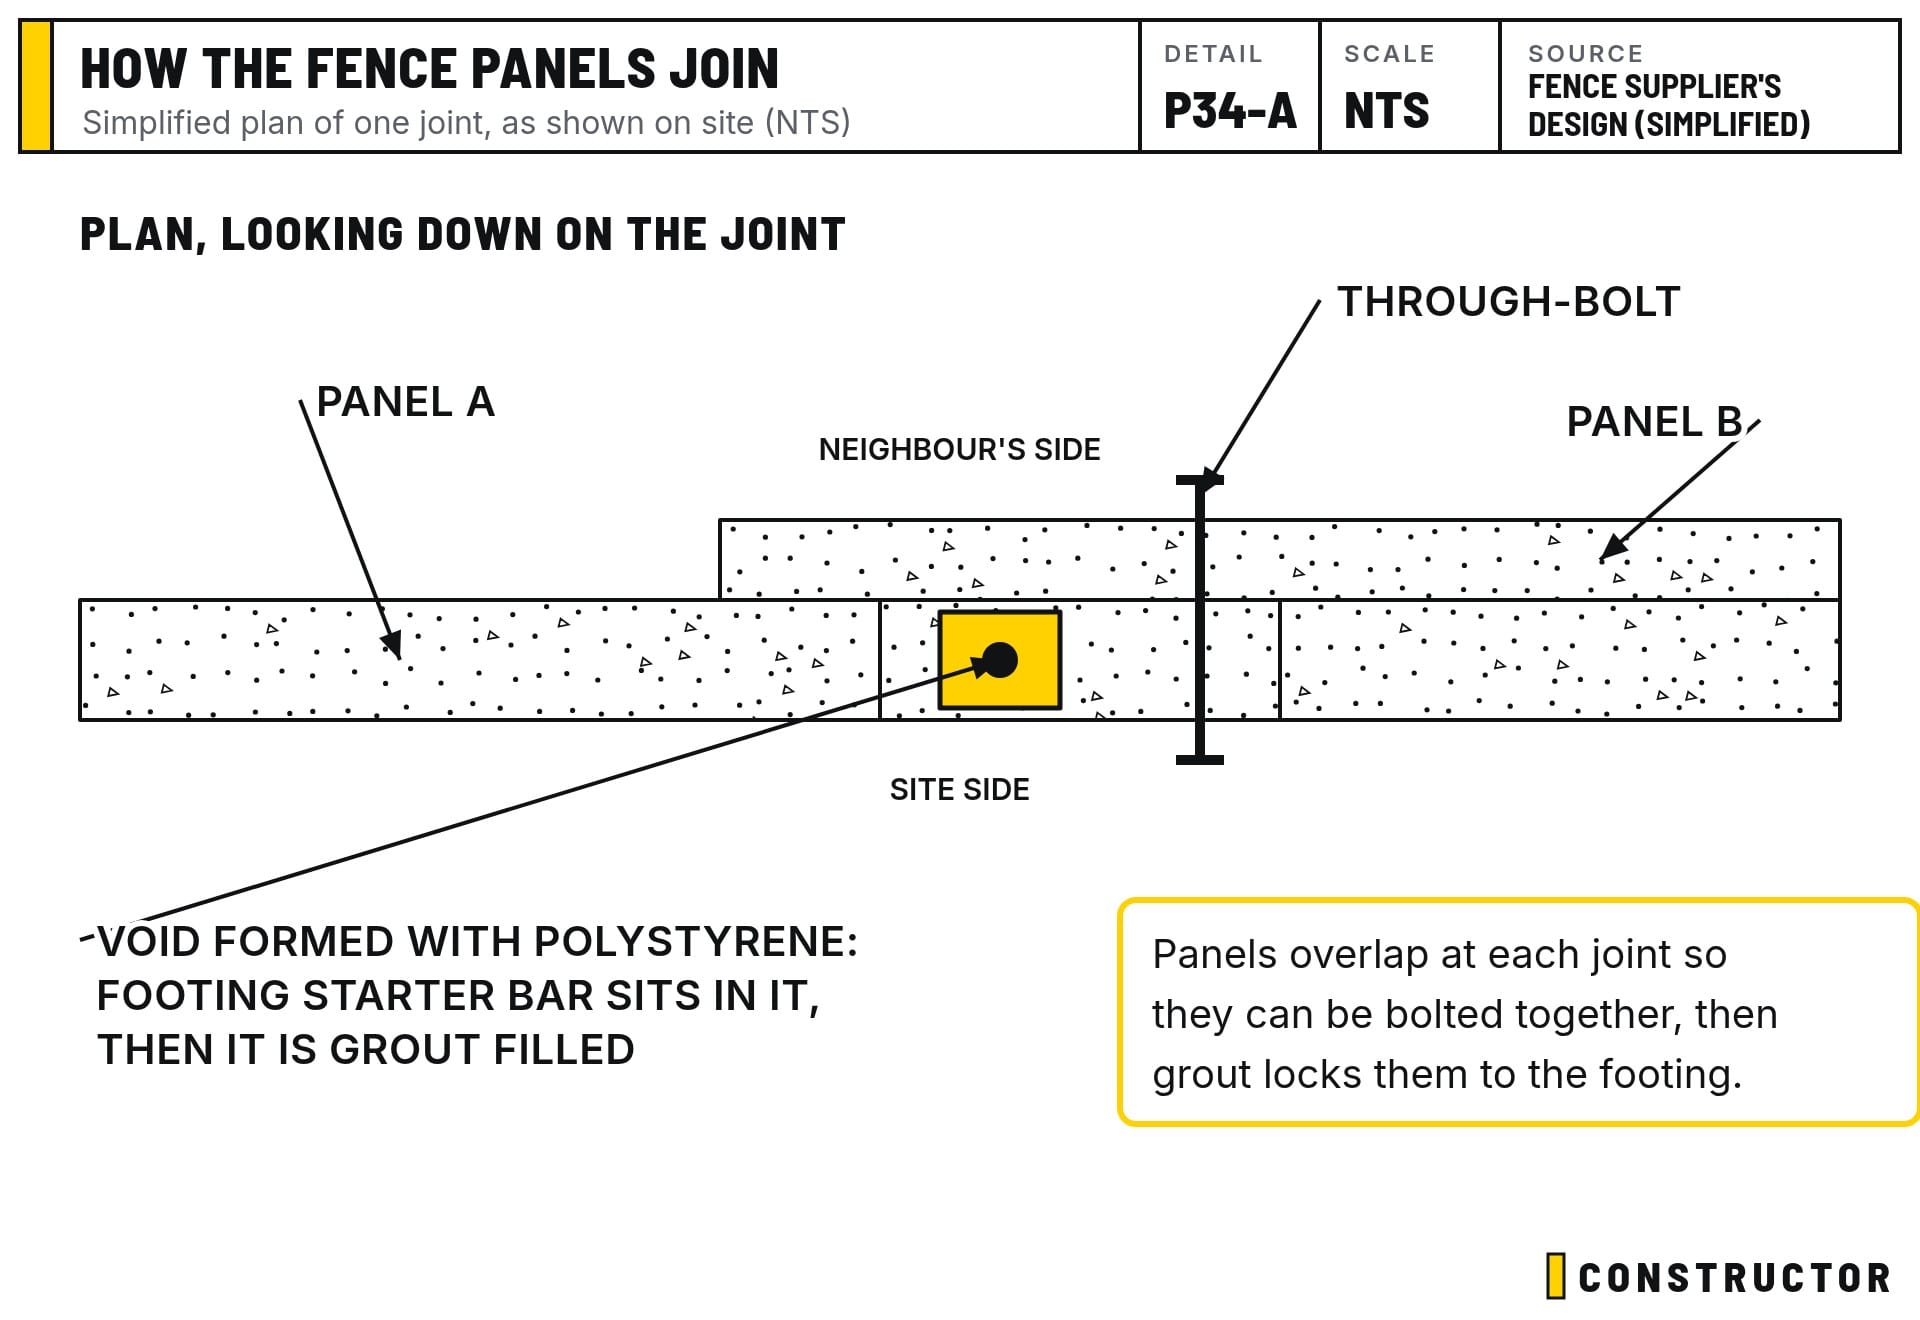
This connection is the fence supplier's engineering detail. They design and certify the panels and starter bars. Our engineer designed the footing they sit on (Post 32).
Until the grout has gone off, each panel is held by push-pull props. The bases screw in and out to plumb the wall (make it dead vertical), and the top slips over the panel edge. We added star pickets at the prop feet because we weren't happy with how the contractor had left them.
Patching and painting tilt-up panels
The chipped edges from lifting the panels too early (Post 33) still need repairing. We'll give the contractor the chance to finish their own repairs first, because we don't want to interfere with their work. Then we'll go over every panel ourselves with a high-strength patching compound and feather it out.
The finish will be an applied textured coating, most likely a heavy stipple. It looks good on both sides, covers small imperfections, and saves the cost of rendering the whole wall.
The most important part is preparation. Tilt panels are cast flat on the ground, and the formwork is coated with a release agent so the panel lifts off cleanly. That release agent stays on the face of the panel. Paint won't bond to it, and that's why you see so many tilt-up fences with the paint peeling off.
There are two ways to deal with it:
- Wait. Keep wetting the panels and let the release agent weather off. It can take three to six months.
- Treat it. Apply a compound that breaks the release agent down, then wash the panels. It's a hydrocarbon product that stinks and will give you a headache, so ventilation and the right protective gear matter.
Either way, the coating only goes on once the release agent is gone.
Backfilling behind the wall
We hired an 8-tonne excavator, alongside our 3-tonne, to work over the panels into the neighbour's garden.
- Agi pipe. The slotted agi pipe in its sock runs the full length of the boundary.
- Pea gravel. The 8-tonne dropped at least 200 mm of pea gravel over the pipe along the whole length, reaching over the fence with the bucket.
- Sand. Then sand, up to the marked heights.
- Garden soil. Last came the garden soil from bulk bags. That was harder than it sounds: the soil was moist and didn't want to come out of the bags, so there was a lot of bag bashing.
The fill will be watered and left to settle, then brought back to level so the path can be concreted. There's a timer on the irrigation so the plants are getting watered again, and a temporary sprinkler is running. When another excavator comes on the 21st, it will lift in the last bag of soil and re-sling the neighbour's trees back into place. Then we'll redo the irrigation and garden lights and start rebuilding the concrete path.
Closing the gaps at the return walls
Where the neighbour's existing return walls meet the new fence, there are gaps. We'll put plywood on each side, dig out the base, and dry pack concrete in to extend the wall across to the fence. Then the renderer comes back to touch everything up before it's all repainted.
A crack that wasn't ours
There's a large crack in the render on the neighbour's house. We were worried our work had caused it, so we looked into it carefully and talked it through with the engineers who've been on site.
The cause is a missing isolation joint. That concrete path was poured hard against the rendered wall of the house, which goes down to a basement. With the rain we've had, the path has settled. Because it's stuck to the wall, it's dragged the render down with it and torn it.
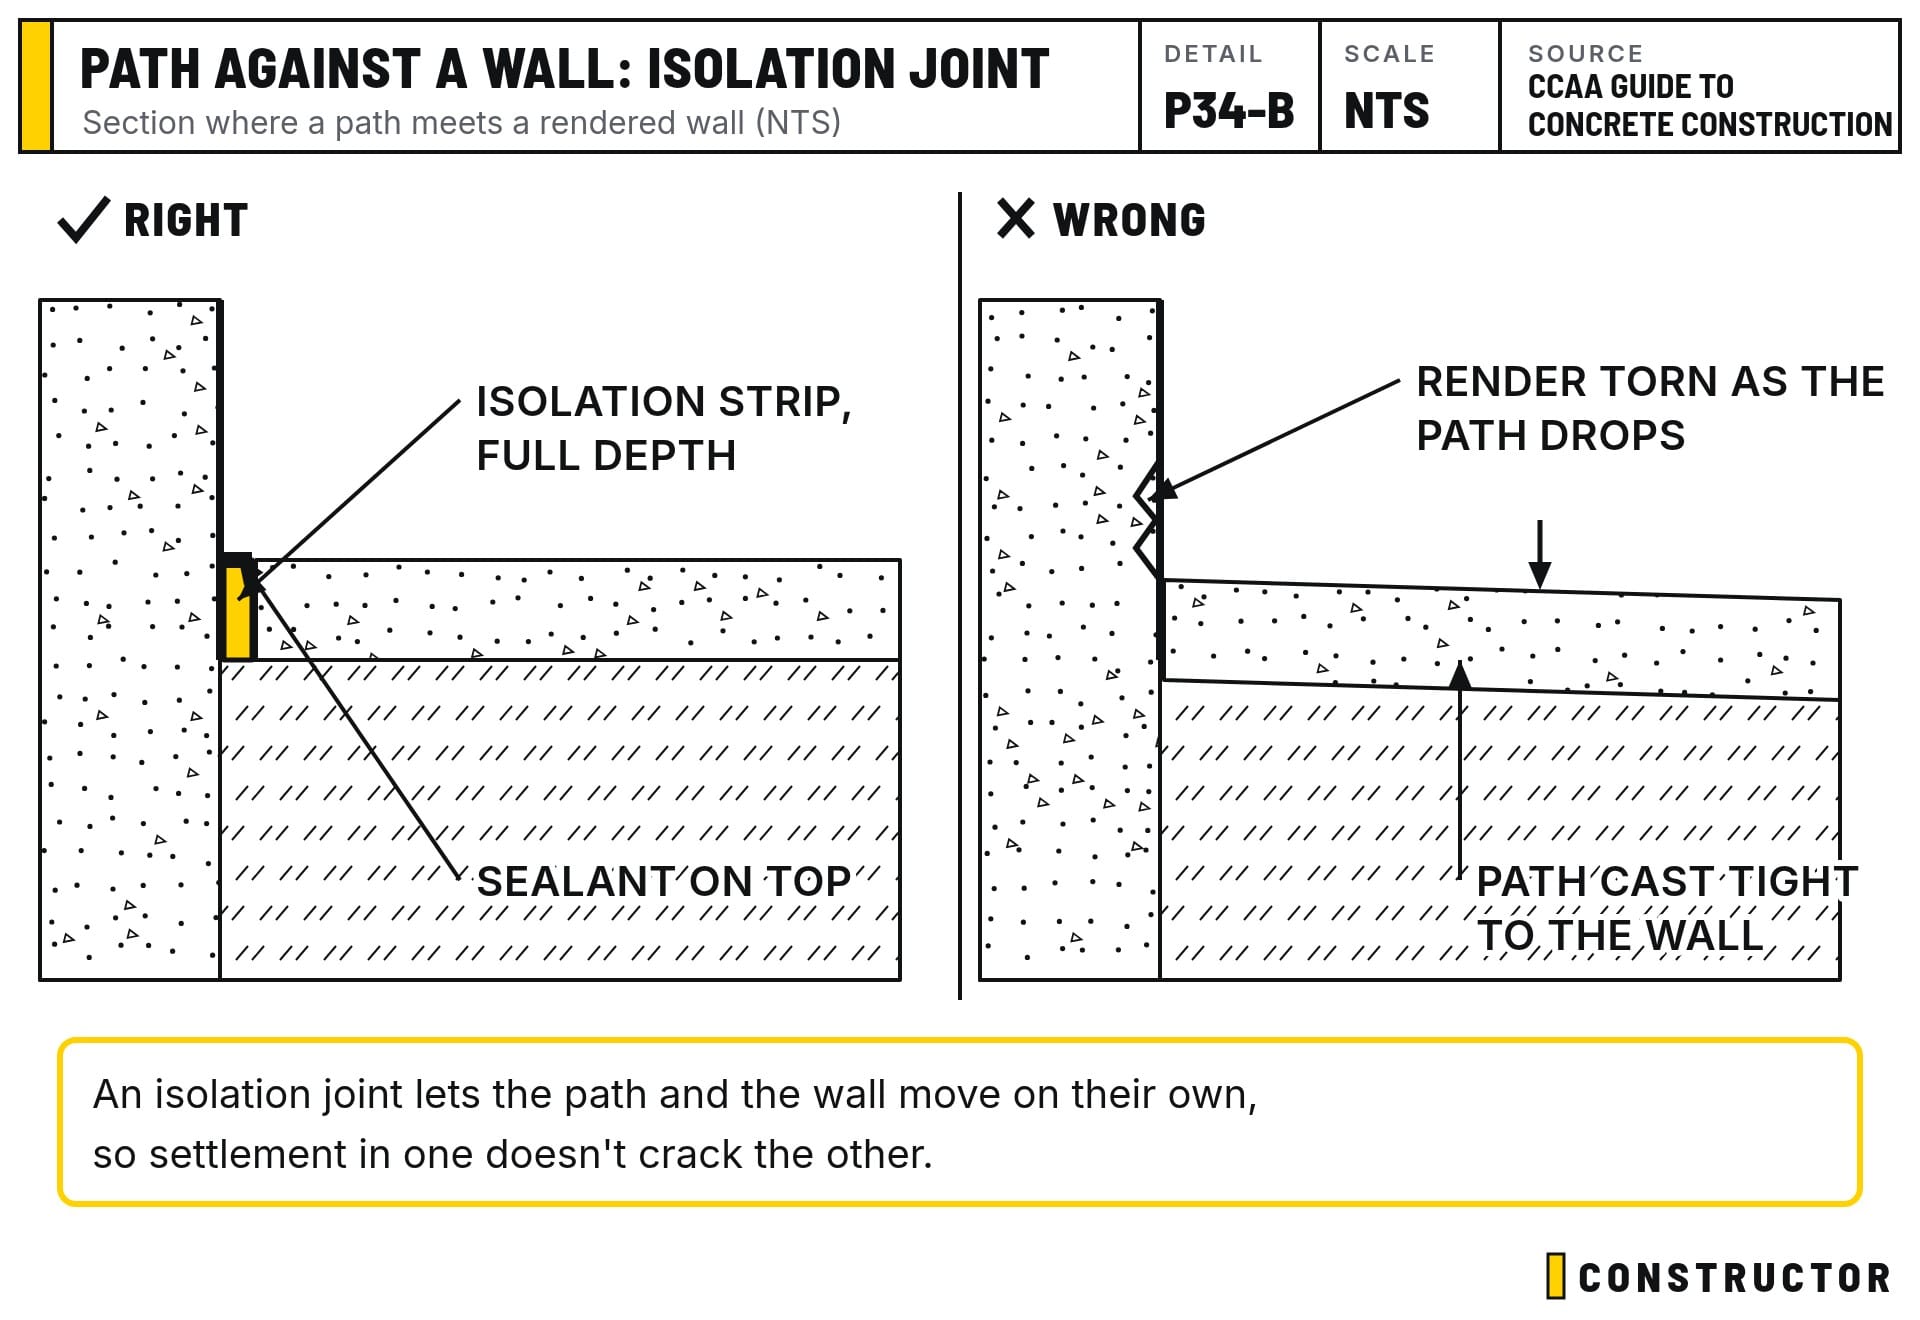
An isolation joint is a full-depth strip of compressible material (Abelflex is a common one) between a slab and the structure it butts against, finished with a flexible sealant on top. It lets the two move independently, up and down as well as sideways.
The Cement Concrete & Aggregates Australia (CCAA) guides explain where isolation joints go. They're not the Standards themselves, but they summarise good practice well. I give them to homeowners and concreters alike. Doing it right doesn't take much more time or money. It's mostly knowing what to do.
We get on well with the neighbours, so while we're doing the other work there we'll fix it for them. We'll pull off the loose render, epoxy-inject the crack, re-render and repaint.
The short version
The boundary fence is up, with the last panel made to measure. The drainage and garden are backfilled, and the patching and painting will follow once the release agent is dealt with.
We're still working through the dewatering, which has been a challenge. The civil contractor's excavator is booked for the next bulk dig, which will take the site down another 900 mm or more.