

Welcome back. There are a few of these updates at the moment, because this is a big job and a lot is happening at once.
This one is a walk around the whole site. We've been getting it ready for the dewatering and the bulk excavation. I'll cover how we store chemicals, the temporary power, the walkway down the side, the drainage that goes behind the new boundary wall, and a problem with the precast fence panels.
Storing chemicals properly
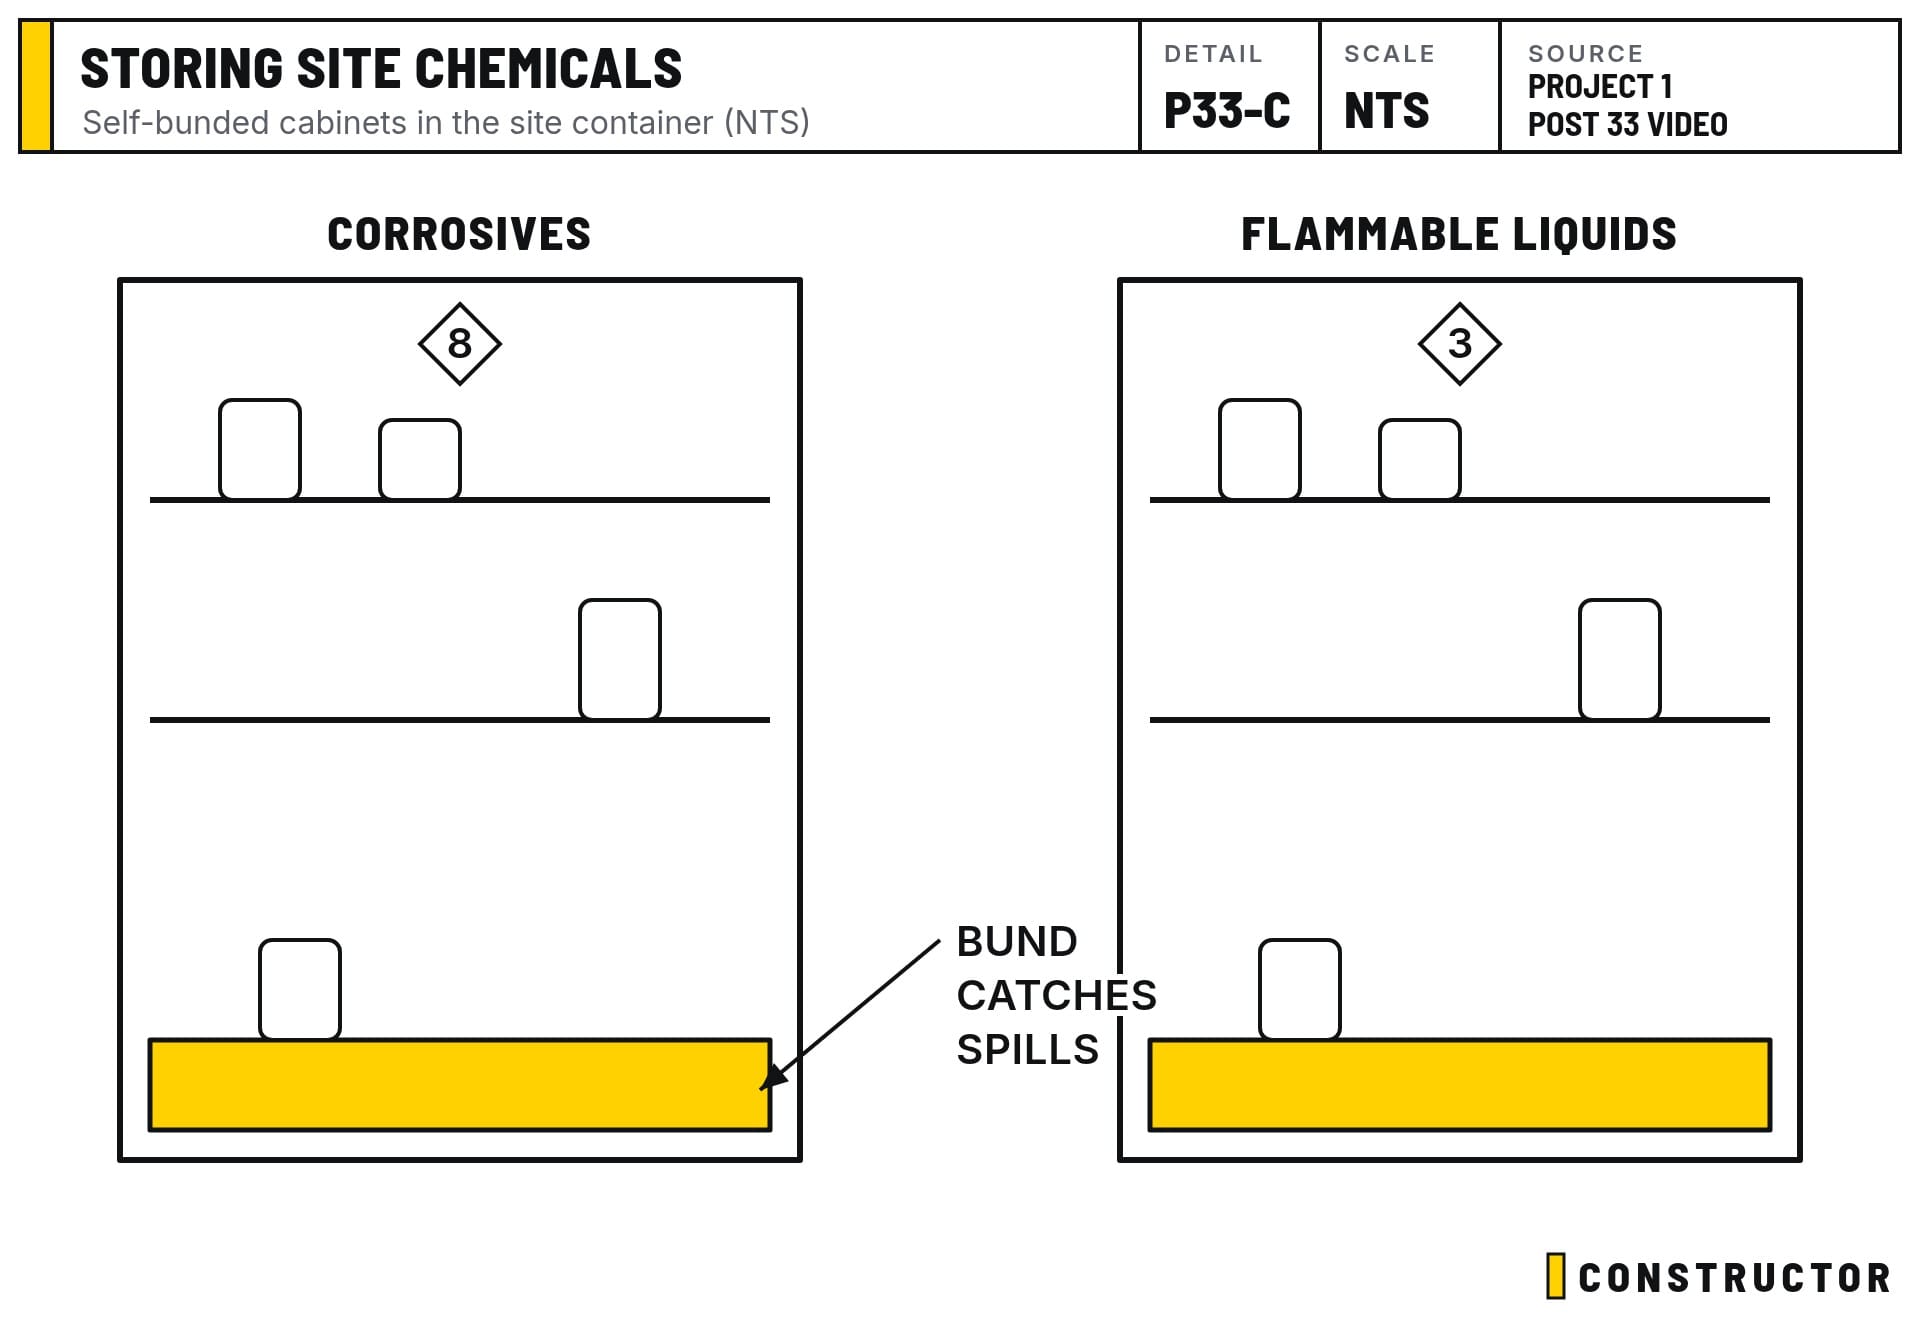
The first thing you see is a blue corrosive substances cabinet. It'll mostly hold fuel. We found it on Facebook Marketplace, of all places. These are normally about $3,000 new, and we paid $700. It came with one shelf and no keys, so we fitted a hasp and padlock. We've taken the shelf to a metal fabricator to get two more made.
Inside the container there's a second cabinet for flammable liquids, also from Marketplace. It's usually around $2,500 new, and we paid $600. Same story: no lock, so it got a hasp and padlocks from Bunnings.
Both cabinets are self-bunded. That means the base is a sump. If something leaks or tips over, it stays inside the cabinet instead of running across the floor.
The next job is to put the safety data sheet (SDS) for every product in each cabinet on the door. If someone gets a splash in the eye or a spill on their skin, the first-aid instructions are right there.
Inside the site container
We've cleaned out the container, and there's a lot more room in it now. Here's what lives in there:
- Safety gear. First aid kit, a temperature sensor, a smoke alarm, signs, fire gear, a fire blanket and an extinguisher.
- Concrete tools. The poker vibrator (we use it a lot), screeds, the concrete rake, plastic and the dumpy level.
- Galvanised dowels. These are short steel bars that get drilled and fixed into existing concrete, so a new pour locks onto the old one. They stop the two sections moving apart, including vertical lift. The blue marks along the neighbour's path show where they're going.
- Lifting straps, Acrow props and star pickets for propping and bracing.
- The network gear, with small fans to keep it cool.
- Power leads, including a 20 m four-pin lead for the dewatering pumps.
We're also stringing a line across the top so the lightweight tools can hang up out of the way.
Temporary power
At the site board there's:
- A three-phase 32 A four-pin outlet on its own isolator for the dewatering pumps
- A 15 A outlet on its own isolator
- Circuits inside the board for general power, plus shore power for the boat and the jetty
We'll add more subboards as the job grows. An isolator next to each big load means a pump can be switched off and worked on safely without shutting the whole site down.
We also dug up the sewer again to take levels (RLs) for the surveyor, because the survey plan needs updating for the building over sewer application.
A safe walkway down the side
Since the last video we've extended the railing down the side of the house and filled the hole with crusher dust. That gives us a walkway from the front of the house to the back. Once the excavation goes down, that path will be the only safe way through. The crusher dust is firming up nicely, so it's also doubling as a material storage area.
There's a second fire extinguisher on a hook at the back, with a little cover to keep the rain off it. Once the hole is dug, we'll have an extinguisher at both the front and the back.
The jetty
We've pulled all the carpet off the jetty. It's aluminium underneath. We used a trolley jack as a lever under the edge, because its wheels let it roll along as you go, and scraped the carpet up with a shovel. We've marked any holes and bolts that need filling.
The concrete pontoon area will probably be honed and finished, either with an epoxy coating or a honed finish with a non-slip treatment. My preference is the honed, non-slip finish, but it's the client's jetty, so it's their call. A new subboard and meter box will eventually go here too.
Drainage behind the boundary wall
This is the bit that matters most for the new fence. The plumber was in on Friday. He repaired some of the drainage, put a new tap in next door and lagged the pipes, and added drainage points so we can run yard gullies.
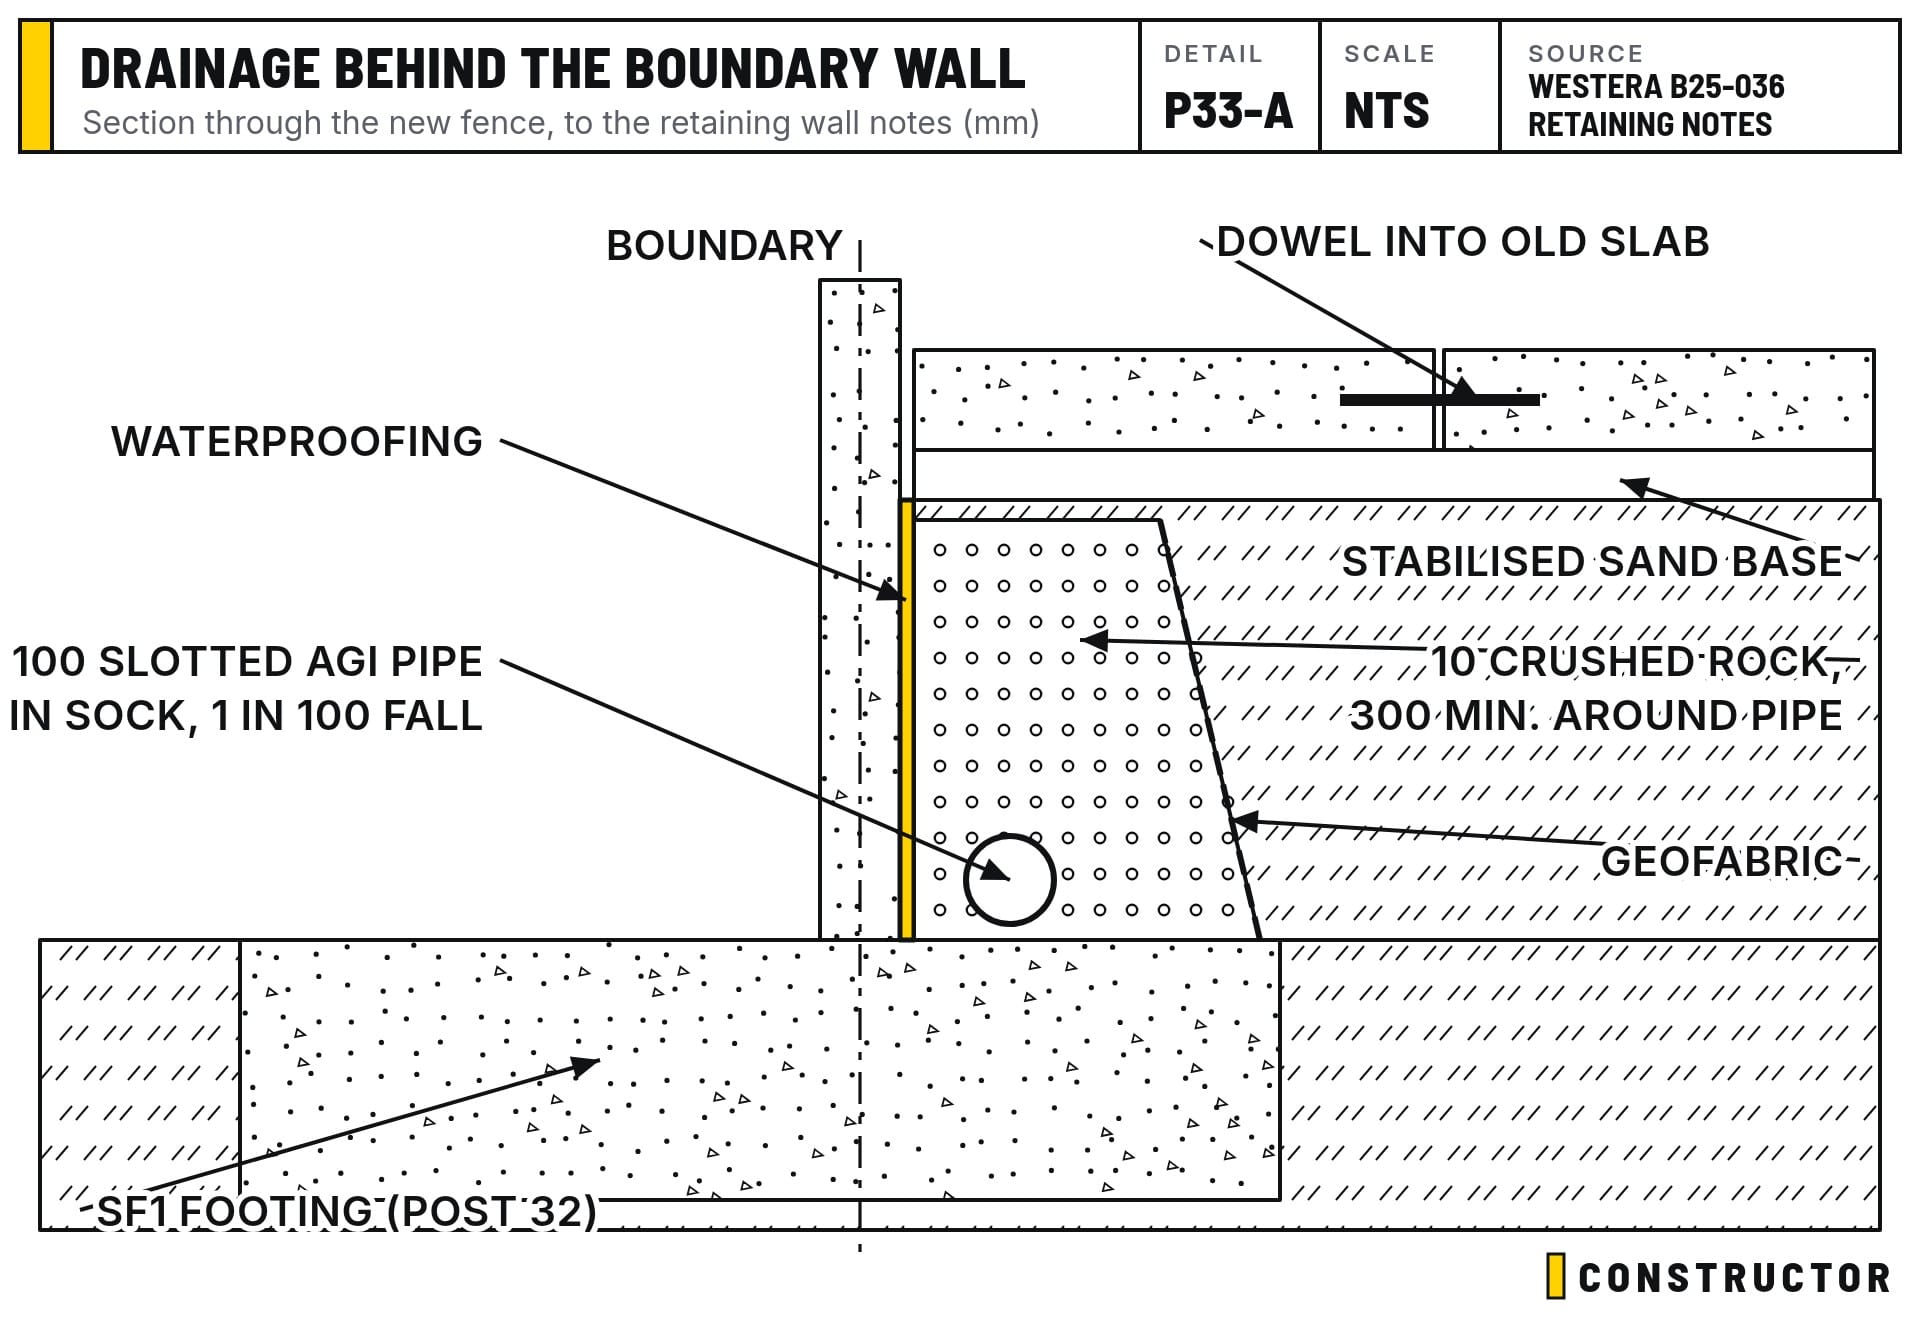
Behind the wall, on the neighbour's side, everything follows our engineer's retaining wall notes:
- An agi pipe. This is a 100 mm slotted PVC pipe in a geotextile sock, laid along the base of the wall. It falls at least 1 in 100 to the stormwater system, so any water that builds up behind the wall drains away instead of pushing on it.
- Free-draining gravel. At least 300 mm of 10 mm crushed rock goes around the pipe and up the back of the wall.
- Geofabric. A layer of geotextile separates the gravel from the soil, so fine material doesn't wash in and clog it.
- A firm base for the new path. The neighbour's path gets re-poured on top. Concrete on loose sand will settle, so the engineer's notes call for stabilised sand or no-fines concrete under any path along the boundary. We'll bring crusher dust up as well to make a firm pad. The new section is then dowelled into the old slab, and we'll redo the levels.
Waterproofing on the retained face of the wall is a separate system, applied and certified by a specialist.
We also need to cut the sheet piling down to concrete level. We'll dig a small channel along the side, get the oxy-acetylene bottles in, and cut it off.
Panels lifted too green
The tilt panel contractor has started, and this is where it went wrong.
Each precast panel has cast-in lifting inserts near the top. The crane hooks onto those to stand the panel up. Concrete keeps gaining strength for days after it's poured. These panels were lifted before they'd separated cleanly from the casting bed, while the concrete was still green (not yet strong enough). The inserts pulled at the soft concrete and chipped the panels around the lifting points.
So it's now a repair job. We'll see how the contractor handles their repairs. Then we'll probably go over the wall ourselves: patch and fill the damaged areas, sand everything back, and finish it with an applied textured coating, most likely a stipple coat. That way the wall doesn't need a full render.
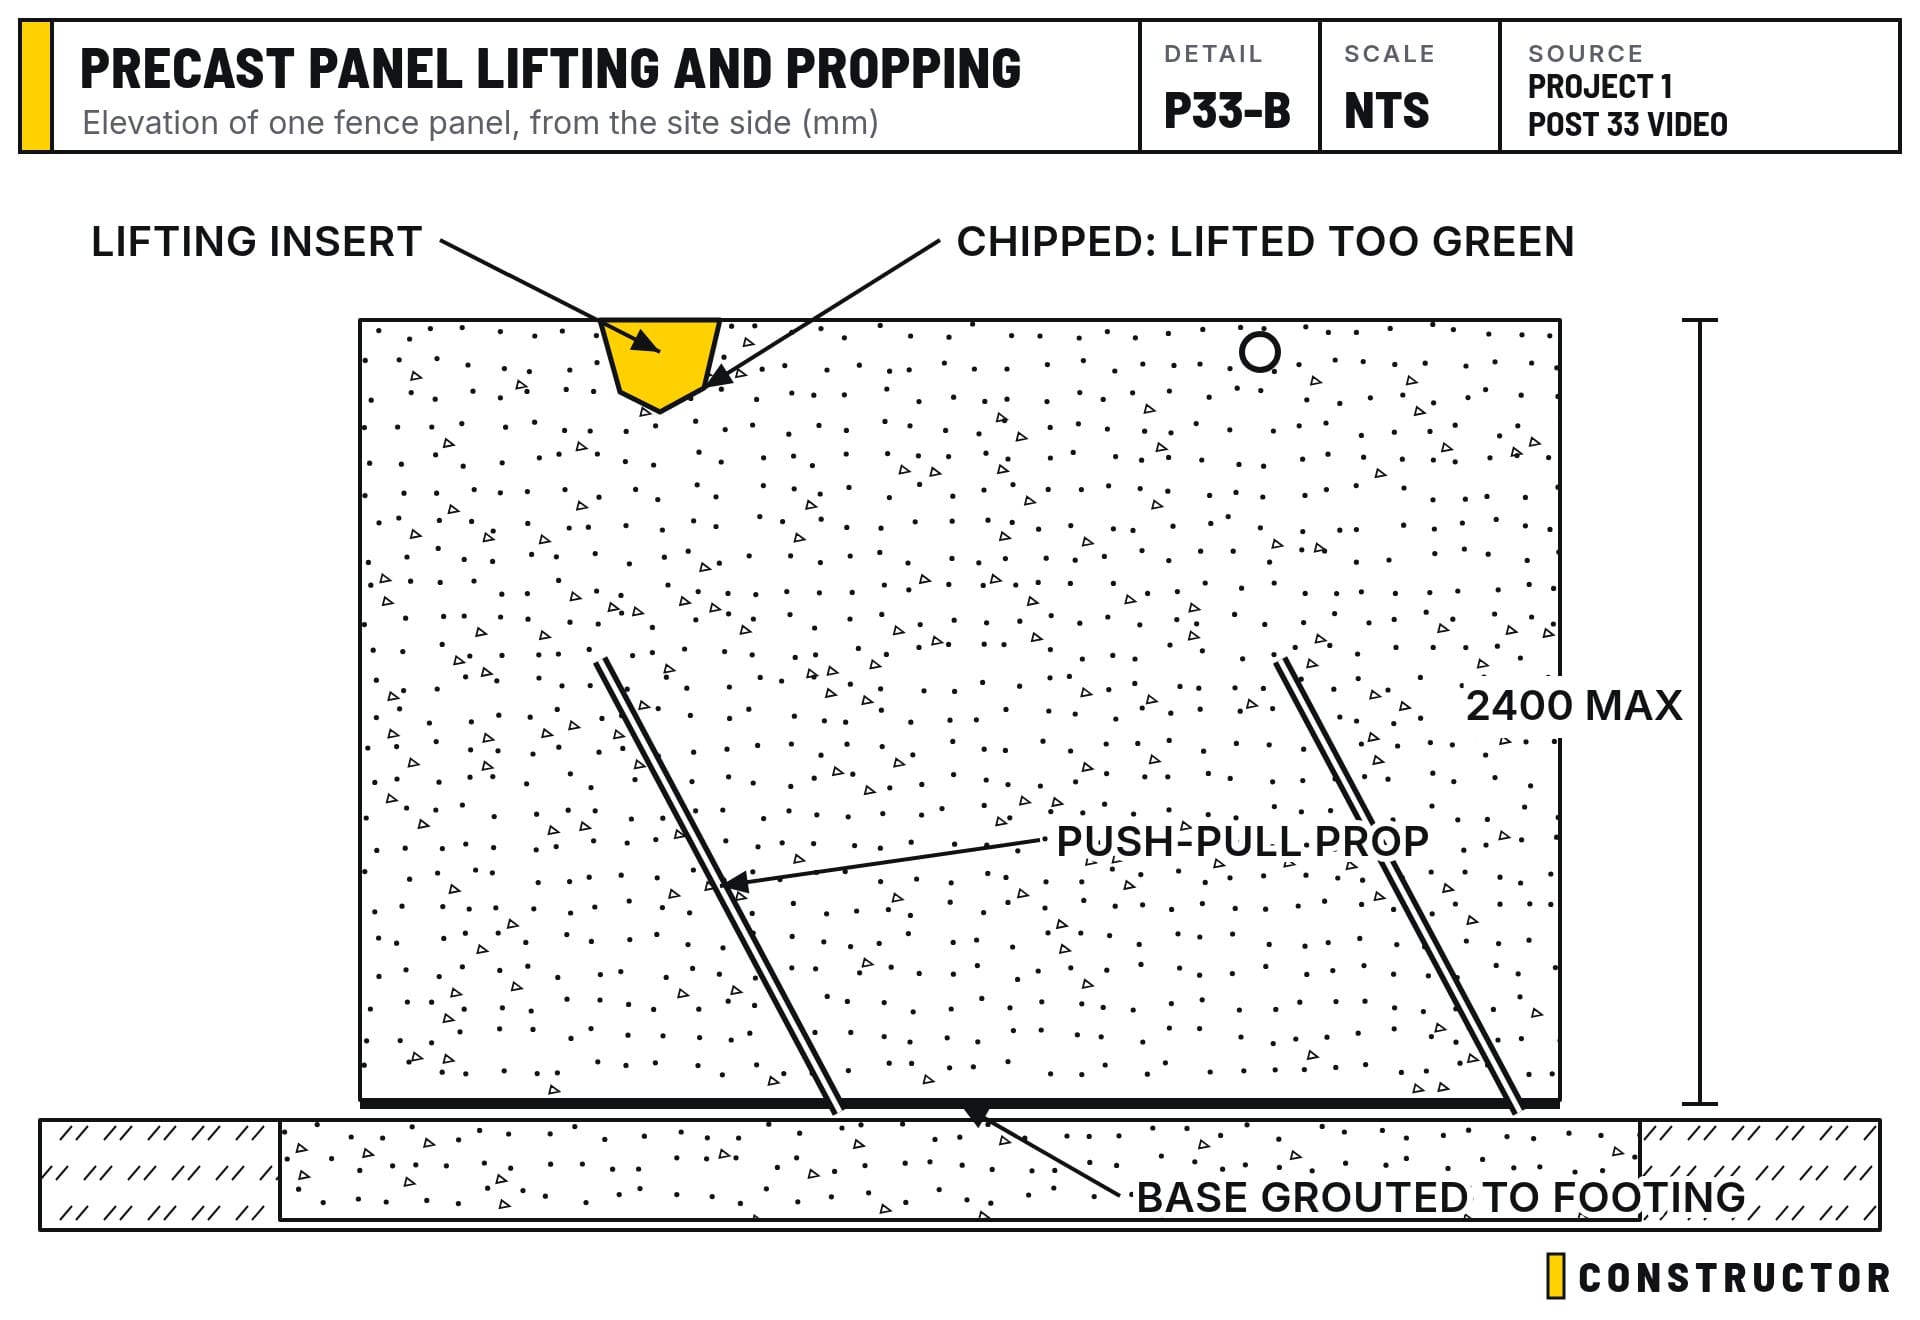
You can also see the panels standing on the footing pads, with the reinforcement from the pour coming up into them. One base has been grouted so far. The diagonal braces are push-pull props. They hold each panel plumb (dead vertical) until its base is grouted and it can stand on its own.
Next door's garden bed
The electrician was also in on Friday. He tidied up the electrical along the wall and added double power points, so we can reconnect the neighbour's garden lights and irrigation once the wall's in. Where the wall lands, we'll dry pack the gap and re-render.
We've pulled out the rest of the old fence, and its footing is next. When we dug into the garden bed, we found out why the pine trees there never grew well. Whoever built the house next door had used it to dump their building rubbish: broken tiles and debris that the roots couldn't get through.
We'll dig all of that out. We'll also extend the new footing across to the fence so the last panel can go in. New garden soil was delivered on Thursday. It goes in behind the wall, then the trees get fertilised and replanted where they belong. A new agi line will run the full length of the wall and connect to the older one on the other side.
The short version
The site is tidy, the chemicals are stored safely, the power is set up for the dewatering pumps, and there's a safe walkway front to back. The drainage behind the boundary wall follows the engineer's notes. The precast panels need repairs after being lifted too early.
We've given the dewatering contractor two weeks' notice and we're waiting on a start date. Once they're going, we can book the bulk excavation and keep the program moving.


