Last time (Post 56) we got the steel into the Rediwall basement walls. This one is the walk-round the day before the core fill: what's done, what's still to come, and why.
The engineer's walk-through
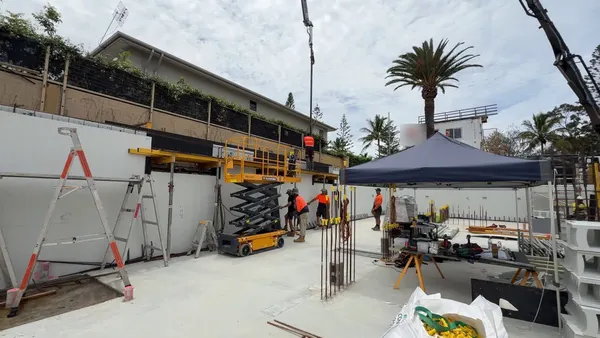
We did a video call with the engineer to walk them through the walls, and they're coming out to site tomorrow for another check before the pour. I'll show them where all the L bars go, and they'll look inside the walls. We've put steps along the walls so everyone can get up and see in.
I've already been round myself checking the horizontals, the starter bars, and that the L bars sit where the starters come up. Every vertical is now in.
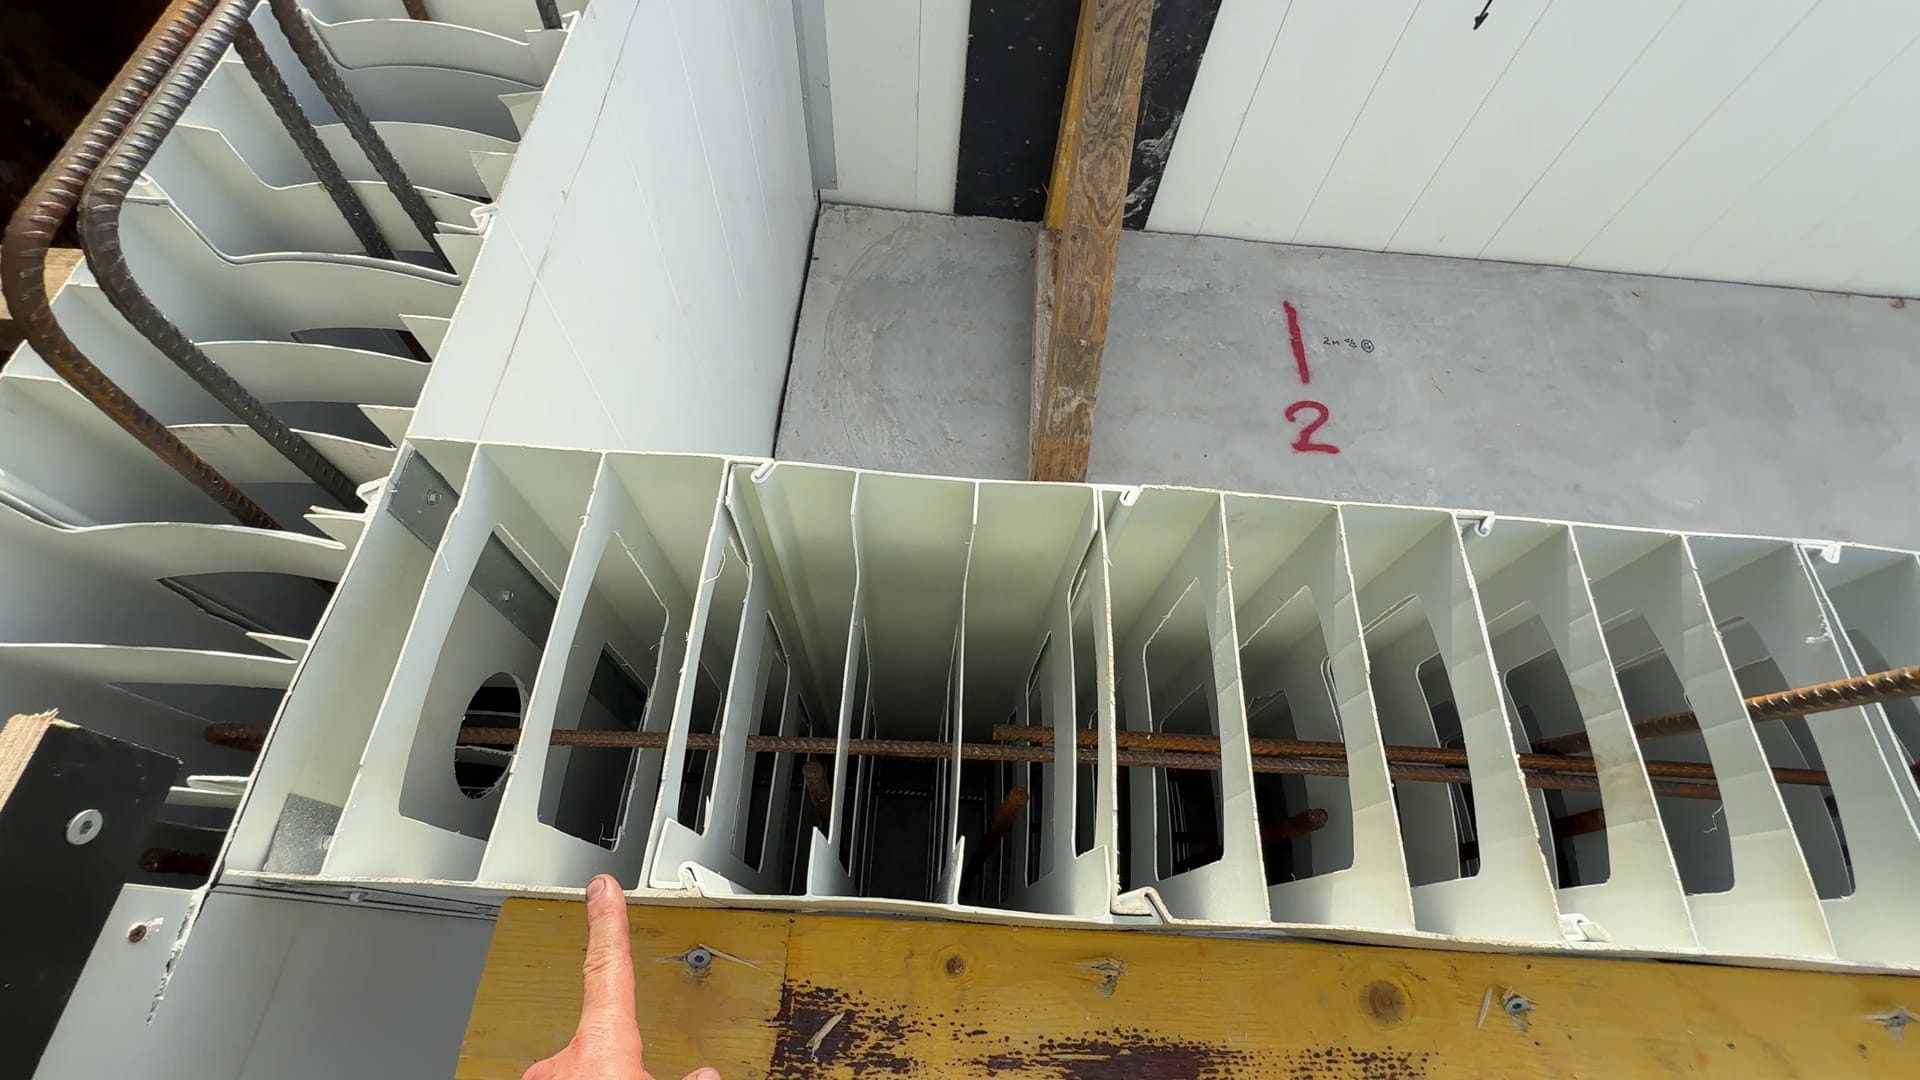
Back-propping and closing out
Today was mostly back-propping and formwork close-outs.
- Close-outs go anywhere there's a gap in the panels. Panel sizes don't always work out exactly, so those gaps get formed up.
- Corners have internal angle braces screwed off. I think the normal spacing is 250 centres, and we've gone a little closer.
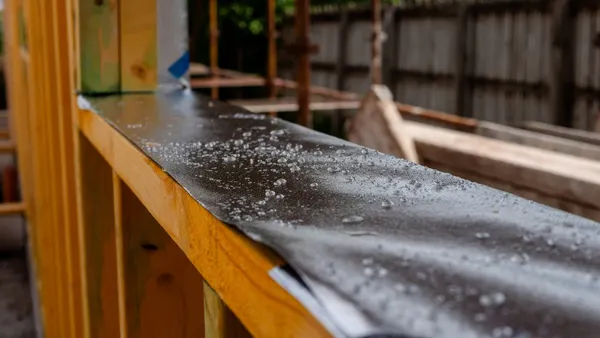
- The bottom of the wall sits in a rebate, and there's an angle on the other side, so it can't really move. Timber battens are screwed down to keep the toe of the wall in place.
- Intermediate braces at 1200 centres stop the wall moving along its length.
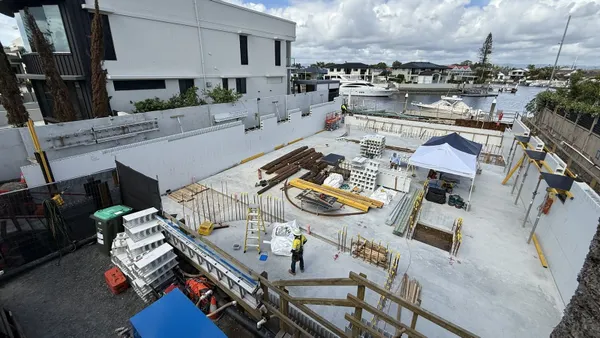
We've propped off the back of the walls, against the sheet piling, rather than bracing back into the basement. That keeps the floor clear. We had a second scissor lift craned in this morning, so on pour day there'll be one lift with the pump crew and one with the guys vibrating and finishing, and both can run the full length of the walls. Brace back the other way and you're forever driving the lifts in and out.
A lintel waiting on steel
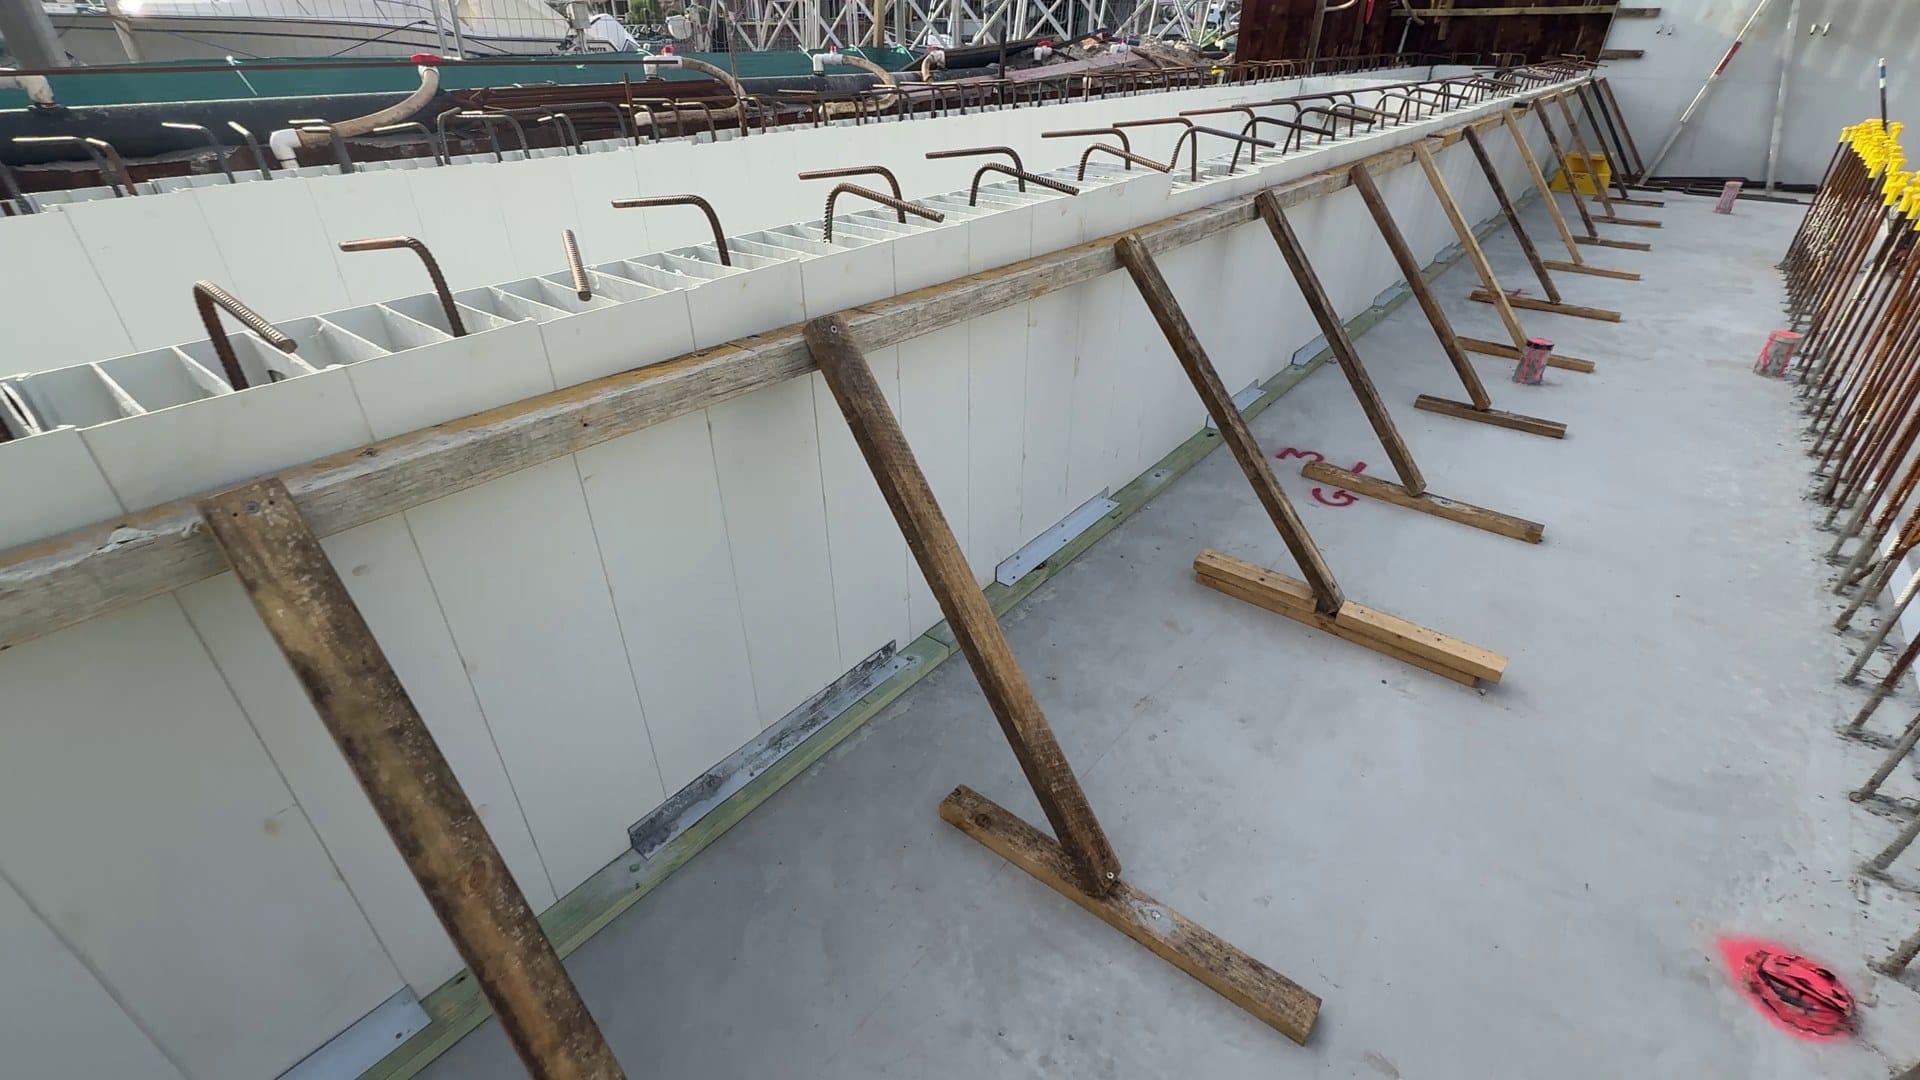
The reinforcement supplier didn't send the right steel for the concrete lintels over the window openings. So we'll pour the walls and leave the concrete about 150 mm down at the lintels. When the steel arrives, we'll key it back in, finish the formwork, and pour the lintel across the top. The wall keys into the next slab, so it all ties together.
Not ideal, but nothing wrong with it either. Westera has OK'd it, so structurally it's adequate, and it's all above the hydrostatic level (the groundwater level), so it's above ground.
Why have a lintel at all? These are the ventilation window openings from Post 56. The load from the wall above spreads down at about 45 degrees. The lintel catches it and carries it across the opening, so nothing presses on the window and the opening can exist. Acrow props hold up the bearers and the form ply, which carry the weight of the wet concrete until it's hard.
A boatload of L bars
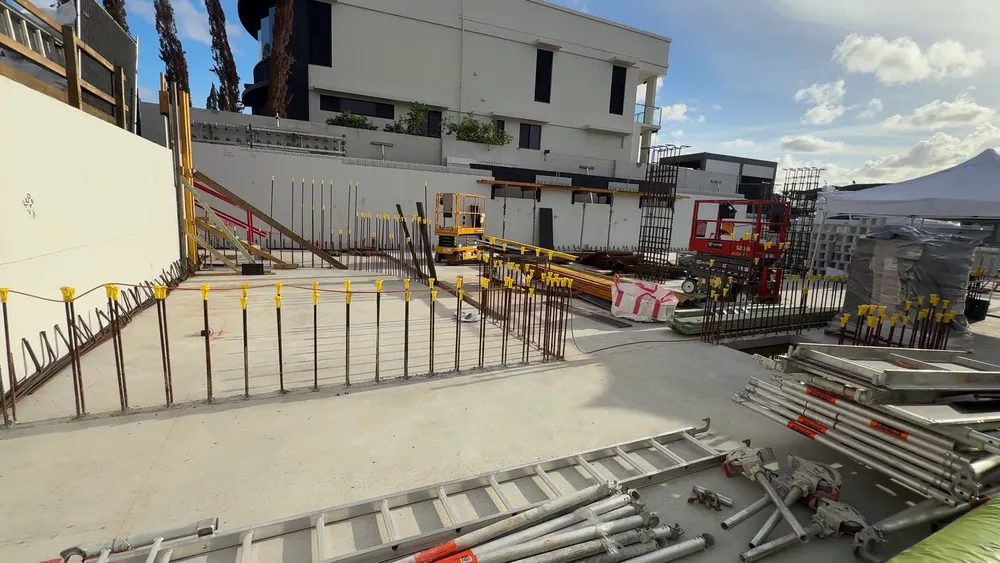
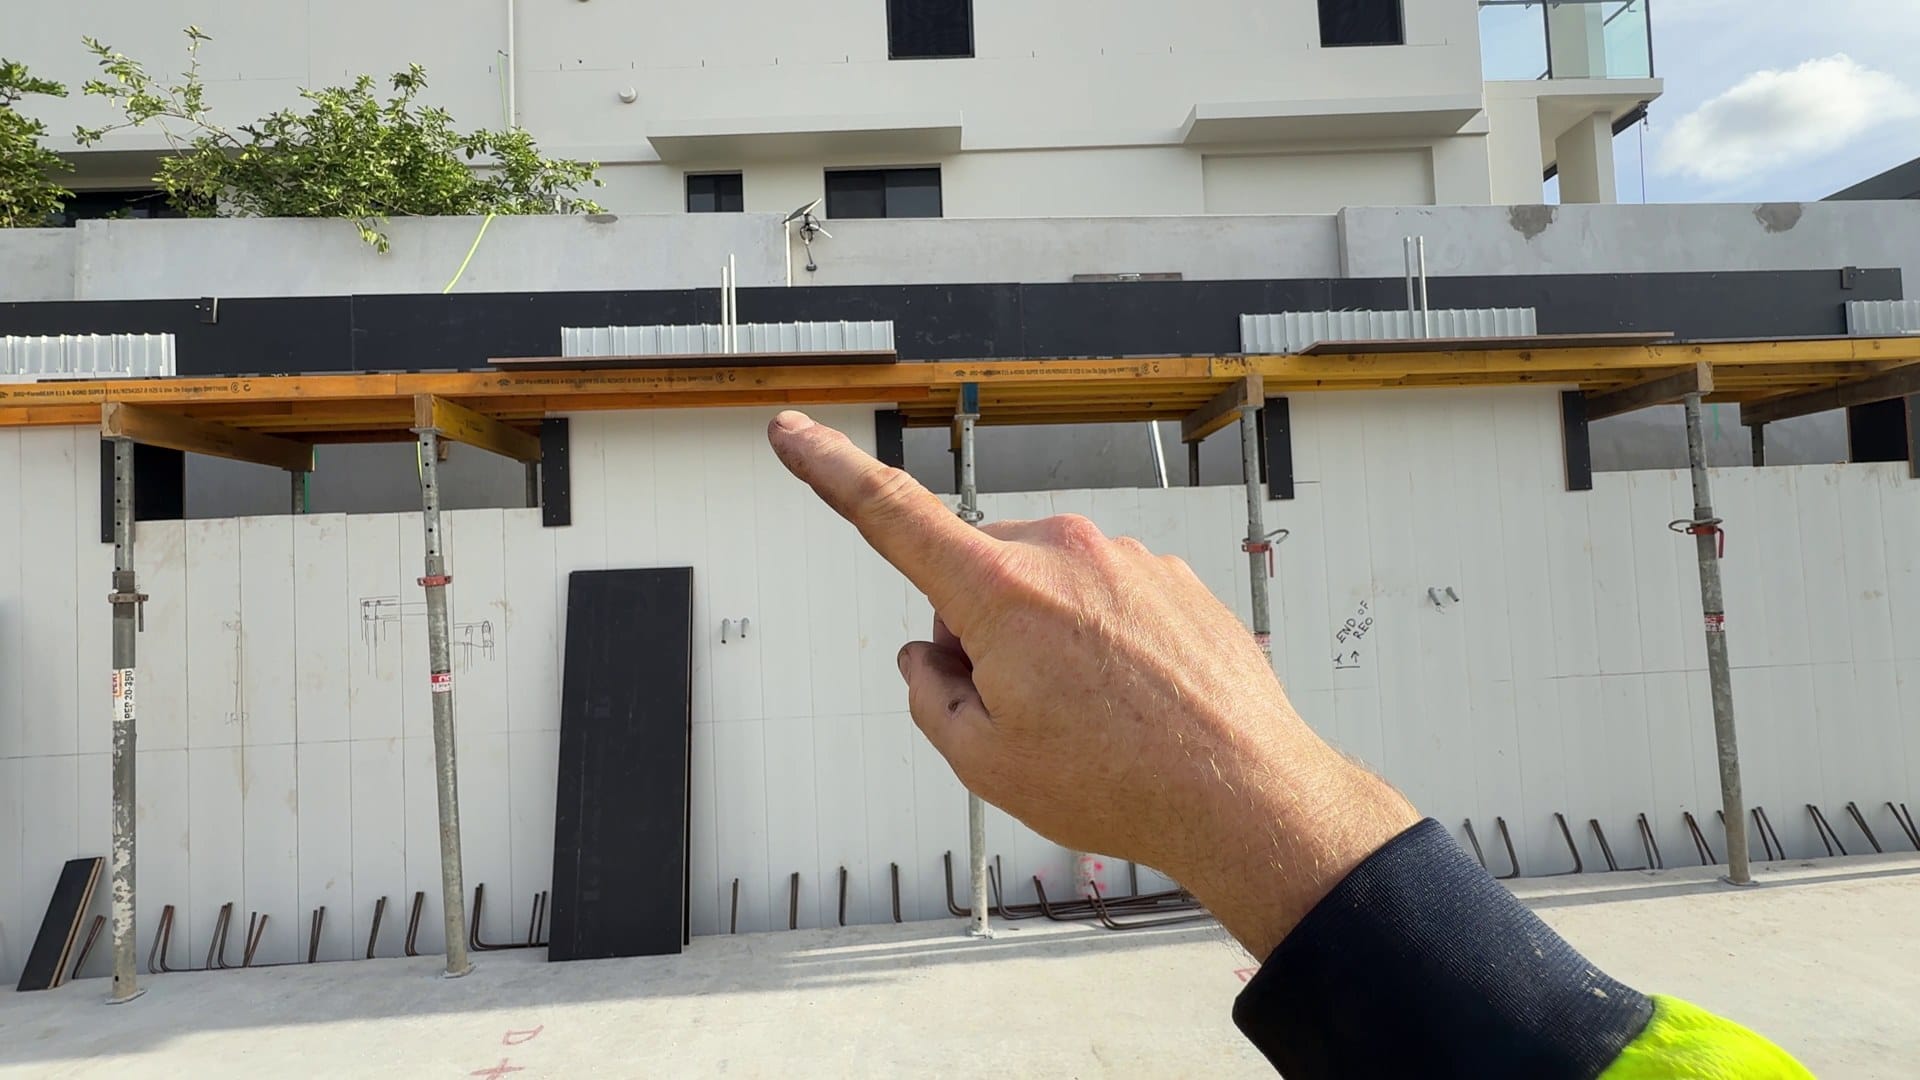
Today we laid out all the L bars. It took about three and a half hours, and it was a boatload of steel.
They're called L bars because they look like an L: one N16 bar, 1200 mm one way and 300 mm the other. One goes everywhere there's a starter bar and a vertical bar, at 250 mm centres.
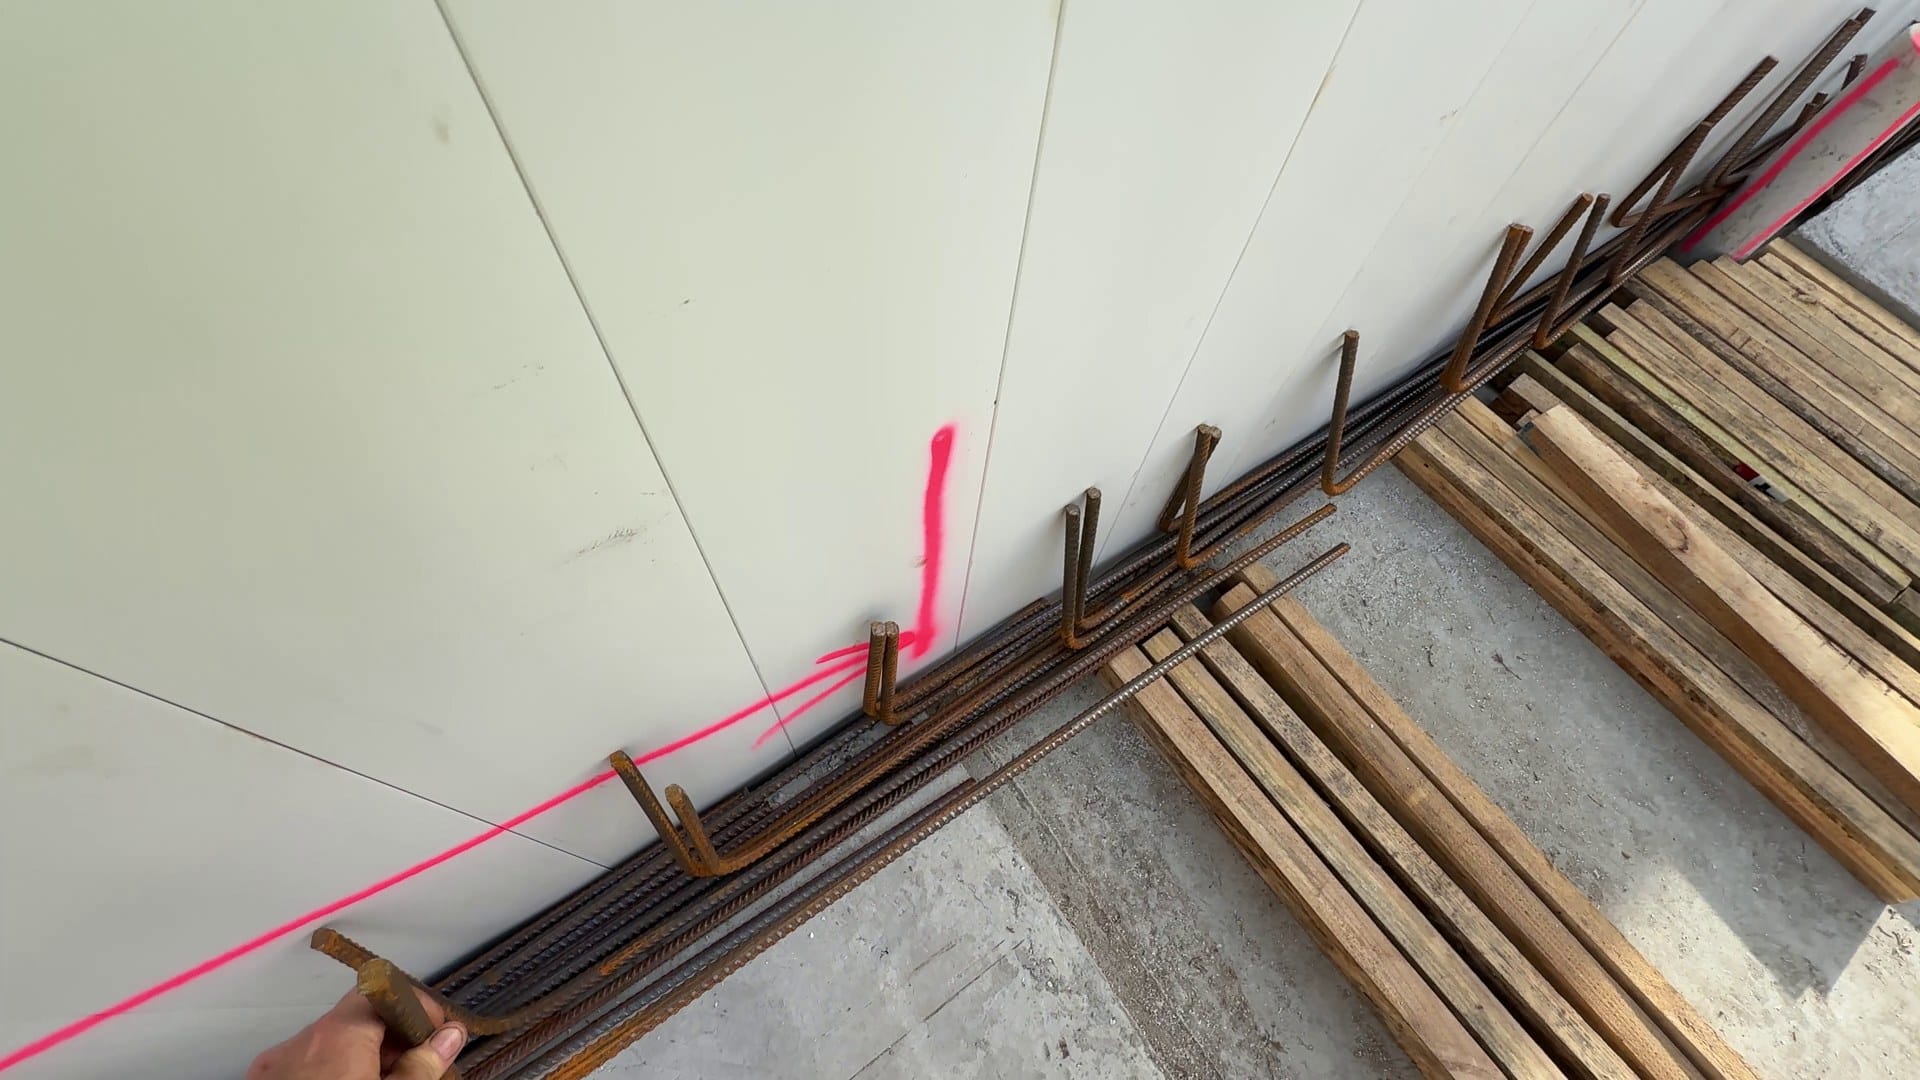
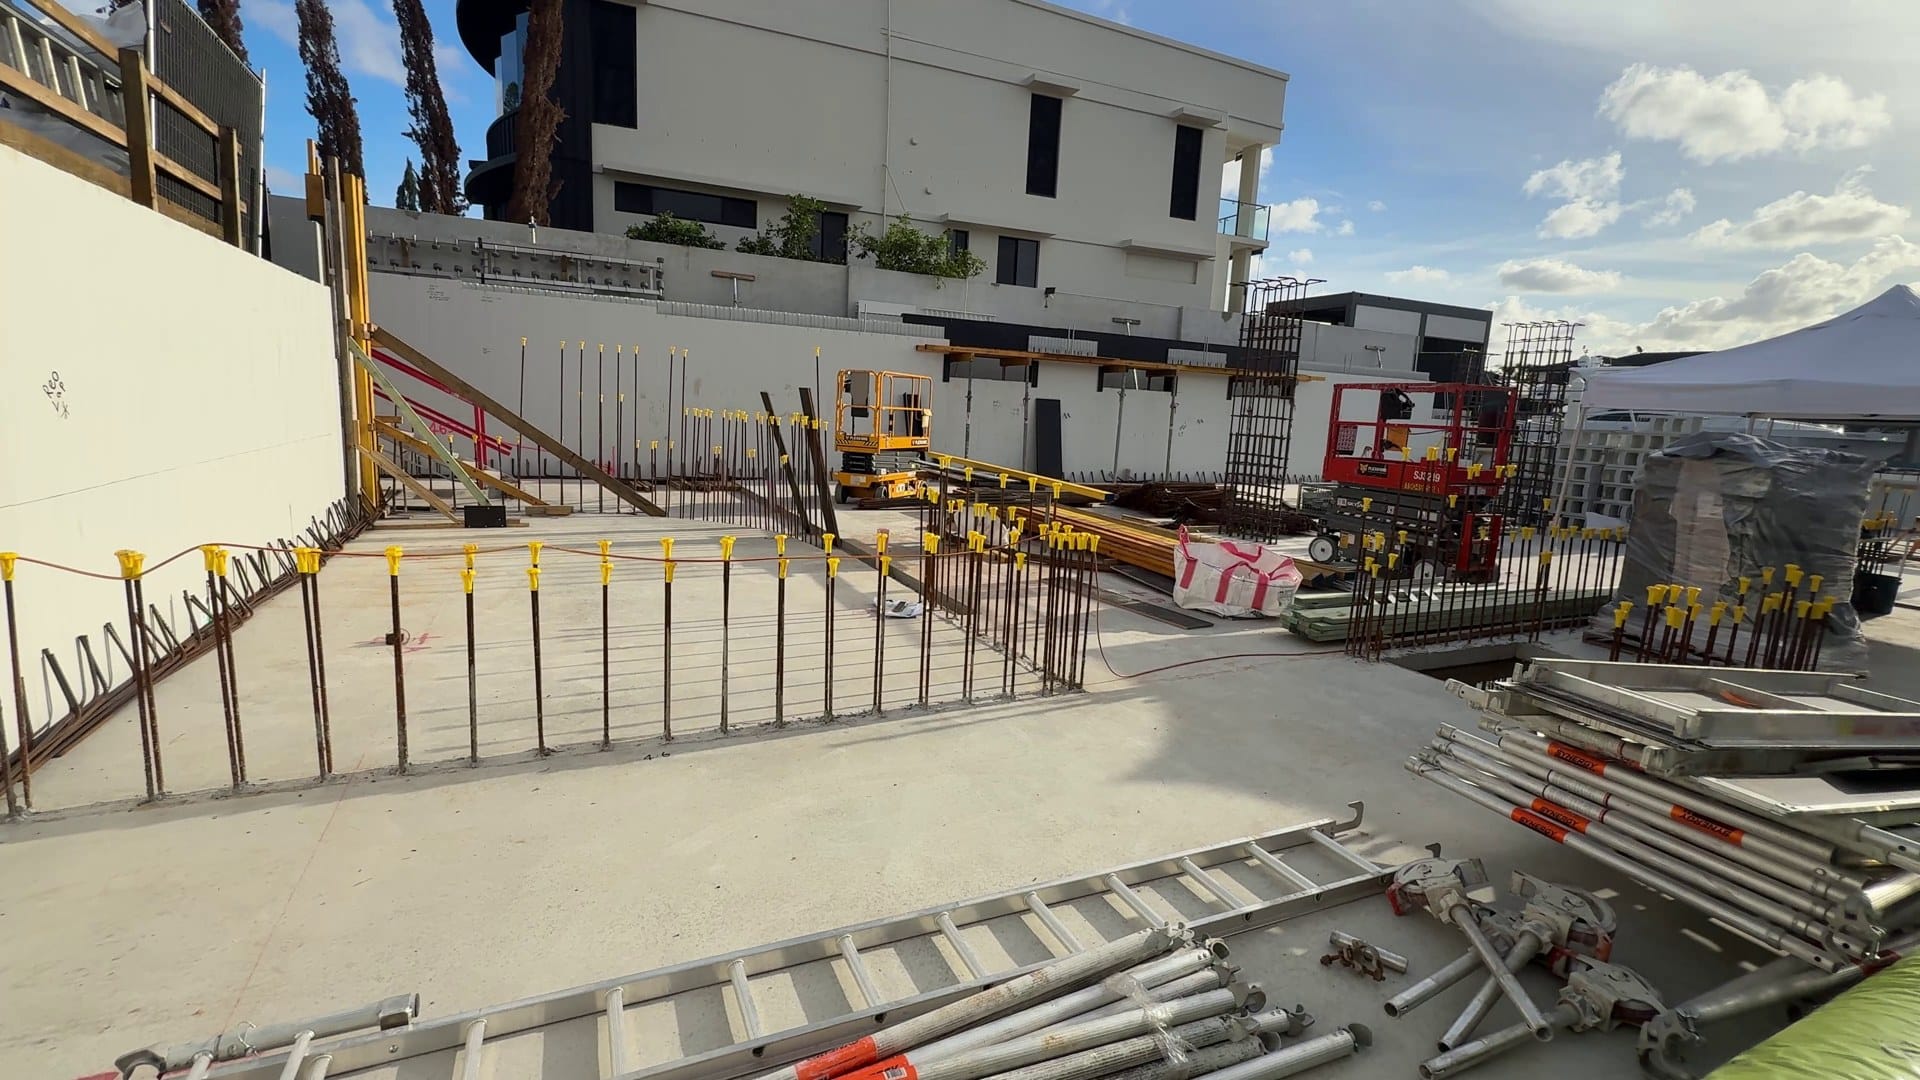
They don't go in yet. When we pour tomorrow, the crew will hand them up to the scissor lifts and push them into the core fill while it's still wet enough. The long leg goes down into the wall beside the verticals, and the short leg points out into the slab. Westera's DW1 detail turns the wall steel into the ground floor slab like this, so the wall and slab are tied together and act as one piece.
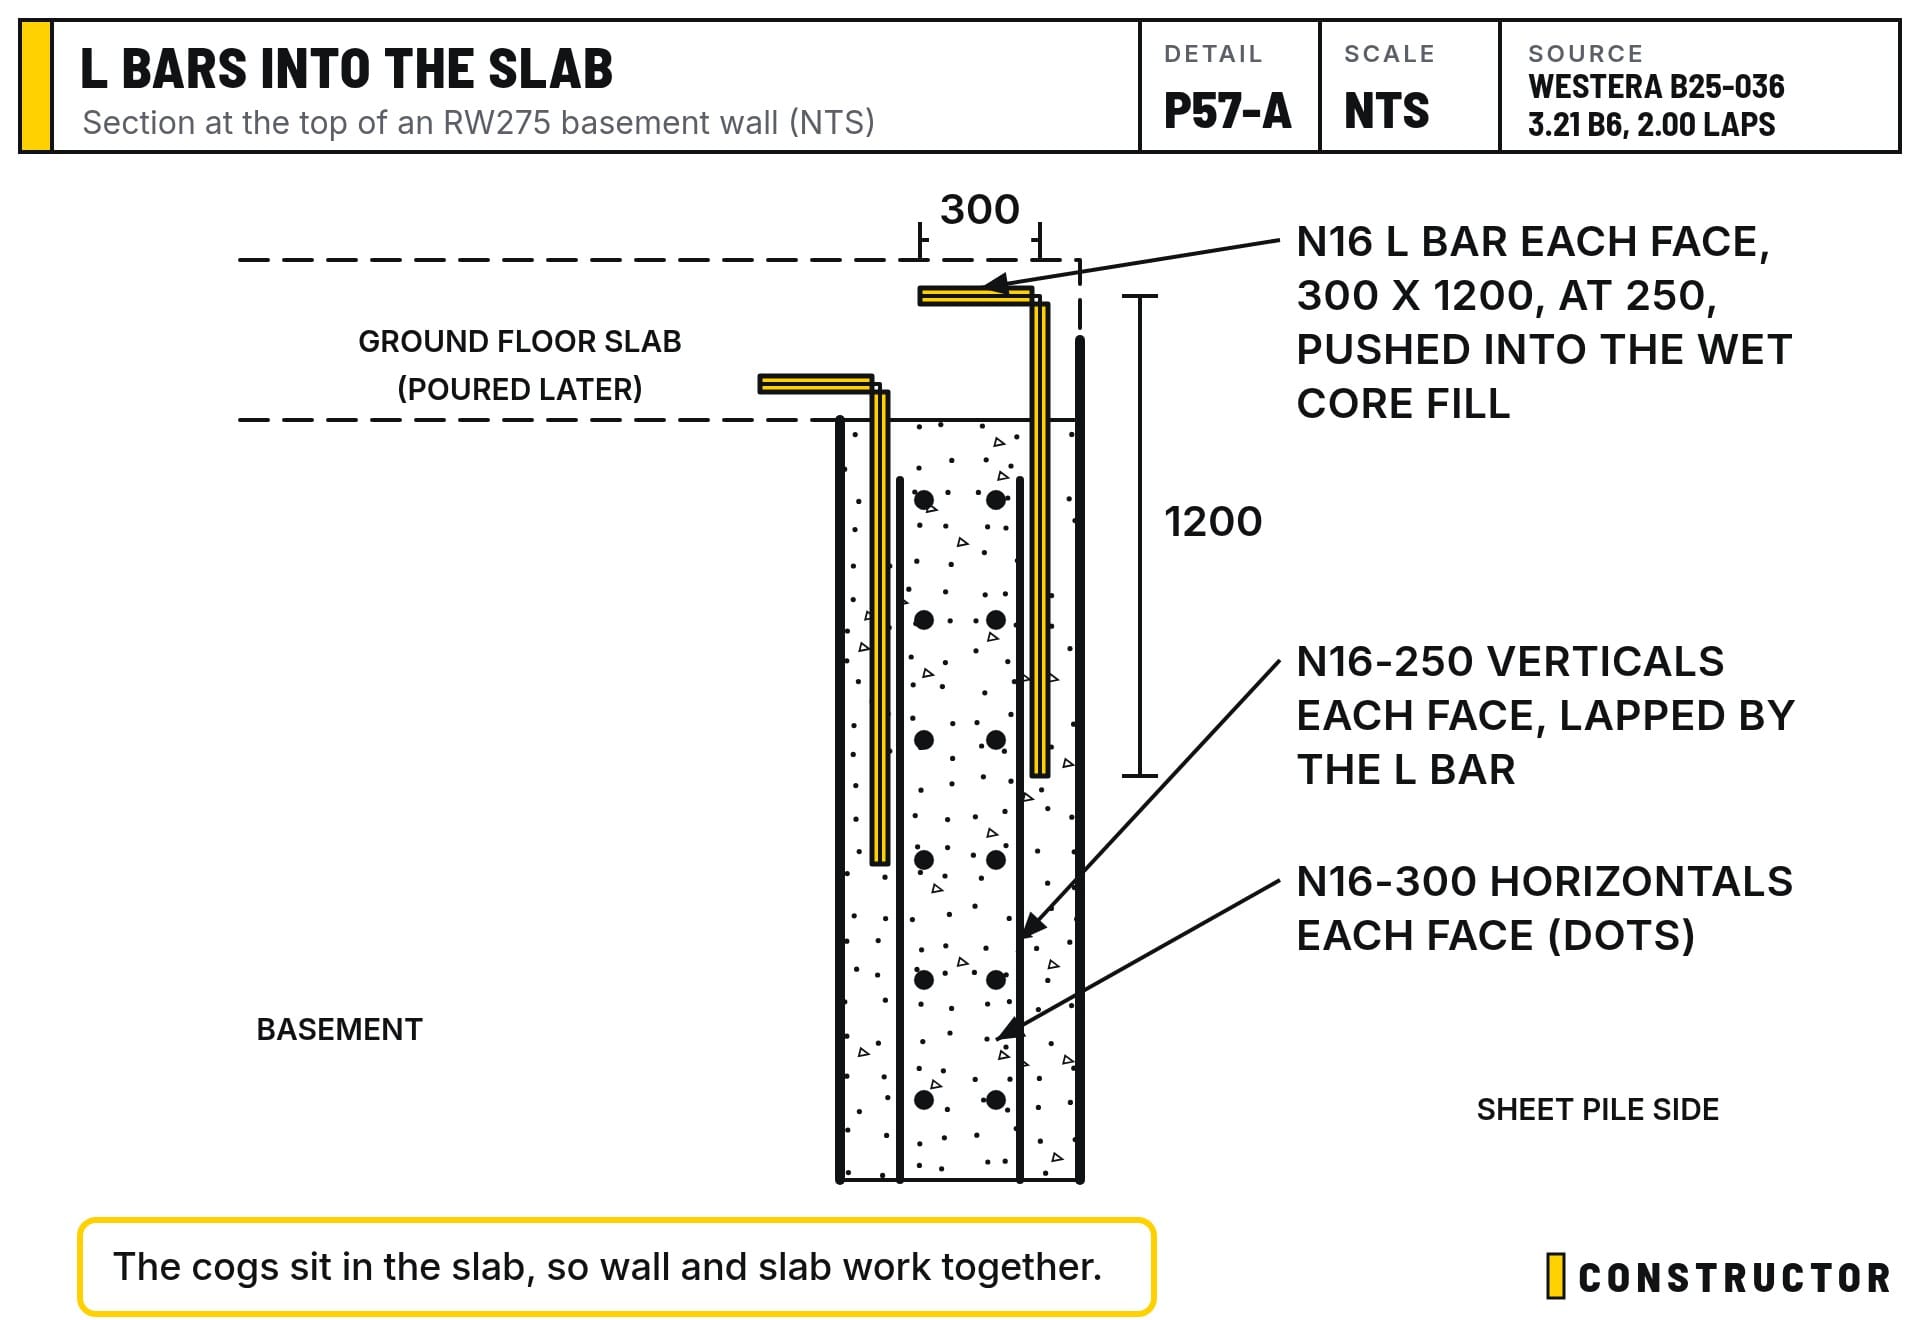
Along the canal side, the L bars point both ways. A slab goes over the top there and cantilevers out. Later we'll cut the sheet piling down with an oxy torch so the slab can sail over, sitting just above the canal revetment wall. We're not allowed to put any load on that wall, so the slab is all cantilever. It's a 300 mm thick slab. The space under it gets filled with gravel, and the slab is built off that.
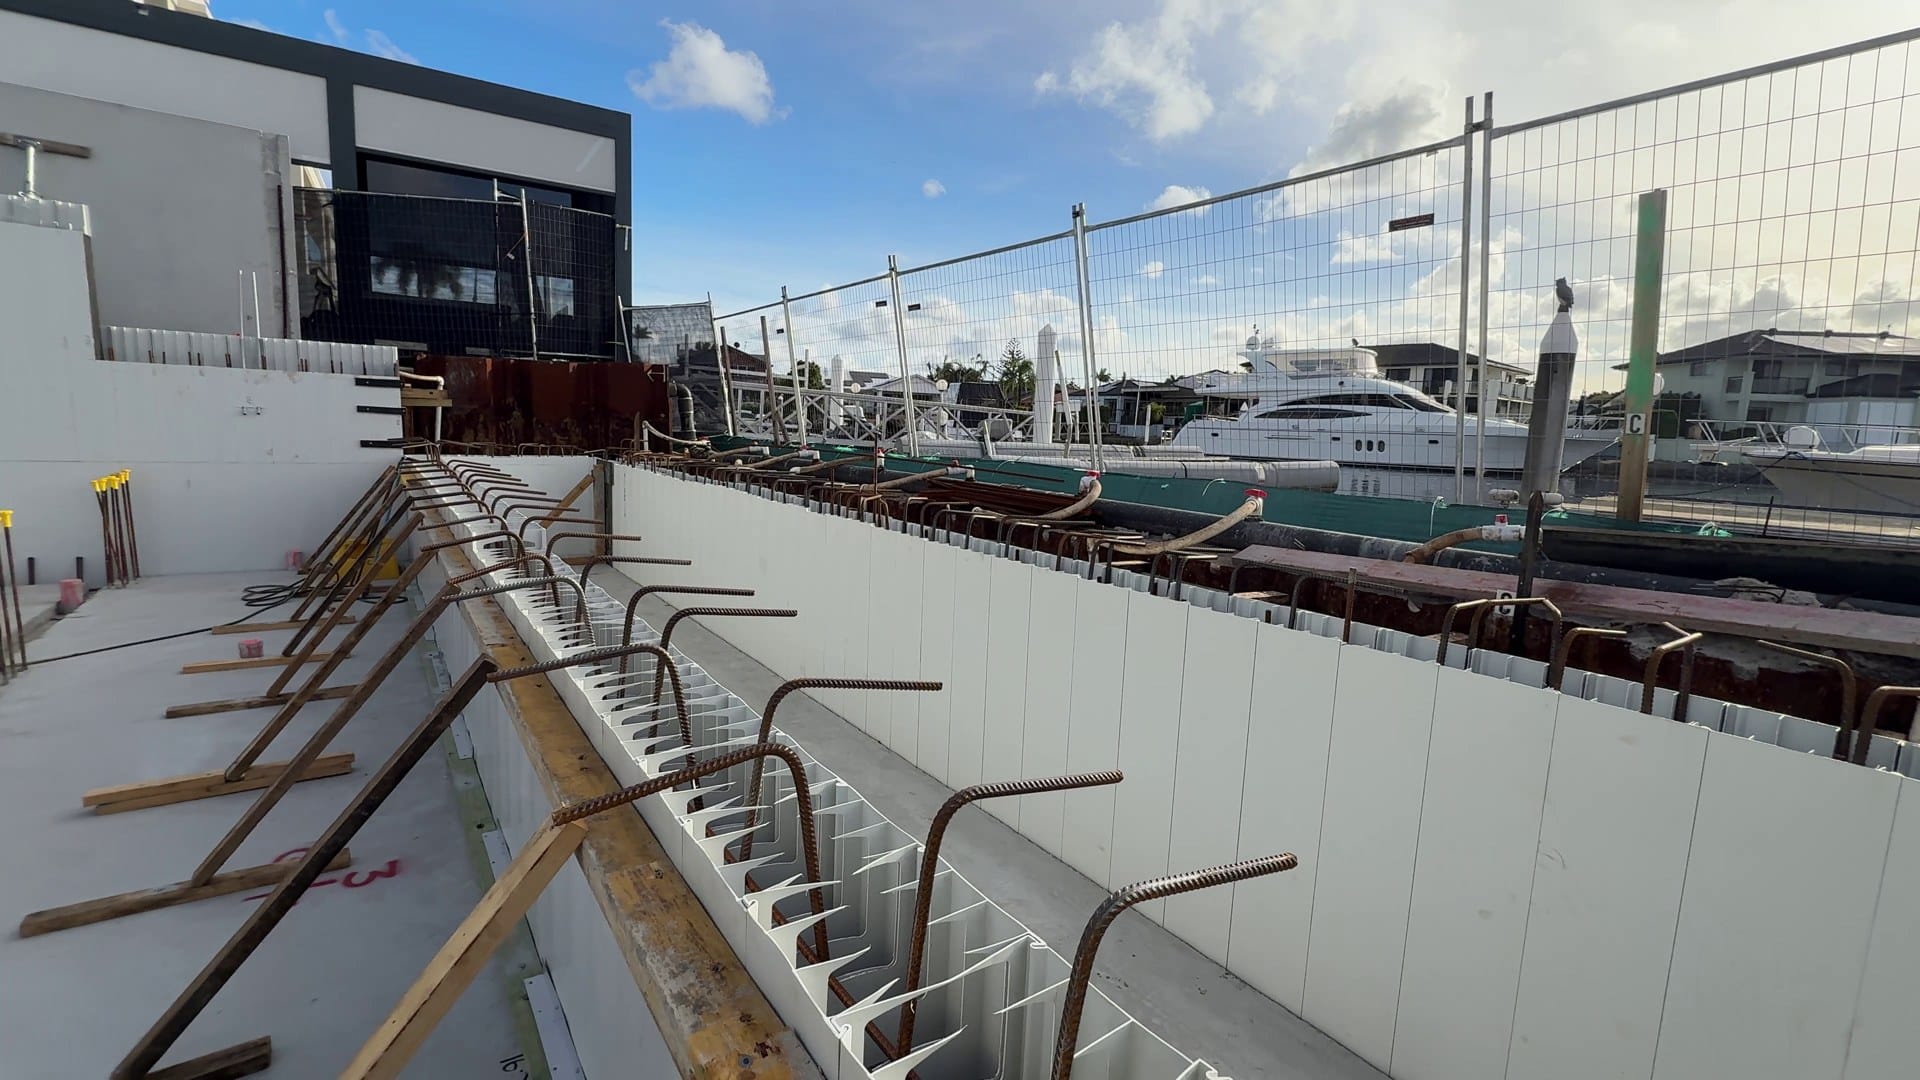
Behind that is a back service corridor. The head height under the slab is about 1.9 m, so taller people will have to duck. We did talk about using it for storage, but there's enough storage in the basement.
The driveway corner
This is where the driveway comes down. There's another wall still to be built here, the driveway support wall, and the L bars in this area will connect into the driveway slab that sails over the top. I'll explain it properly in a future video.
This corner is a good example of how a site changes as you build, and how you adjust. We planned to have this wall higher. But the sheet piling was limited by the sewer main: we have to stay a set distance off the sewer, so the piles, and the wall, moved in. That still left room to work behind it, but the wall ended up lower than planned. The water level here is about 100 mm above the top of the wall.
So we adjust. Water could come in and fill this area, so I'll waterproof all of it, with some special detailing. That's fairly easy to do, and I'll show you in a future video.
Conduits before the concrete
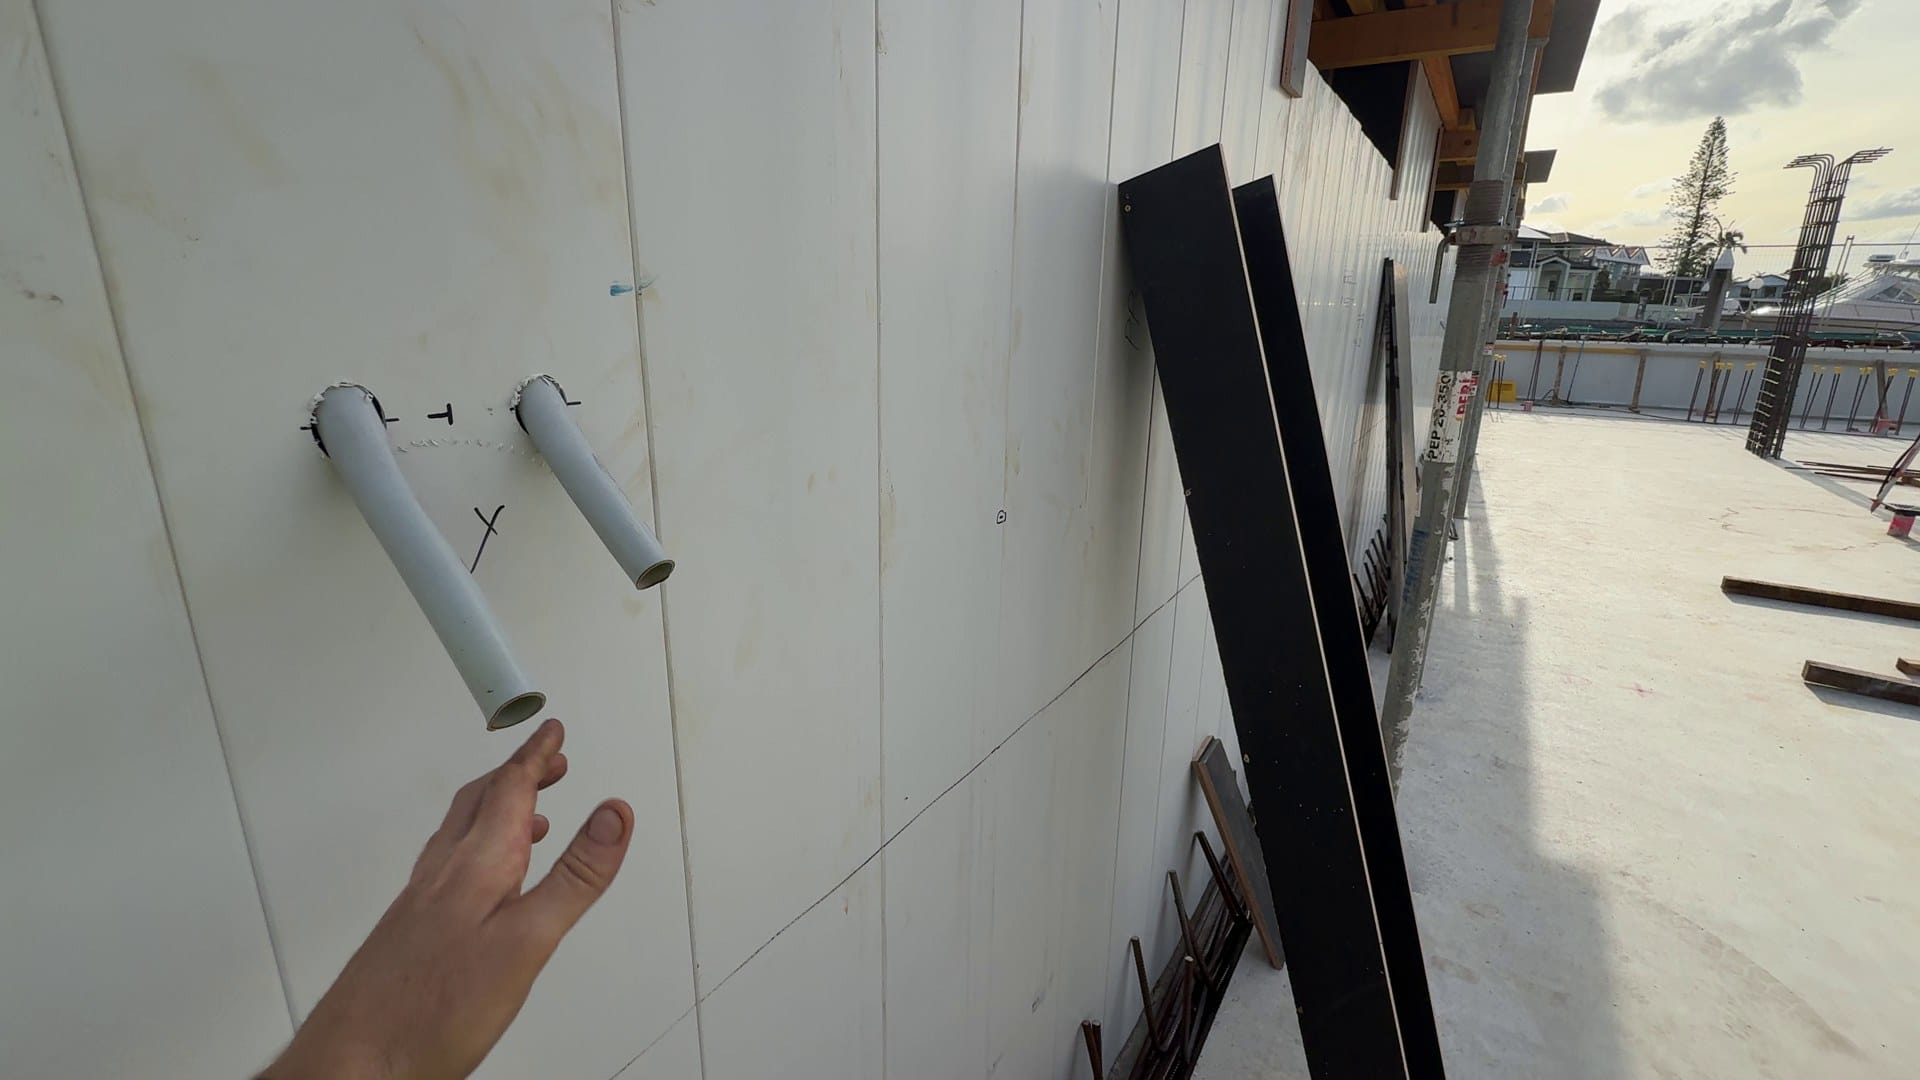
As in Post 56, anything electrical in these walls has to go in before the pour. Today I put in conduits for power points.
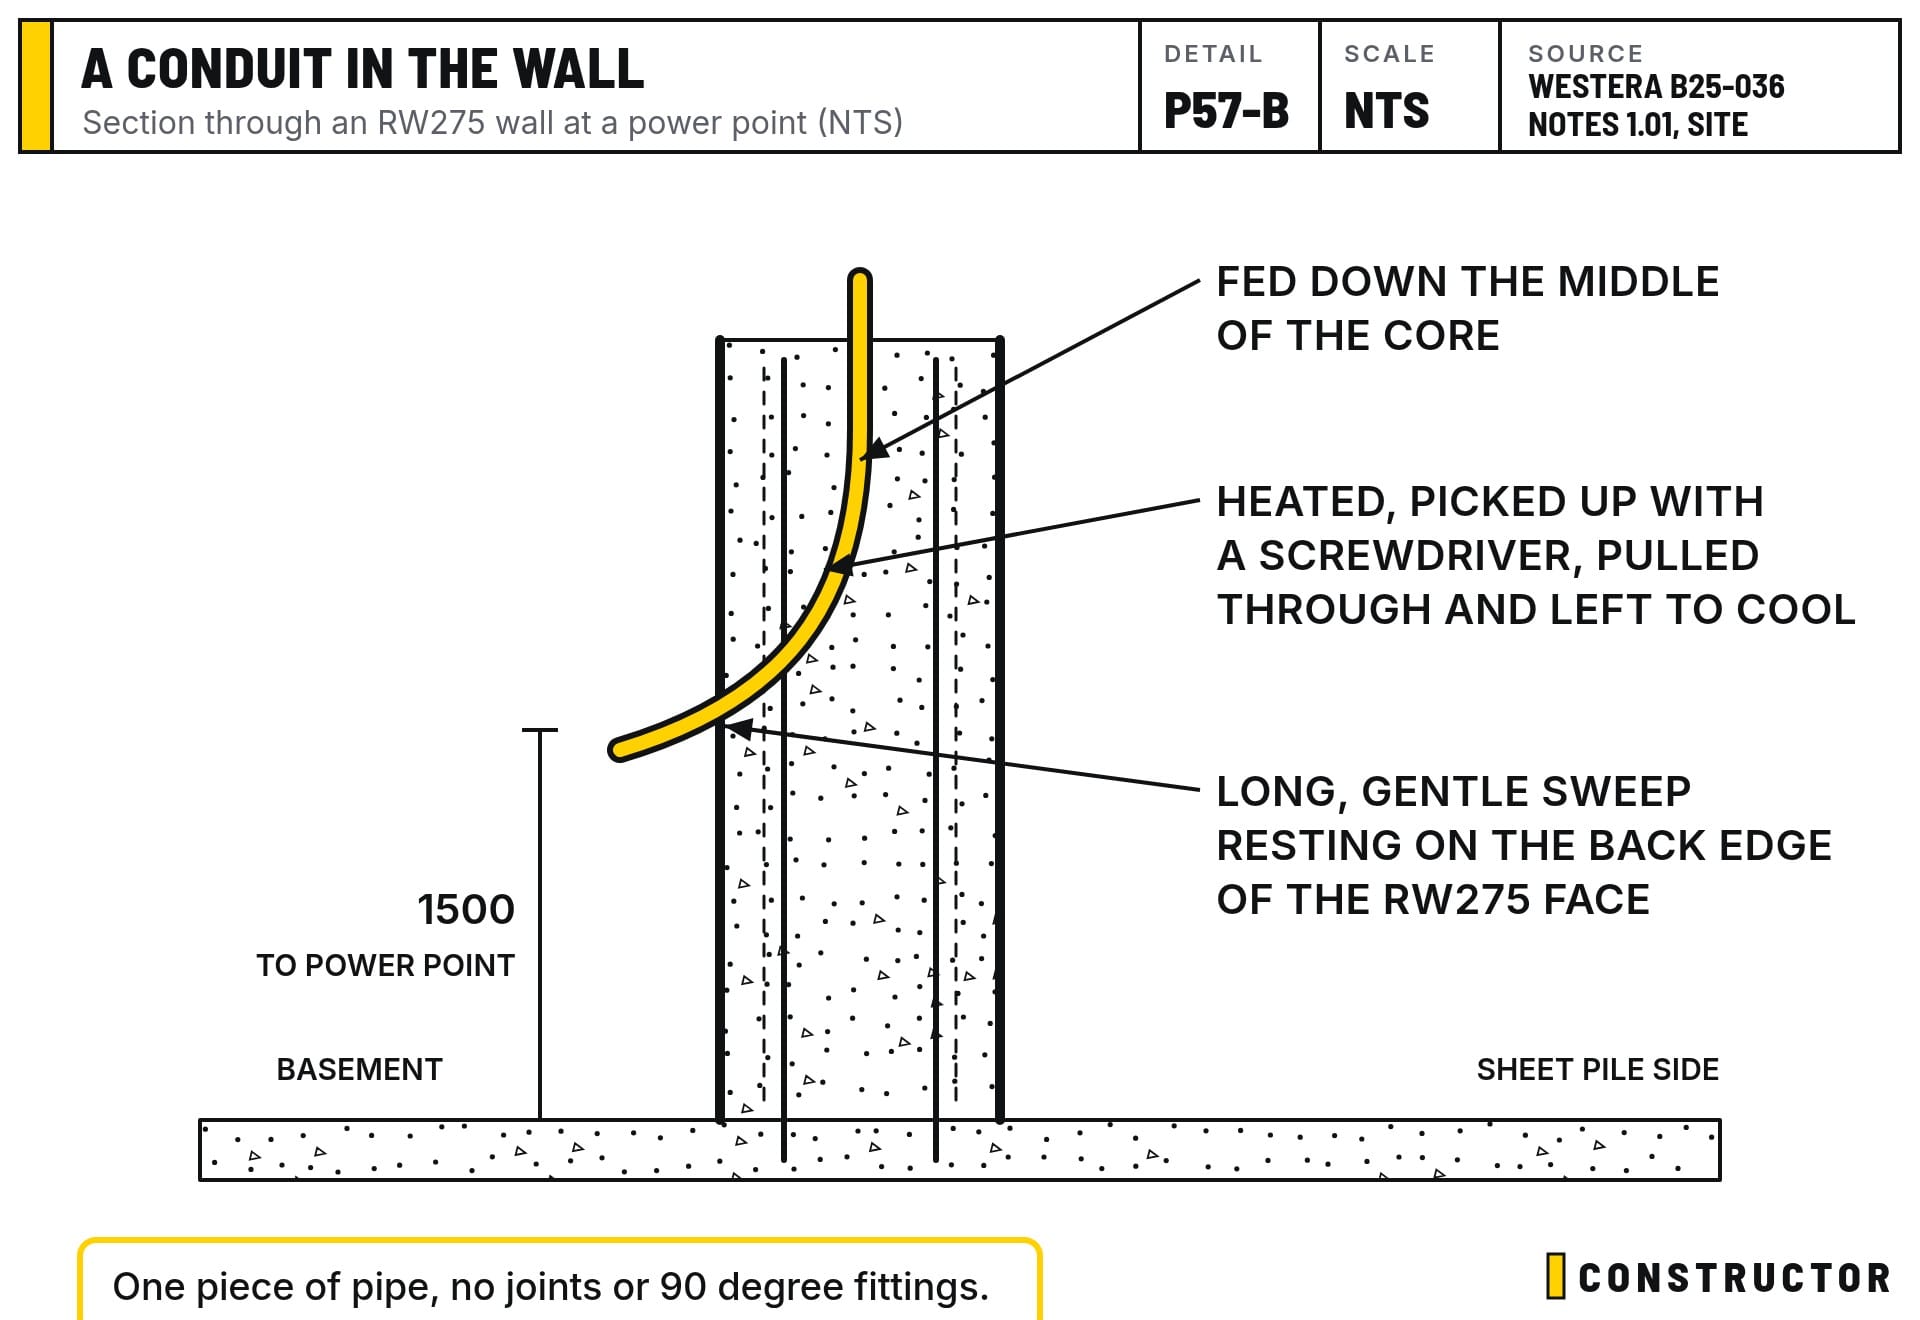
- 1500 mm above floor level. It's a basement, so rather than bend over to plug something in, you plug in at a comfortable height.
- In pairs: one for power, one for data. Data cables can carry low voltage, comms, security and a lot more, so it's worth having.
- Pool equipment area: six power points (or three doubles), plus data.
- No 90 degree bends. We feed the conduit down the middle of the core, heat it with a blowtorch until it's soft, then poke a screwdriver through the wall to catch it and pull it through slightly. As it cools it sets in a long, gentle sweep, resting on the back edge of the RW275 face. It stays one piece of pipe with no joints.
The columns
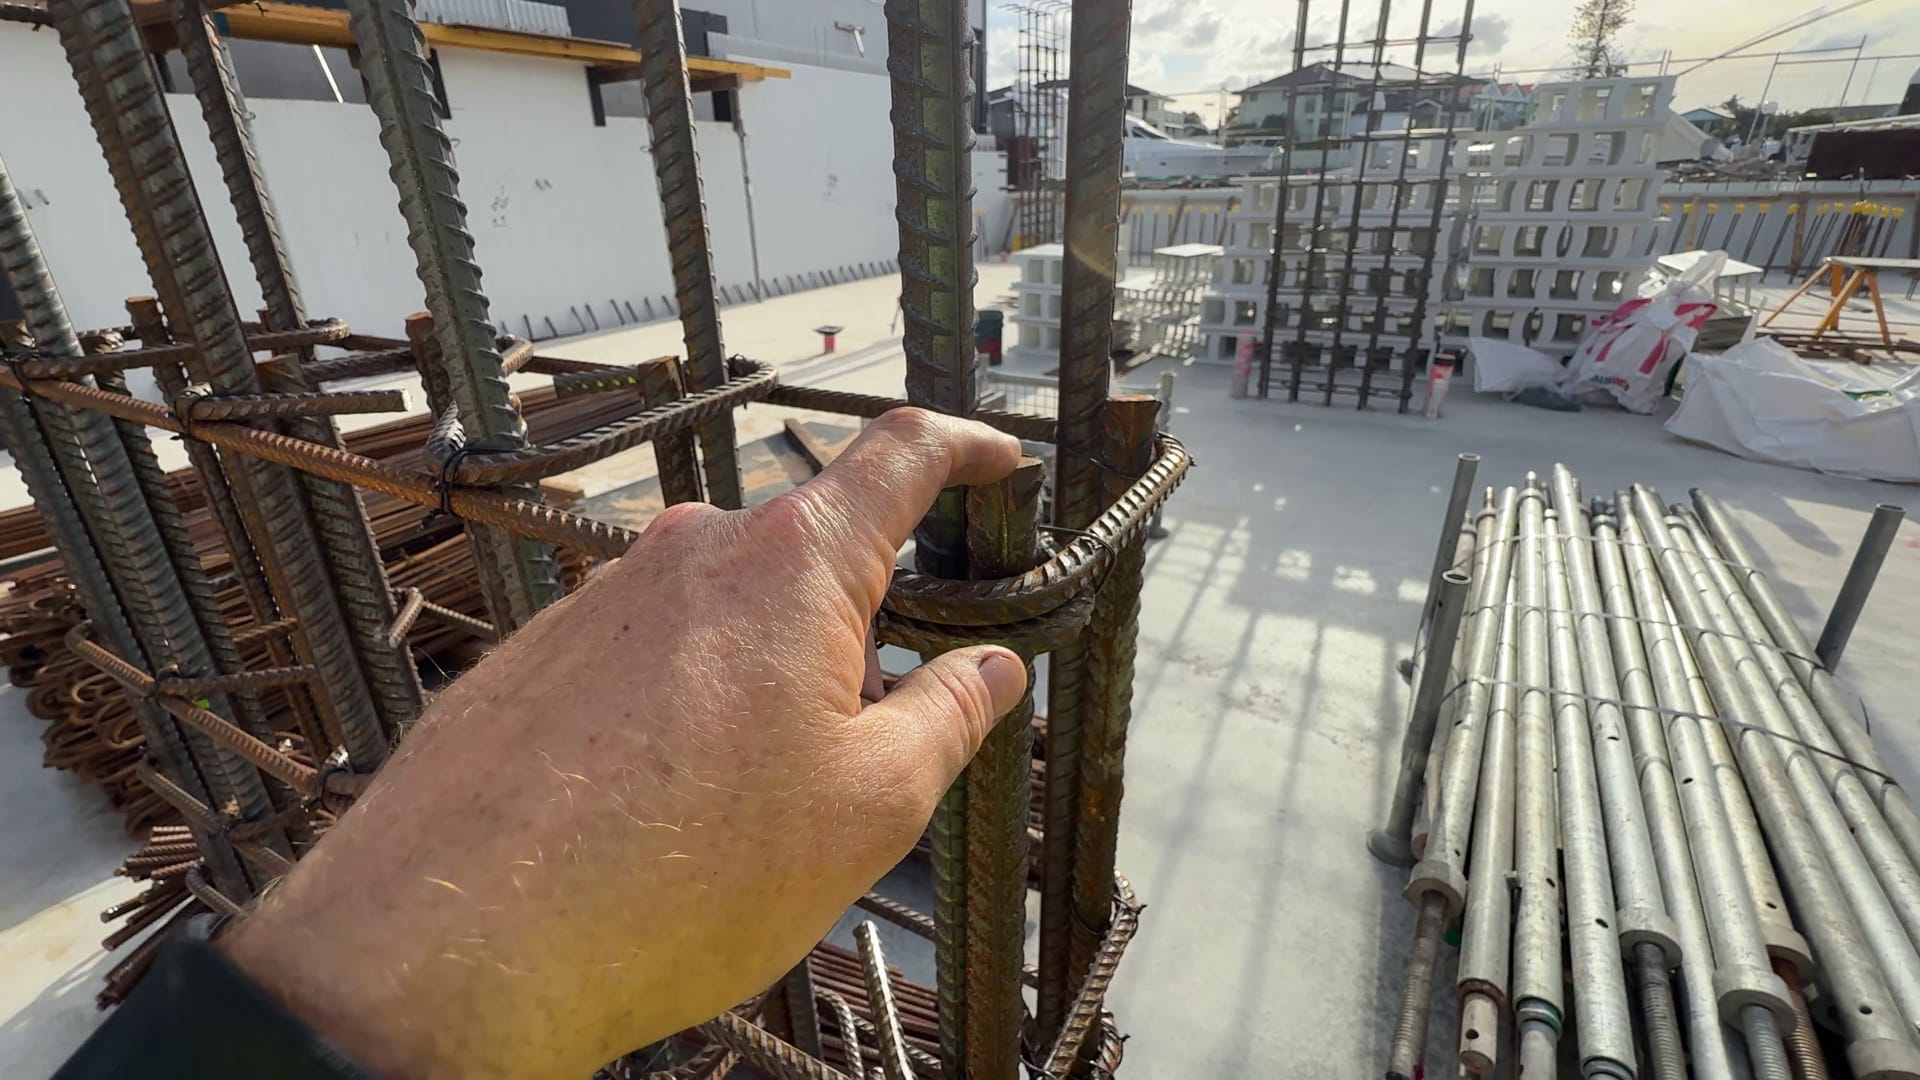
The formworkers set up the columns today. Last time the supplier hadn't sent the ligatures (the closed ties that wrap the vertical bars), and now they're here. The ligatures are N12 at 250 mm centres, and the verticals are 20 mm bar. At the top, the verticals are bent (a cog) where they connect into the ground floor slab. The formwork shutters go round them another day, as they're not being poured tomorrow.
The core fill: a special mix, poured in lifts
We expect about 72 to 80 cubic metres of concrete in the core fill. We did a couple of calcs and averaged between them.
It's a special mix that the engineer signed off for this job:
- About 220 slump, a runny mix, so it flows down every core and around the steel
- 10 mm aggregate, small enough to get through the cores
- An SB mix, Westera's grading for the aggregate (SB means class B2 to AS 1379)
- Xypex, a waterproofing additive
It's not exciting, it just has to be the mix the engineer nominated. Here's how it lines up with the drawings:
- Strength: Westera's wall schedule (sheet 2.00) calls for S40 core fill (40 MPa) in these walls, with the mix designed by the concrete supplier to AS 1379 and the wall system's requirements.
- Slump and stone size: the general concrete notes (sheet 1.01) default to 20 mm maximum aggregate and 100 mm maximum slump "unless approved otherwise". Core fill has to flow down narrow cores, so this job uses the approved 10 mm, high-slump mix instead.
- Xypex: the drawings don't name it. The notes say no additive goes in without the engineer's approval, and this one is approved.
It's poured in three lifts. A lift is a layer poured to a set height all the way round. We start with the lower walls first, then the longer, higher walls, building up in layers so the lower concrete starts to harden before the next layer goes on. That keeps the pressure on the formwork down.
What happens next
- Tomorrow: the core fill pour, with the mobile scaffold set up as well as the two scissor lifts.
- The next day: prep for waterproofing, cleaning the backs of the walls and doing as much as we can. The Geofab protection and the waterproofing products are on site, with more in the container.
- Monday: stripping, infill waterproofing, and the rest of the internal Rediwall arrives, so I need to book the crane. More reinforcement is coming too.
- Tuesday: start backfilling, with push-pull props bracing the walls from inside the basement.
For the backfill, around 140 cubic metres of gravel is coming in, plus a telehandler. That's a machine like a Manitou, with four wheels and a long telescopic boom. We'll put a bucket on ours and flip the gravel over the walls. I won't be driving it. Someone I work with holds the licence. Hopefully that's only two days of work, and it's a good job to get done. It gives us more ground to walk around outside the walls and fewer holes to fall in, so it's a safer site.
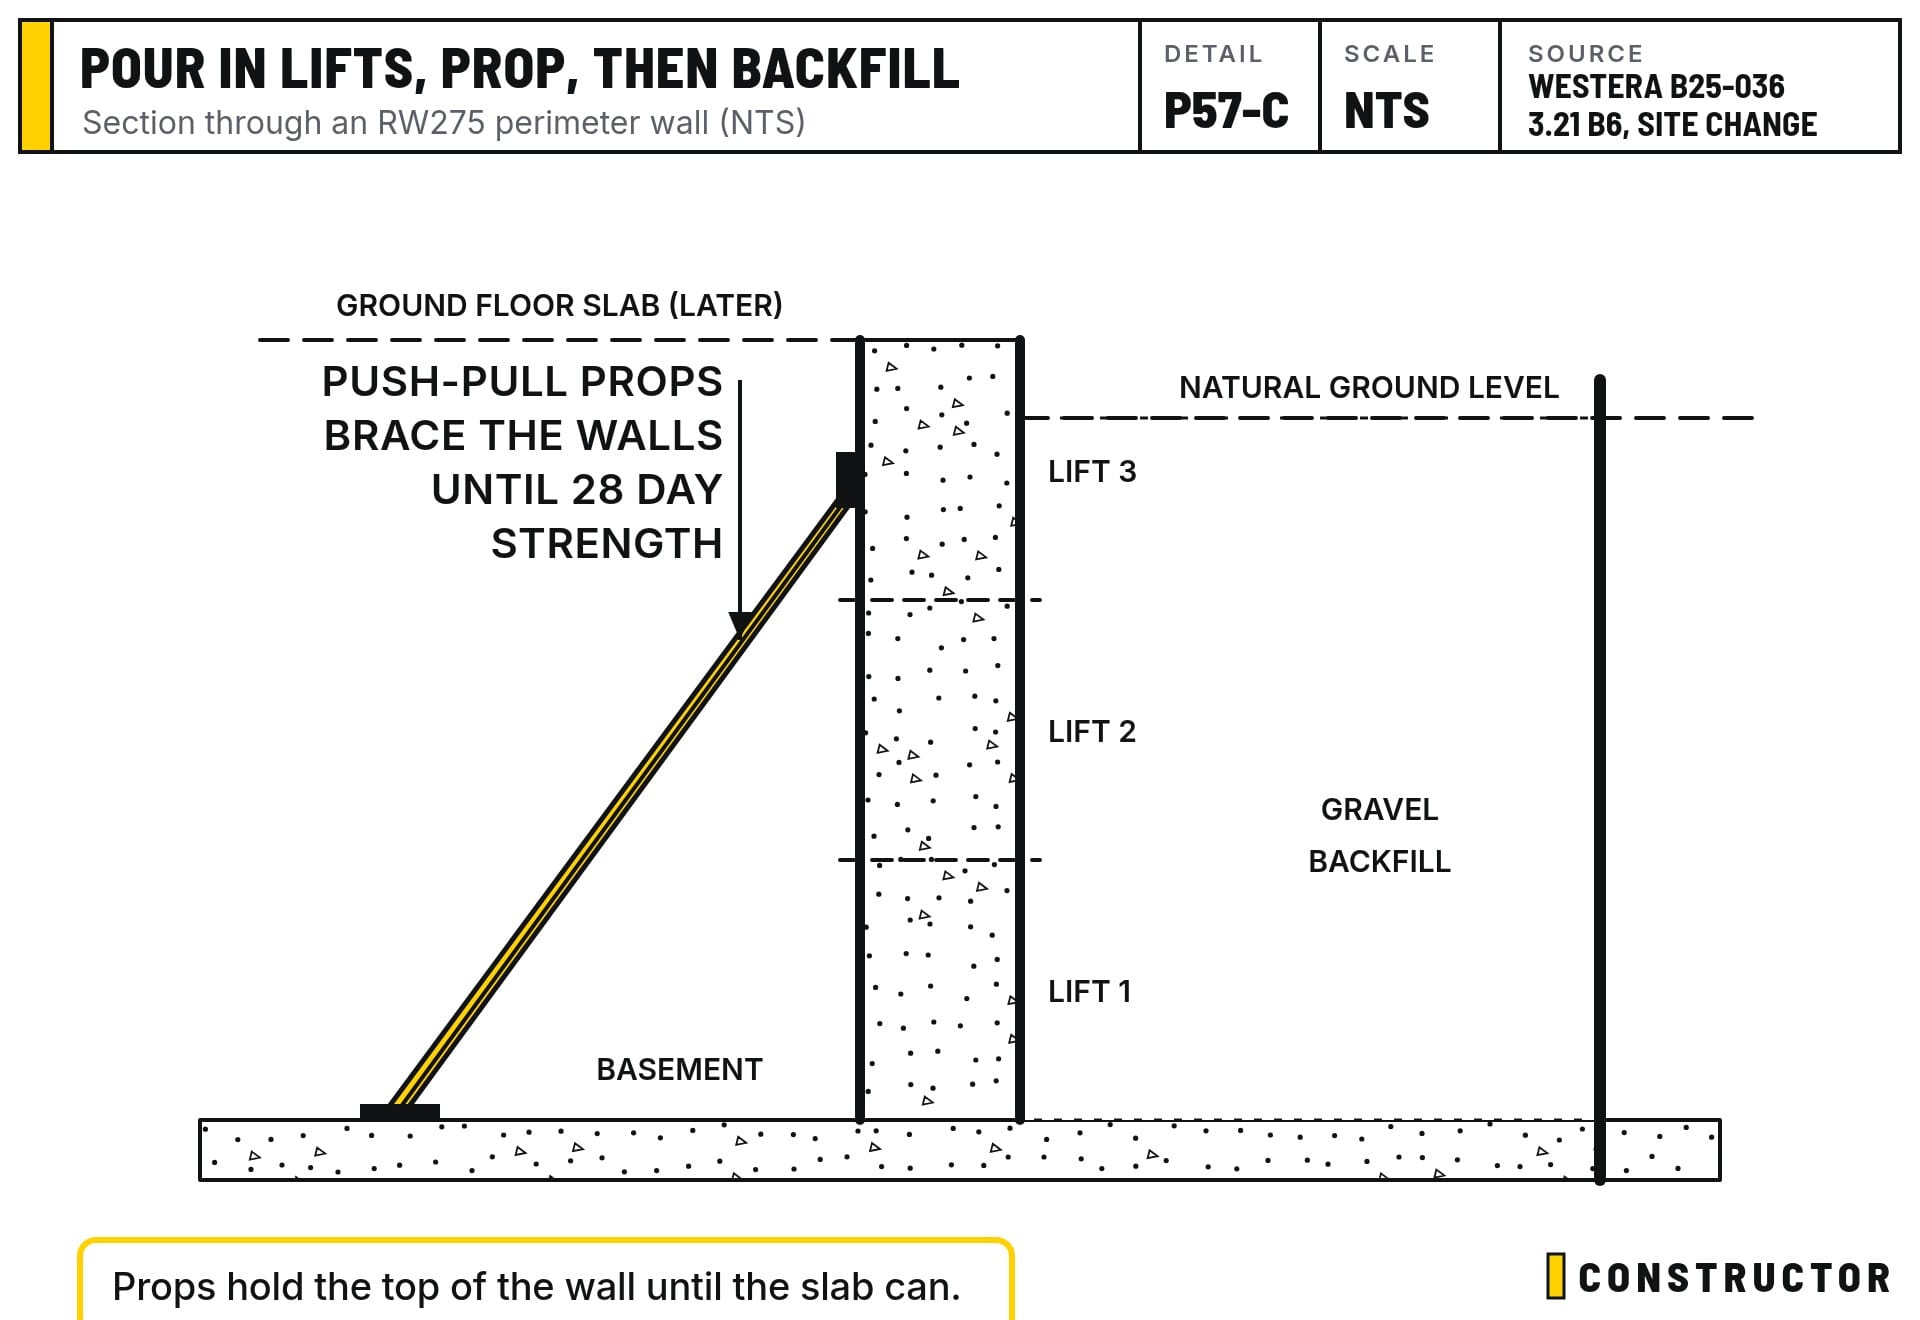
Backfilling before the ground floor slab is poured needs care. Until the slab is in and has gained strength, nothing holds the top of the wall, so the gravel pushes on a wall that's only fixed at the bottom. Westera's DW1 detail (sheet 3.21, B6) allows backfill only up to 2400 mm above the basement slab until the ground floor slab reaches its 14-day strength. On our job we have approval to backfill all the way to natural ground level before the slab goes on, as long as push-pull props back-brace the walls from inside the basement. They stay in through the core fill's curing and the backfill, until the walls reach their 28-day strength.
Then the next cab off the rank is the ground floor slab. We'll be working fast now to get the ground floor in before Christmas, so we can switch off the dewatering.
If you're building with block or formwork walls, the pre-pour check is the same idea as for a slab: steel, cover, laps, anything cast in, and a clean form. Our C5 Pre-Pour Slab Inspection Checklist walks you through it.

C5 - Pre Pour Slab Inspection Checklist
$119.00 AUD
Last updated 28 Oct 2026 · Revision 4 · Free updates for life
Checklist Type: Major (Base Stage)
Form Factor: Fillable, print-ready PDF (A4, 30 pages)
When to use: Base stage: after the slab is prepped, before concrete is poured
A 95-point pre-pour slab checklist. Check setbacks, boxing, membrane, pipes and steel after the slab is prepped and before concrete is poured, while fixes are still simple.
✓ Authorship verified on the blockchain · View certificate