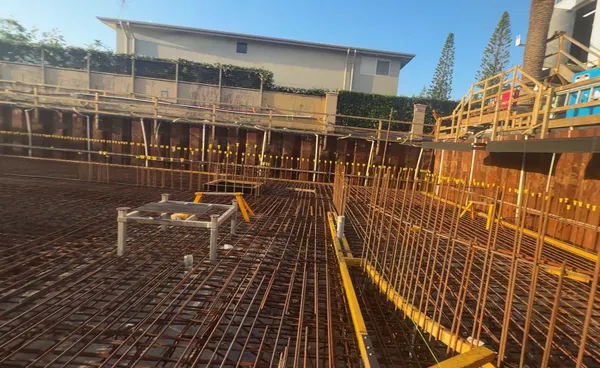
Welcome back. The slab was poured on Monday last week (Post 54), we set out the grid on Tuesday, and the Rediwall arrived the same day. A crane lifted it in, and since then we've been standing up the basement walls. This is a walk-through of how they go together.
What Rediwall is
Rediwall is a PVC permanent formwork system. You stand up the hollow white panels, put the steel inside, and fill them with concrete. The outside stays on as the finished face.
- RW275, so the walls are 275 mm thick. Pretty chunky.
- Three trucks brought it in: one semi and two flatbeds out the front, with a crane in the driveway lifting the packs over into the basement.
- Stock lengths. Panels come in 3.2 m and 3.6 m. We bought 3.2 m (plus a couple of 3.6 m) because stock lengths are cheaper, and we'll cut them to height in place. We flick a line with the laser and cut the inside face, so the outside face keeps going up as formwork and stays one continuous wall.
Step 1: the track
Everything starts from the set-out on the slab.
- Flick a chalk line off the grid lines.
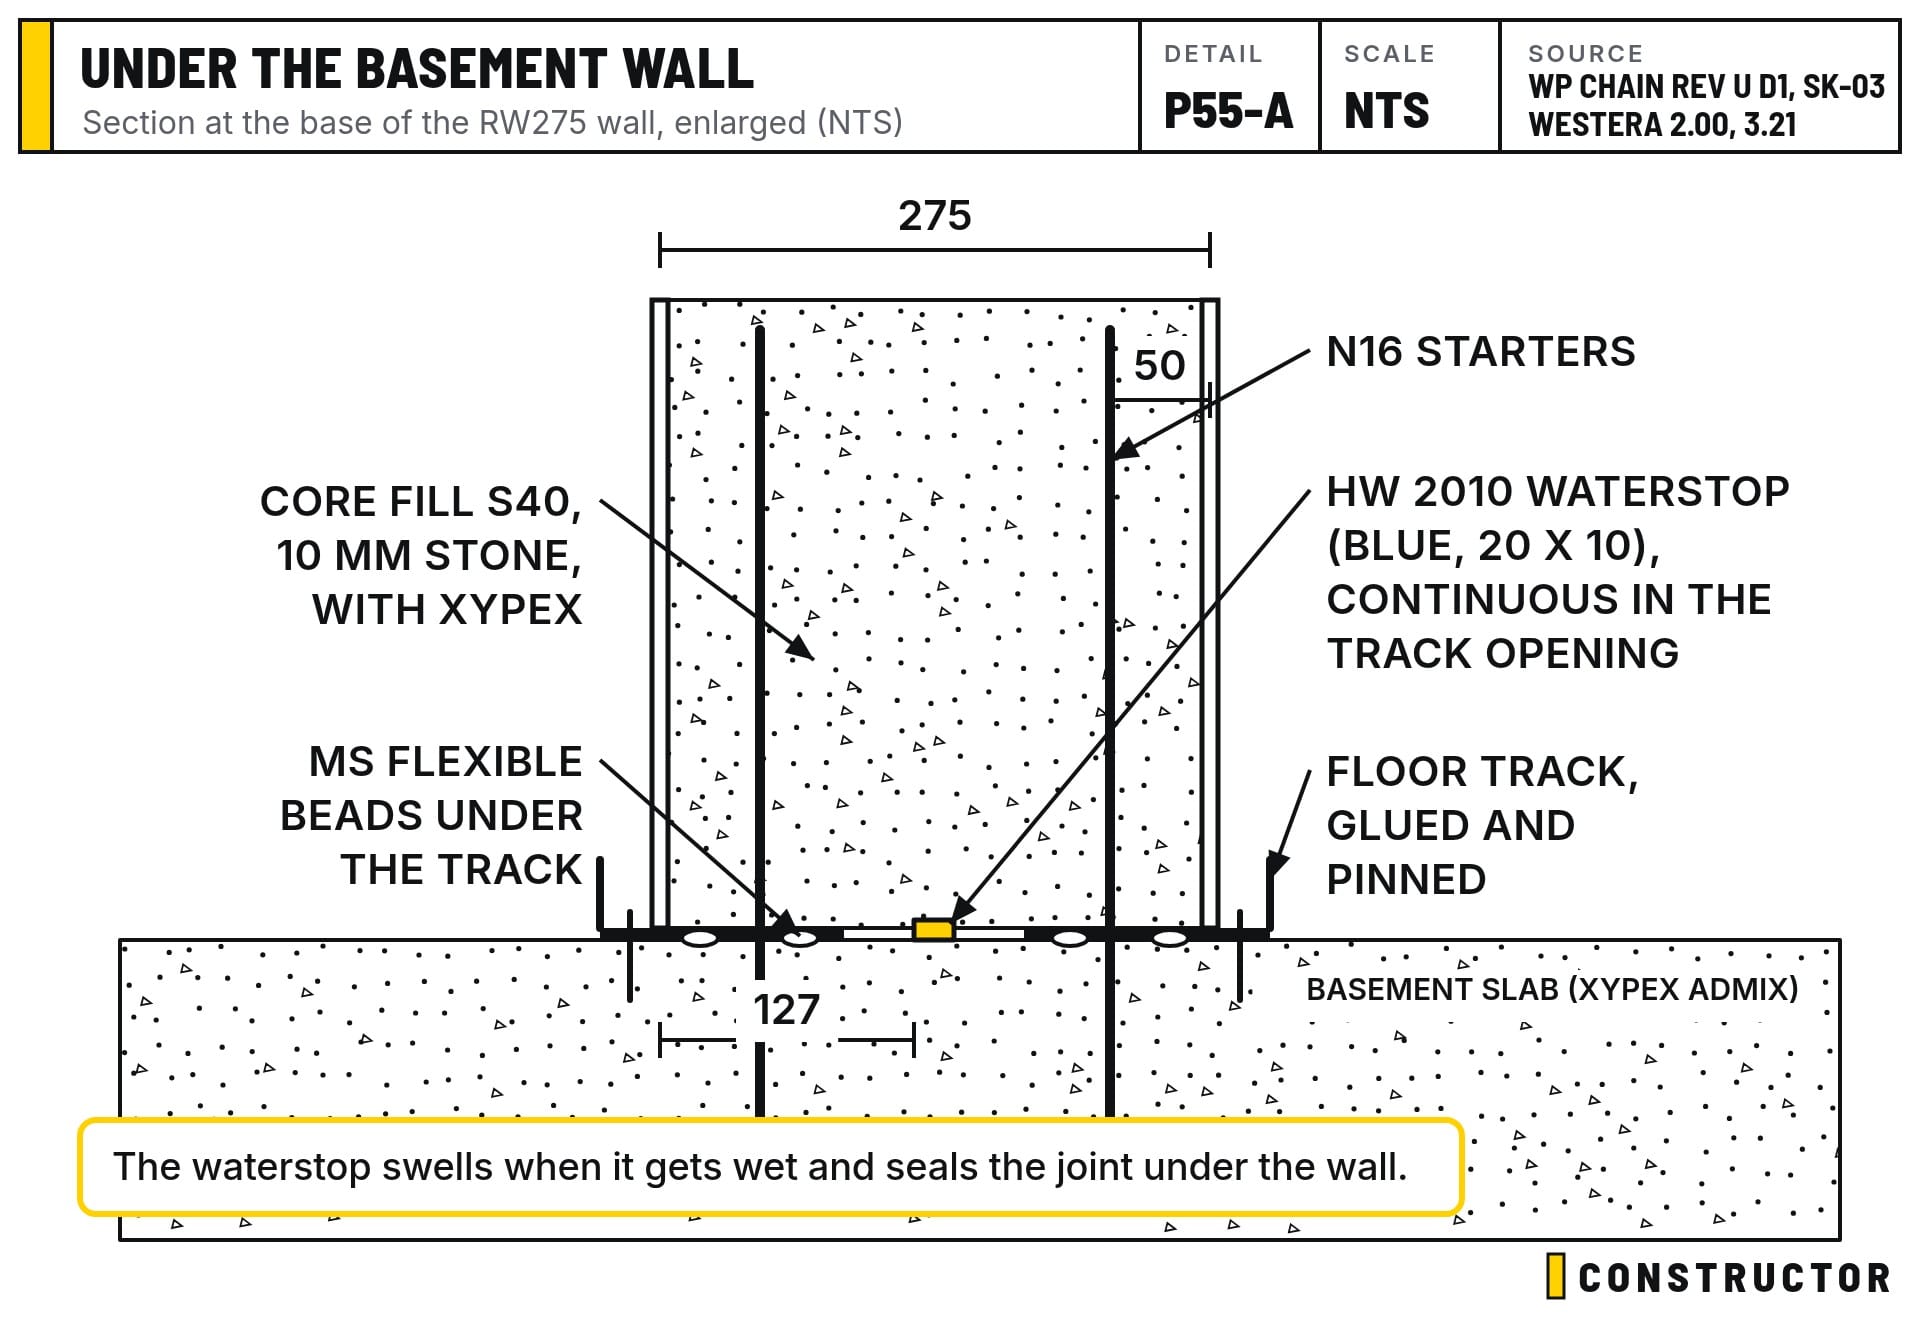
- Lay the floor track upside down beside the line, put adhesive on the back, then roll it over onto the line. The adhesive is WPA MS Flexible, which works on green concrete.
- Pin it with a Ramset gun. The pins only hold it in place while the adhesive goes off.
We left a deliberate 15 mm gap between the edge of the slab step and the wall, so the panels drop in without anyone cutting concrete. You can always fill a gap later. No one is perfect, so give the trades a bit of tolerance and it won't turn into a time or cost problem. You can see the margin wander in and out a little along the wall. That's fine: it's the 15 mm doing its job.
Step 2: the waterstop under every wall
Before any panel goes in, a strip of hydrophilic waterstop goes down in the opening in the middle of the track. Ours is WPA HW 2010, a blue 20 x 10 mm strip. It runs continuously under every basement wall, with no gaps, and it's stuck down so it stays in position while the panels go on.
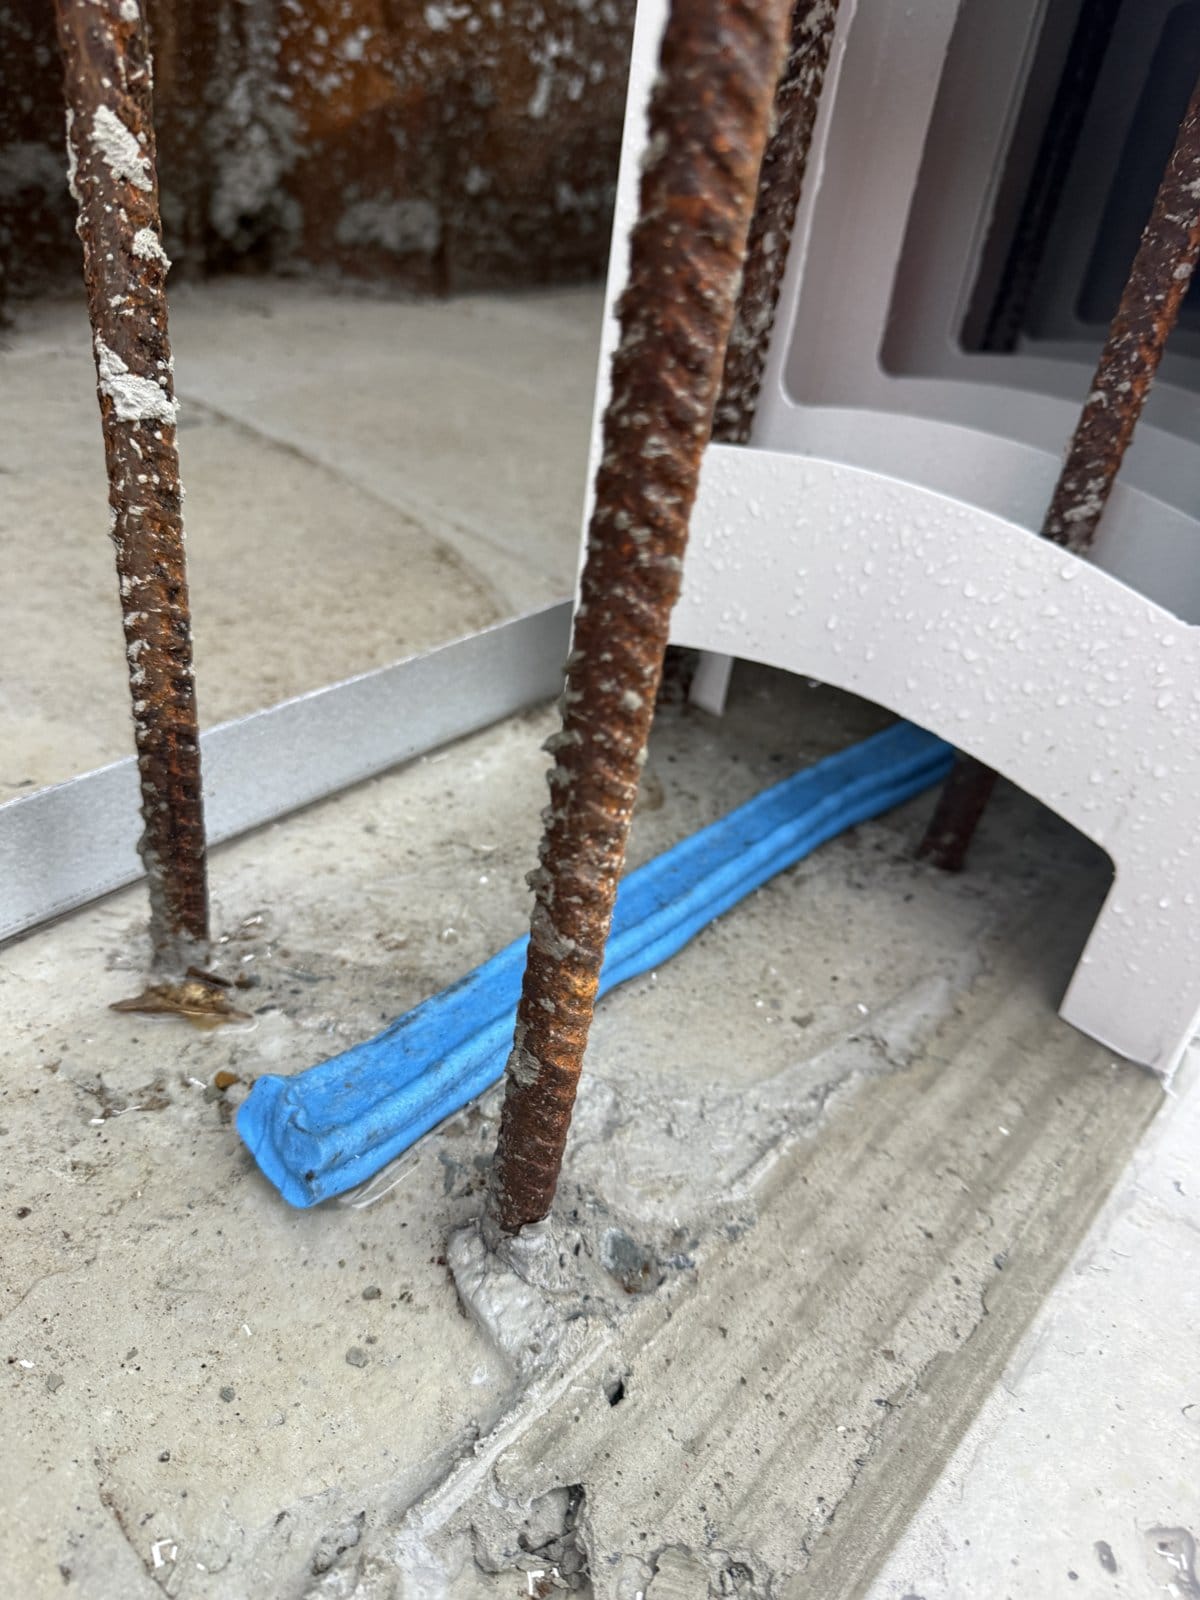
Hydrophilic means it loves water. When it gets wet it swells and presses itself into the joint between the slab and the core fill, which is the weak point in any basement wall.
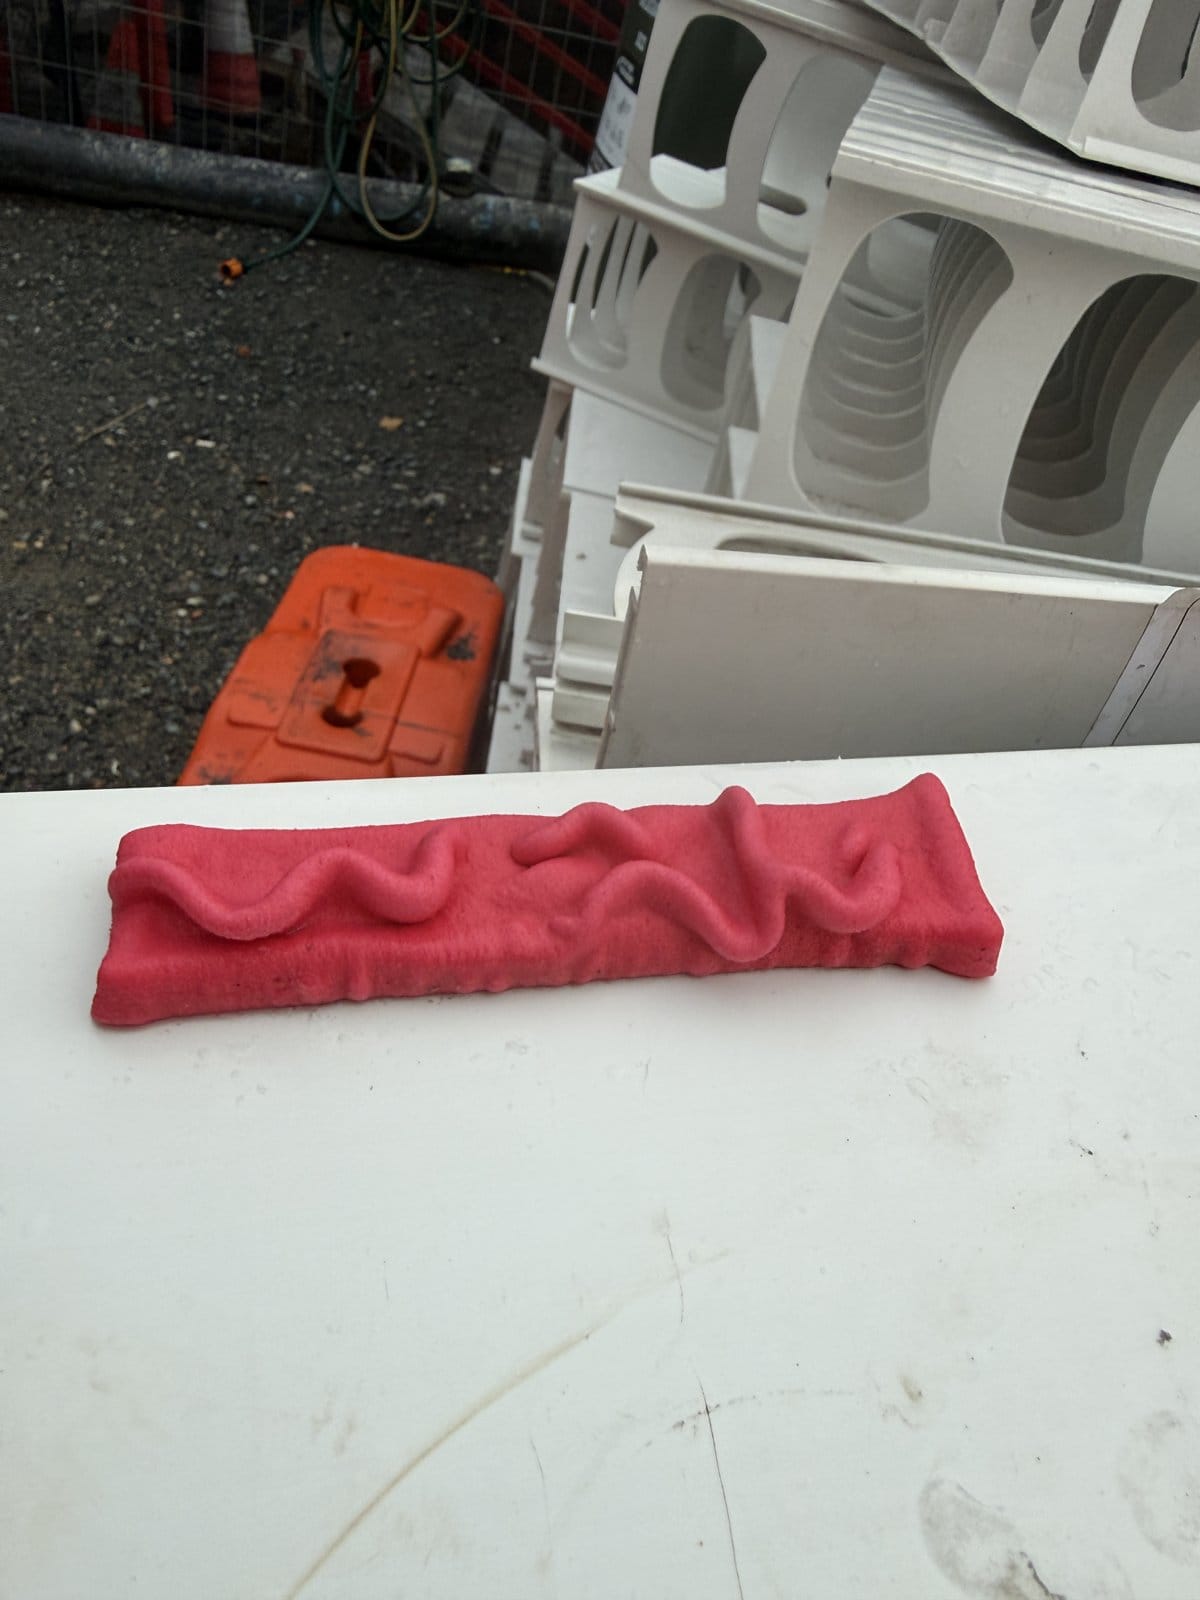
The red sample above is waterstop that has been sitting in water: it swelled to a much chunkier size (it looks like Gumby). By the end of the day it had dried back to about half that, and it will keep shrinking back to its normal size as it dries. That's fine. It does its work when it's wet, which is exactly when you need it.
Where two lengths of waterstop meet, they're lapped side by side, not butted end to end, so there's no gap for water to find.
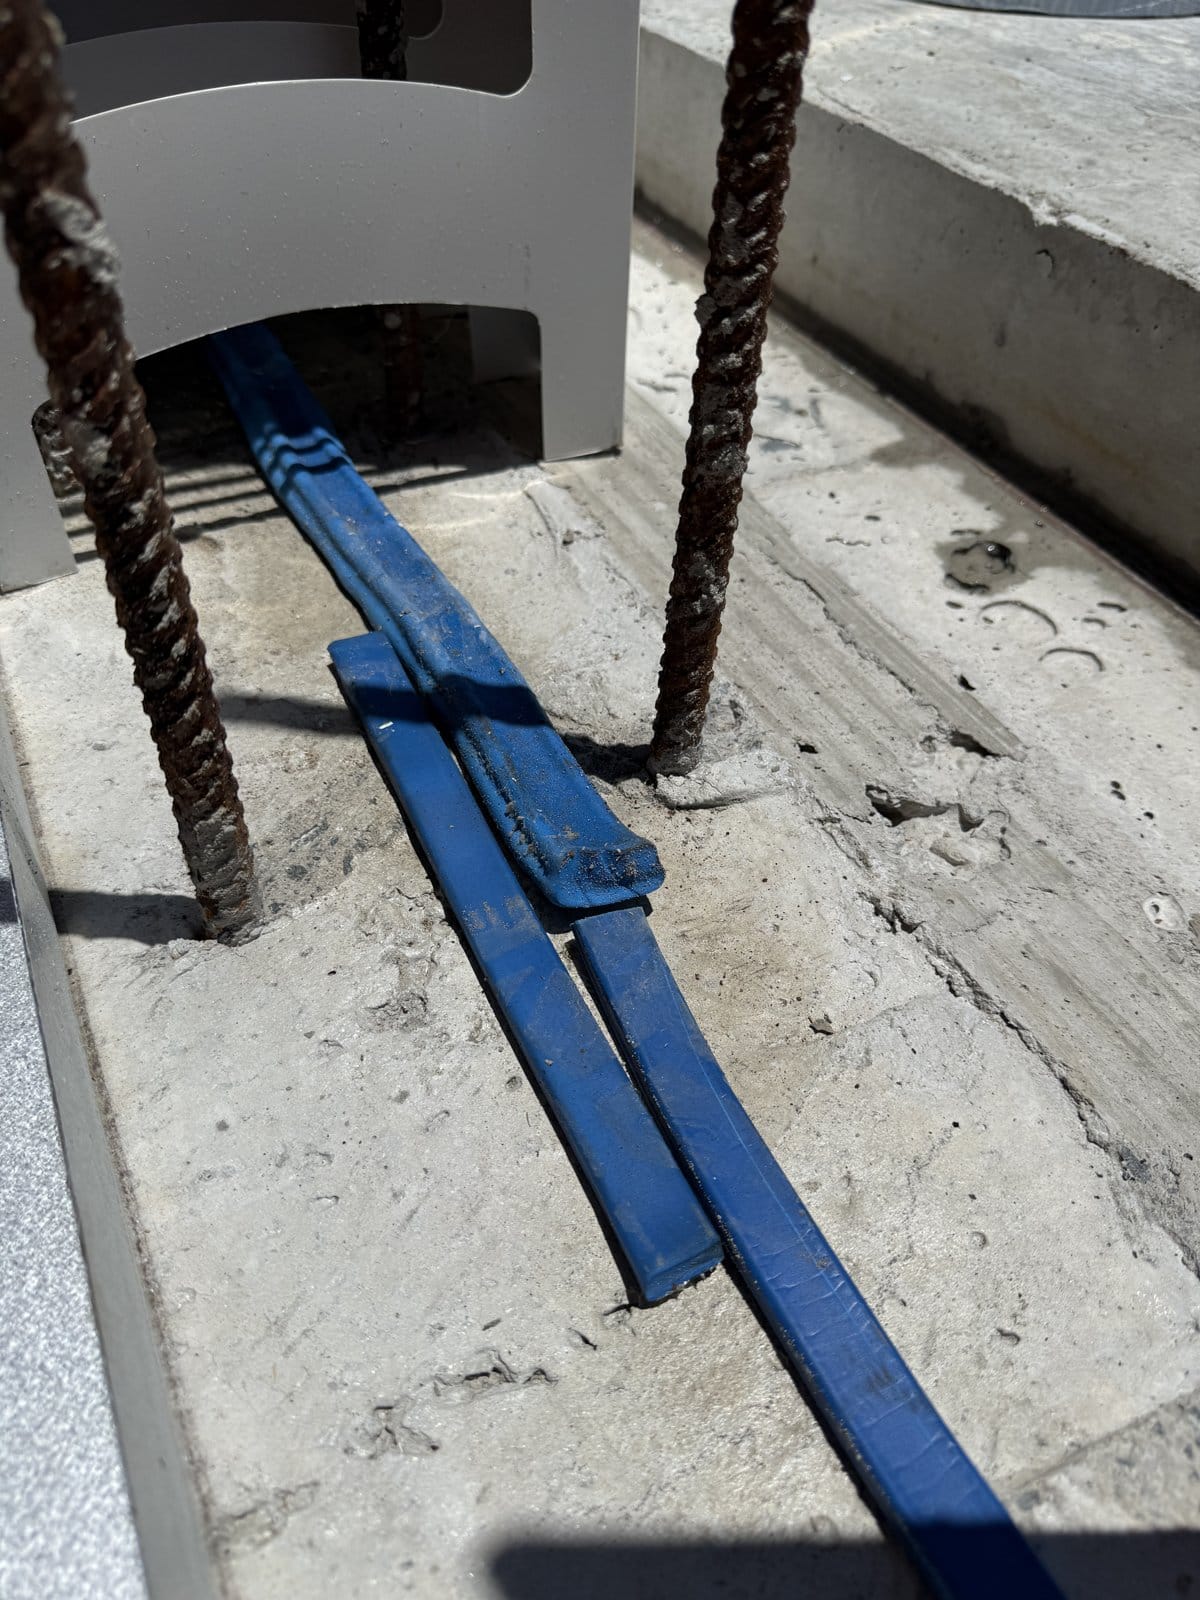
Waterstop round the pipes too
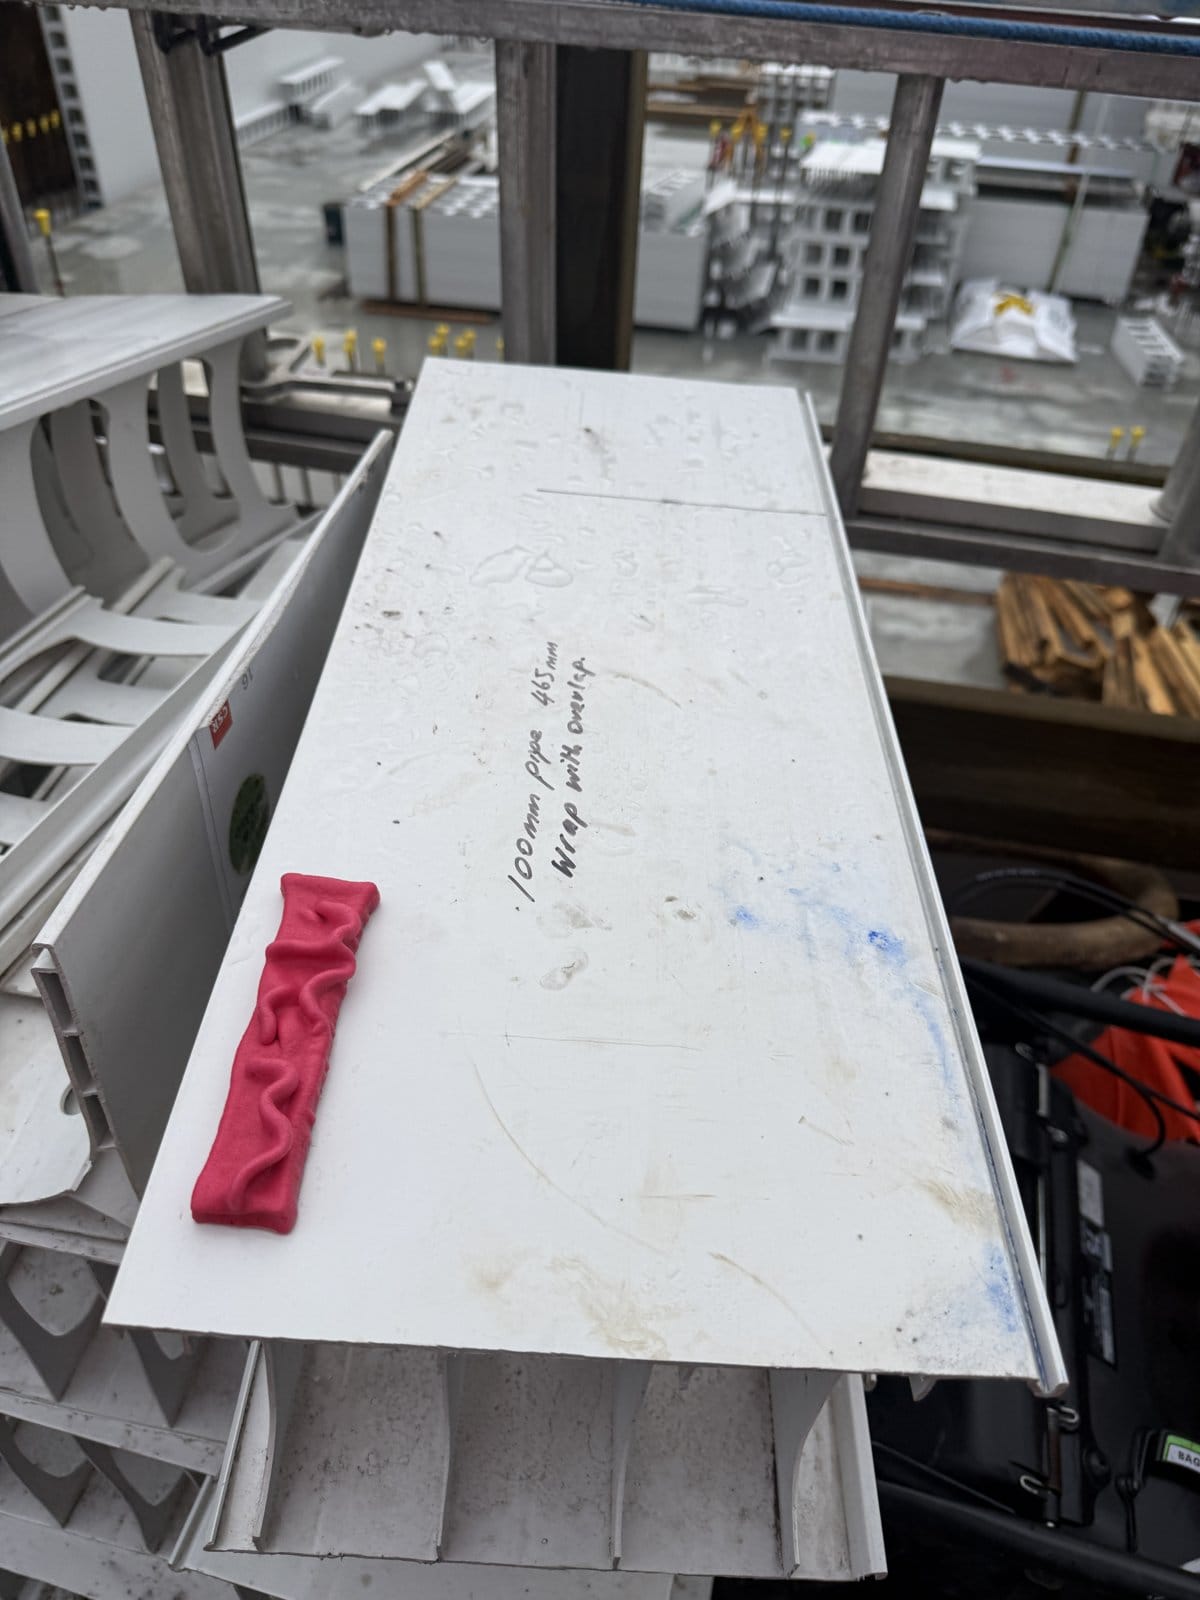
The pipes that come up through the slab have waterstop round them as well: a ring of the thinner red WPA HW 2005 (20 x 5 mm) on each pipe. Before the pour I noticed the plumber had left two pipes hard up against each other. He didn't do anything wrong, but that would have left a void where the concrete couldn't get between them, so I pushed them apart to let the concrete flow all the way round each one.
Step 3: the starters and the panels
Before you drop any panels, straighten every starter bar. Get them all plumb both ways, so the panels slide down over them without catching on the plastic. Then:
- A small scissor lift brings each panel up, and we thread it down over the starters.
- The panels clip together, so each one slides down the groove of the one before.
- The horizontal bars go in as you go. You have to thread them in, put a few panels on, then slide the bars back the other way to get the laps. At the corners we use hooked bars (candy canes), with the bars overlapping all the way down.
- A corner piece slides in to close off each corner. The track is screwed together inside to brace the internal corners.
The steel for the walls arrived late, on a 50 tonne crane lift. Rather than wait, we used the N16 bar we already had on site in place of the N12 horizontals until the right steel turned up. That's heavier than needed, which is fine, but make sure the engineer sees it at the inspection.
Drilling in the extra starters has been slow. There's so much steel in the slab that you're almost guaranteed to hit a bar, so each clean hole has been taking about 20 minutes.
Step 4: bracing and core fill
The walls aren't fully braced yet. For now we're propping them back off the sheet piles (they aren't going anywhere) with offcuts of timber, most of it the old grid profiles and the timber the Rediwall came packed with. Once the walls are plumb, we screw through the metal track into the panels to lock the bottoms in place.
Next we'll screw 40 mm top hat (the steel batten used in roofing) along the walls about three quarters of the way up, and brace back to it with push-pull props. That's for plumb, and for the pour: there's a lot of weight coming.
- About 90 cubic metres of core fill goes into these walls.
- Pumped in lifts, from one end to the other, then back for the next lift, until they're full.
- A special mix: 10 mm stone, 100 slump, with Xypex in it. The engineer's wall schedule calls for S40 core fill.
- Booked for Friday.
Before then, the engineer needs to check the walls and the steel. For Rediwall stages ours will do a video call, which is half the price of a site visit.
Waterproofing the outside
Once the walls are core-filled, the outside gets waterproofed before we backfill. The products are a Sika system:
- Clean the slab toe and make a 40 mm cove of Sikadur-31 epoxy where the wall meets the slab.
- Clean the Rediwall face with xylene, a fairly strong solvent for cleaning plastic.
- SikaShield E40, an HDPE self-adhesive sheet, over the whole outside face, lapping 150 mm over the cove onto the slab toe.
- An aluminium angle along the top as the termination.
- Bidim geotextile hung over the membrane, so the gravel can't puncture it.
- Backfill with about 200 cubic metres of gravel.
Normally you'd add an ag drain behind a retaining wall. Not here. The groundwater sits right up the wall, so a drain would have nowhere to go and the gravel will stay saturated. What matters is that the membrane is continuous, every gap is sealed, and every lap overlaps properly.
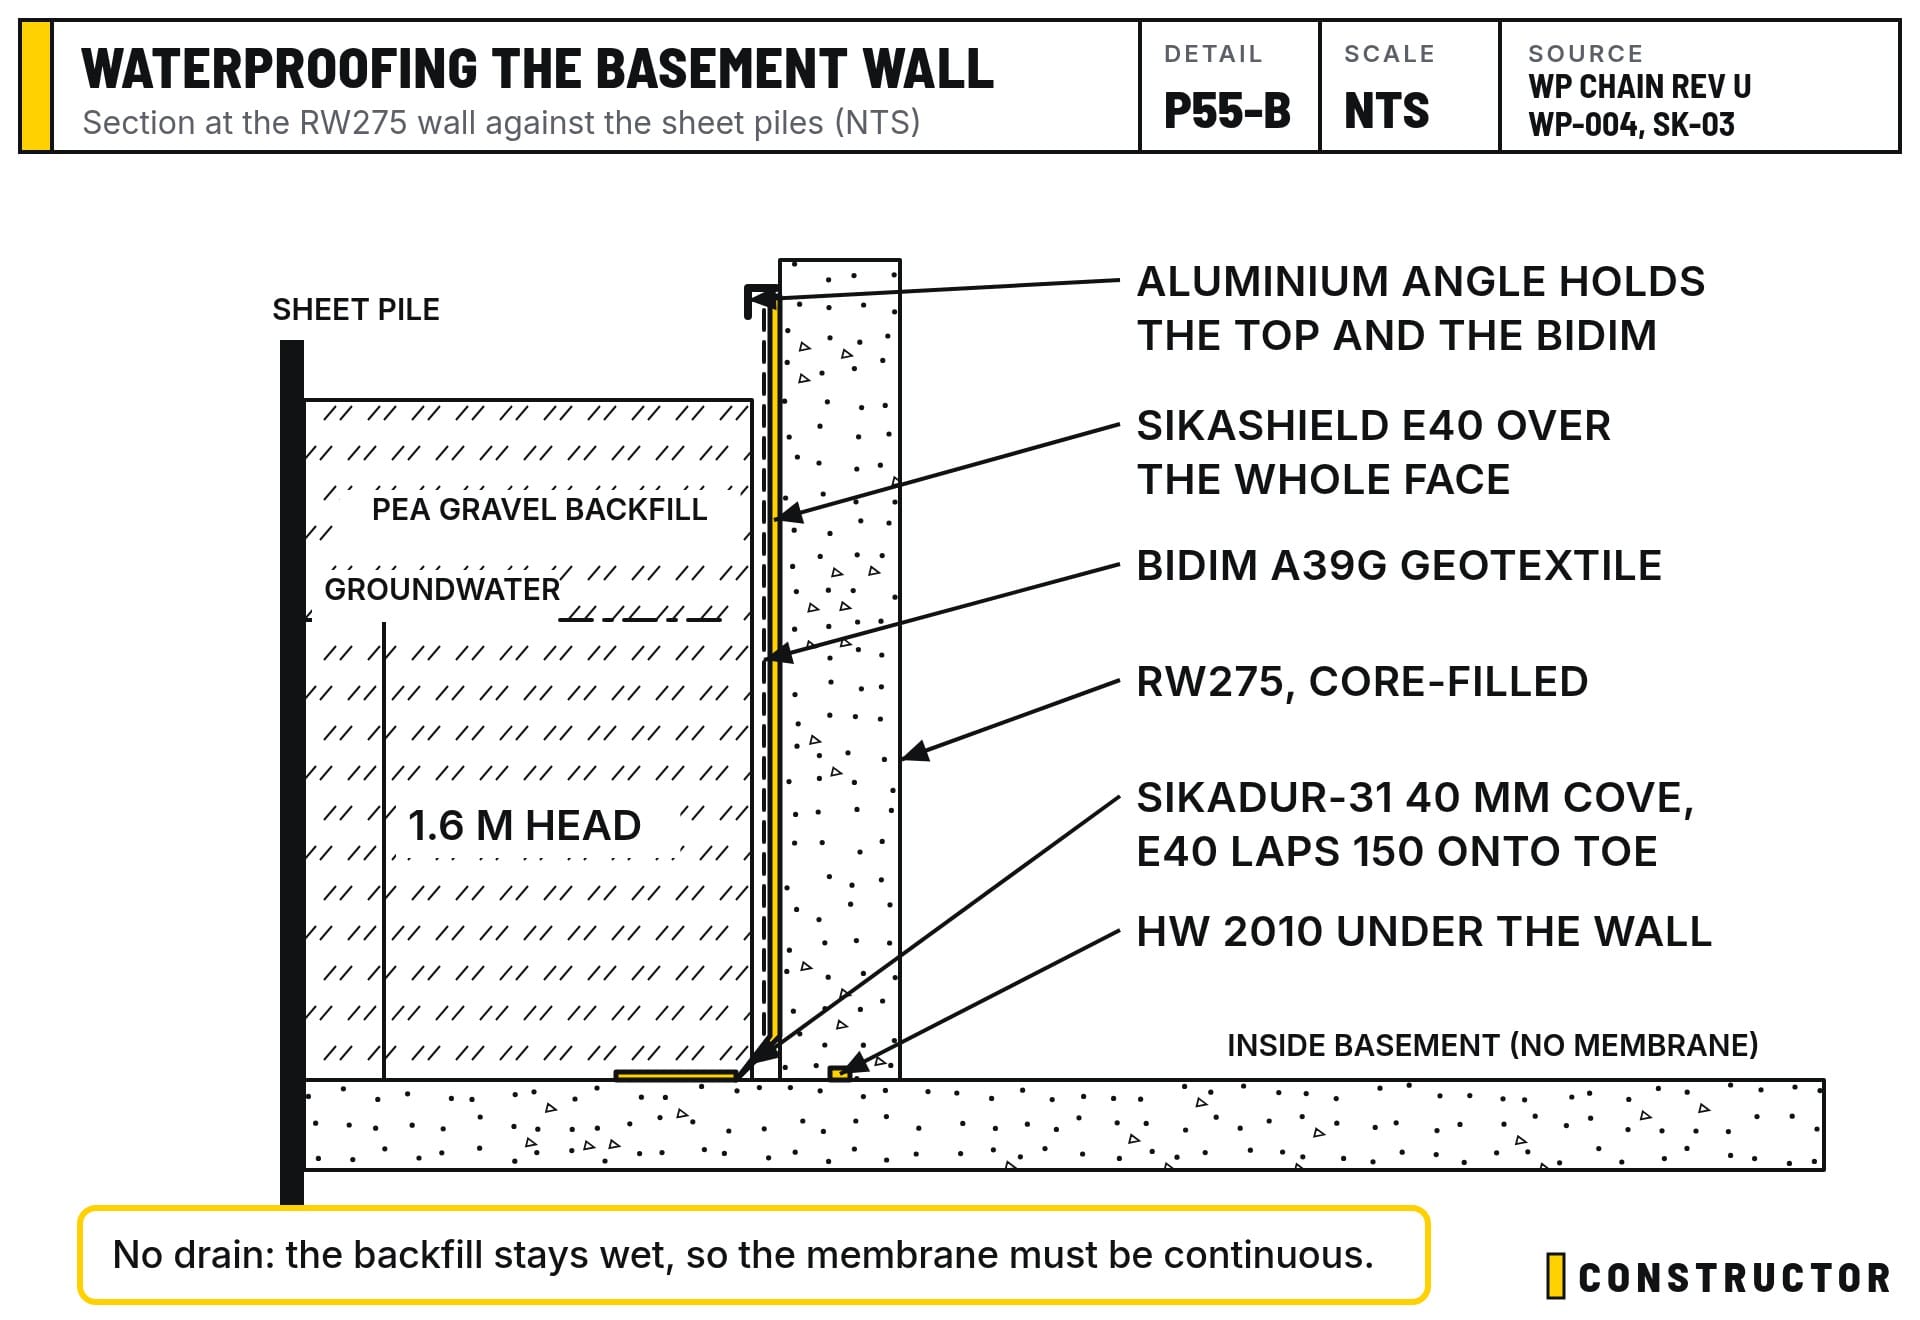
So the wall has several lines of defence:
- the membrane and the cove on the outside,
- Xypex in the core fill (and in the slab),
- the waterstop under every wall, and
- the filled Rediwall itself. Rediwall advise that filled, vibrated panels resist up to 8 m of water head. We only have about 1.6 m.
We're vacuuming the sheet piles and the slab as we go, because everything has to be spotless before the waterproofing goes on, and every time it rains the dirt washes off the sheet piles again.
And the dewatering spears? Once the pumps are off there's no suction, so we'll just cut them off below ground level and cap them. They'll be buried in gravel and no one will ever see them.
Planning the EV charging now
While the walls are open I'm working out the basement electrical, so the conduits go in before the core fill. We're setting the basement up for EV charging: three 25 mm conduits in each column face (one for comms, two for power), on both sides of the columns, so a charger can go on whichever side suits the car.
The comms conduit is for OCPP 1.6J. If you want to get fancy, it lets you connect a charger to a server and record which charger was used, when, on which car and for how long. Most people won't care, but the provision costs almost nothing now and a lot later.
A tidy site is a safe site
We're constantly picking up and sweeping. There are brooms everywhere because it's easy to trip over offcuts. Every offcut we can't reuse goes in a bag that the crane lifts out to the bin, and the bar caps go in a washout bag as we go. We also set up a shade shelter, a camping fridge full of coconut water and fans, because it's been hot.
What's next
Core fill on Friday. After that we're careful about which internal walls go up, because we still need room to waterproof and backfill behind the outside walls. Then the pool support walls and the structural walls that hold up parts of the house, and the formed concrete columns. Those are the slow point before the ground floor slab: deck, services, the A and B layers of steel, inspection, pour.
The driveway will wait, because we still need the stairs to get in and out.
Before the walls go up on your own slab, our C6 Post-Pour Slab Inspection Checklist takes you through what to check before anything is built on it.

C6 - Post Pour Slab Inspection Checklist
$59.00 AUD
Last updated 28 Oct 2026 · Revision 4 · Free updates for life
Checklist Type: Minor
Form Factor: Fillable, print-ready PDF (A4, 21 pages)
When to use: After the concrete pour, before the frame goes up
A 61-point checklist to inspect your slab after the pour: records, curing, edges, levels, pipes and cracks, while repairs are still easy to arrange.
✓ Authorship verified on the blockchain · View certificate