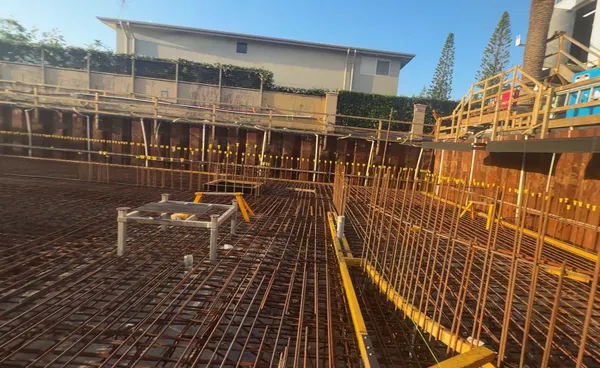
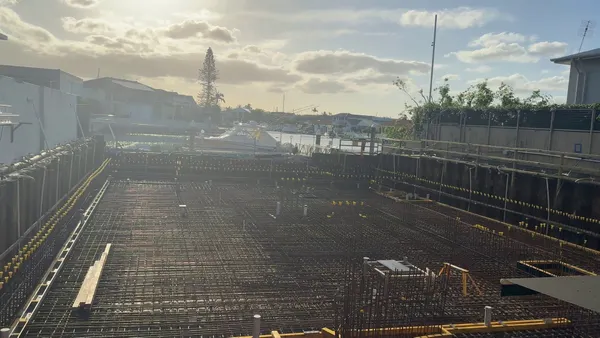
I missed the pour. Well, I was here, but I spent the whole day talking with the architect, a rep from the admixture company, the pump operators and a few other people, so there was no time to film. I'll show you photos instead, and then walk you around the day after.
Pour day
The basement raft we checked in Post 52 and Post 53 went down in one pour.
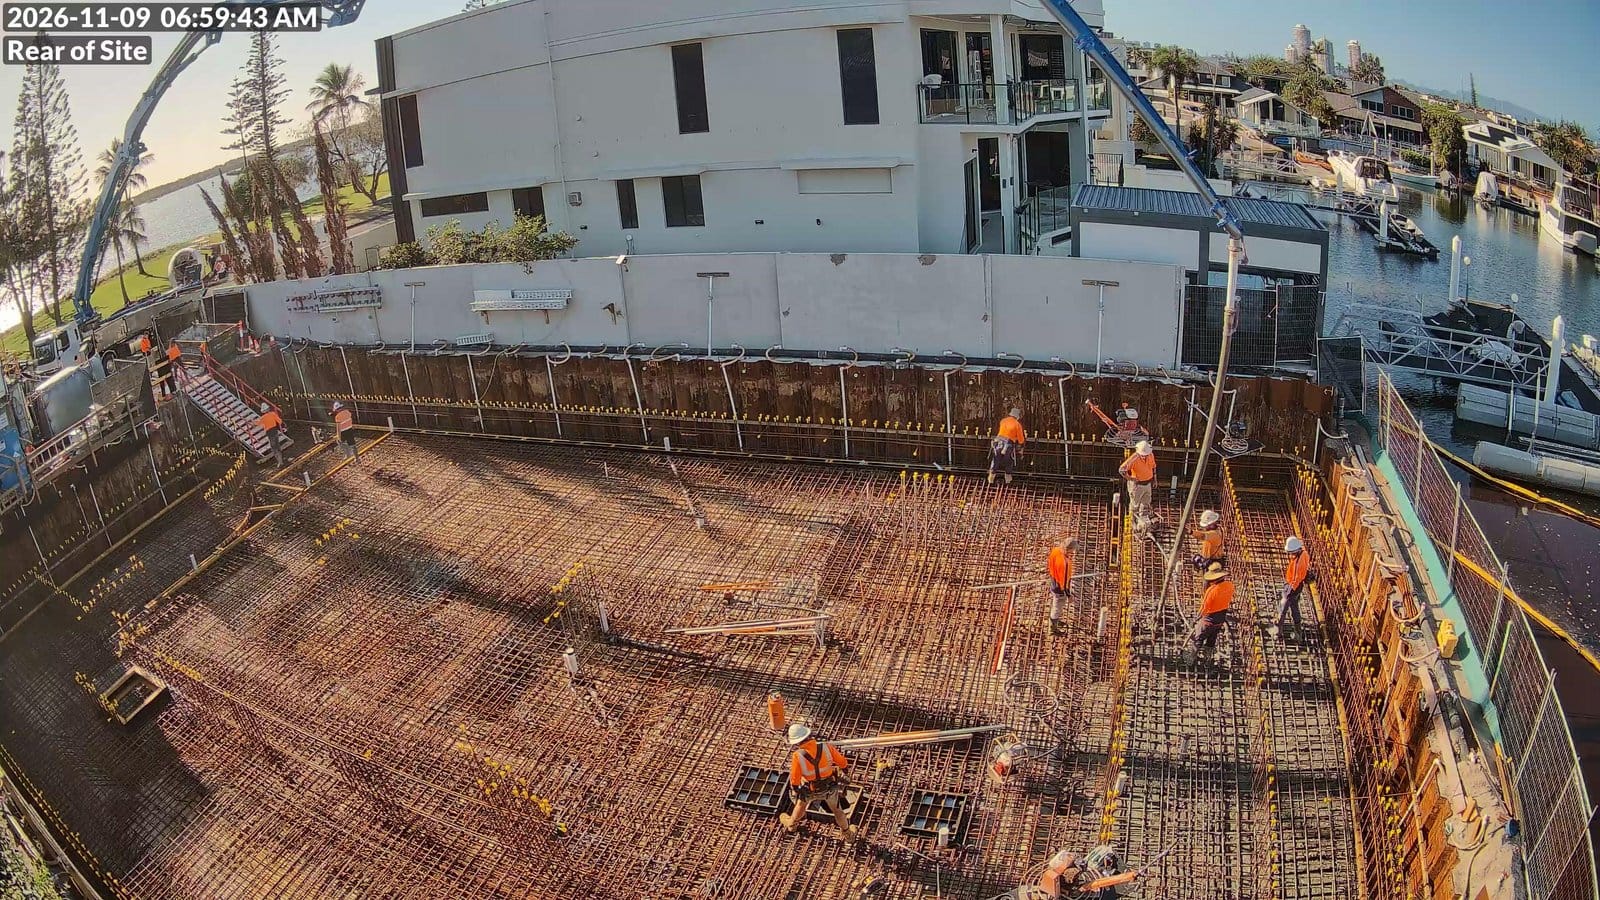
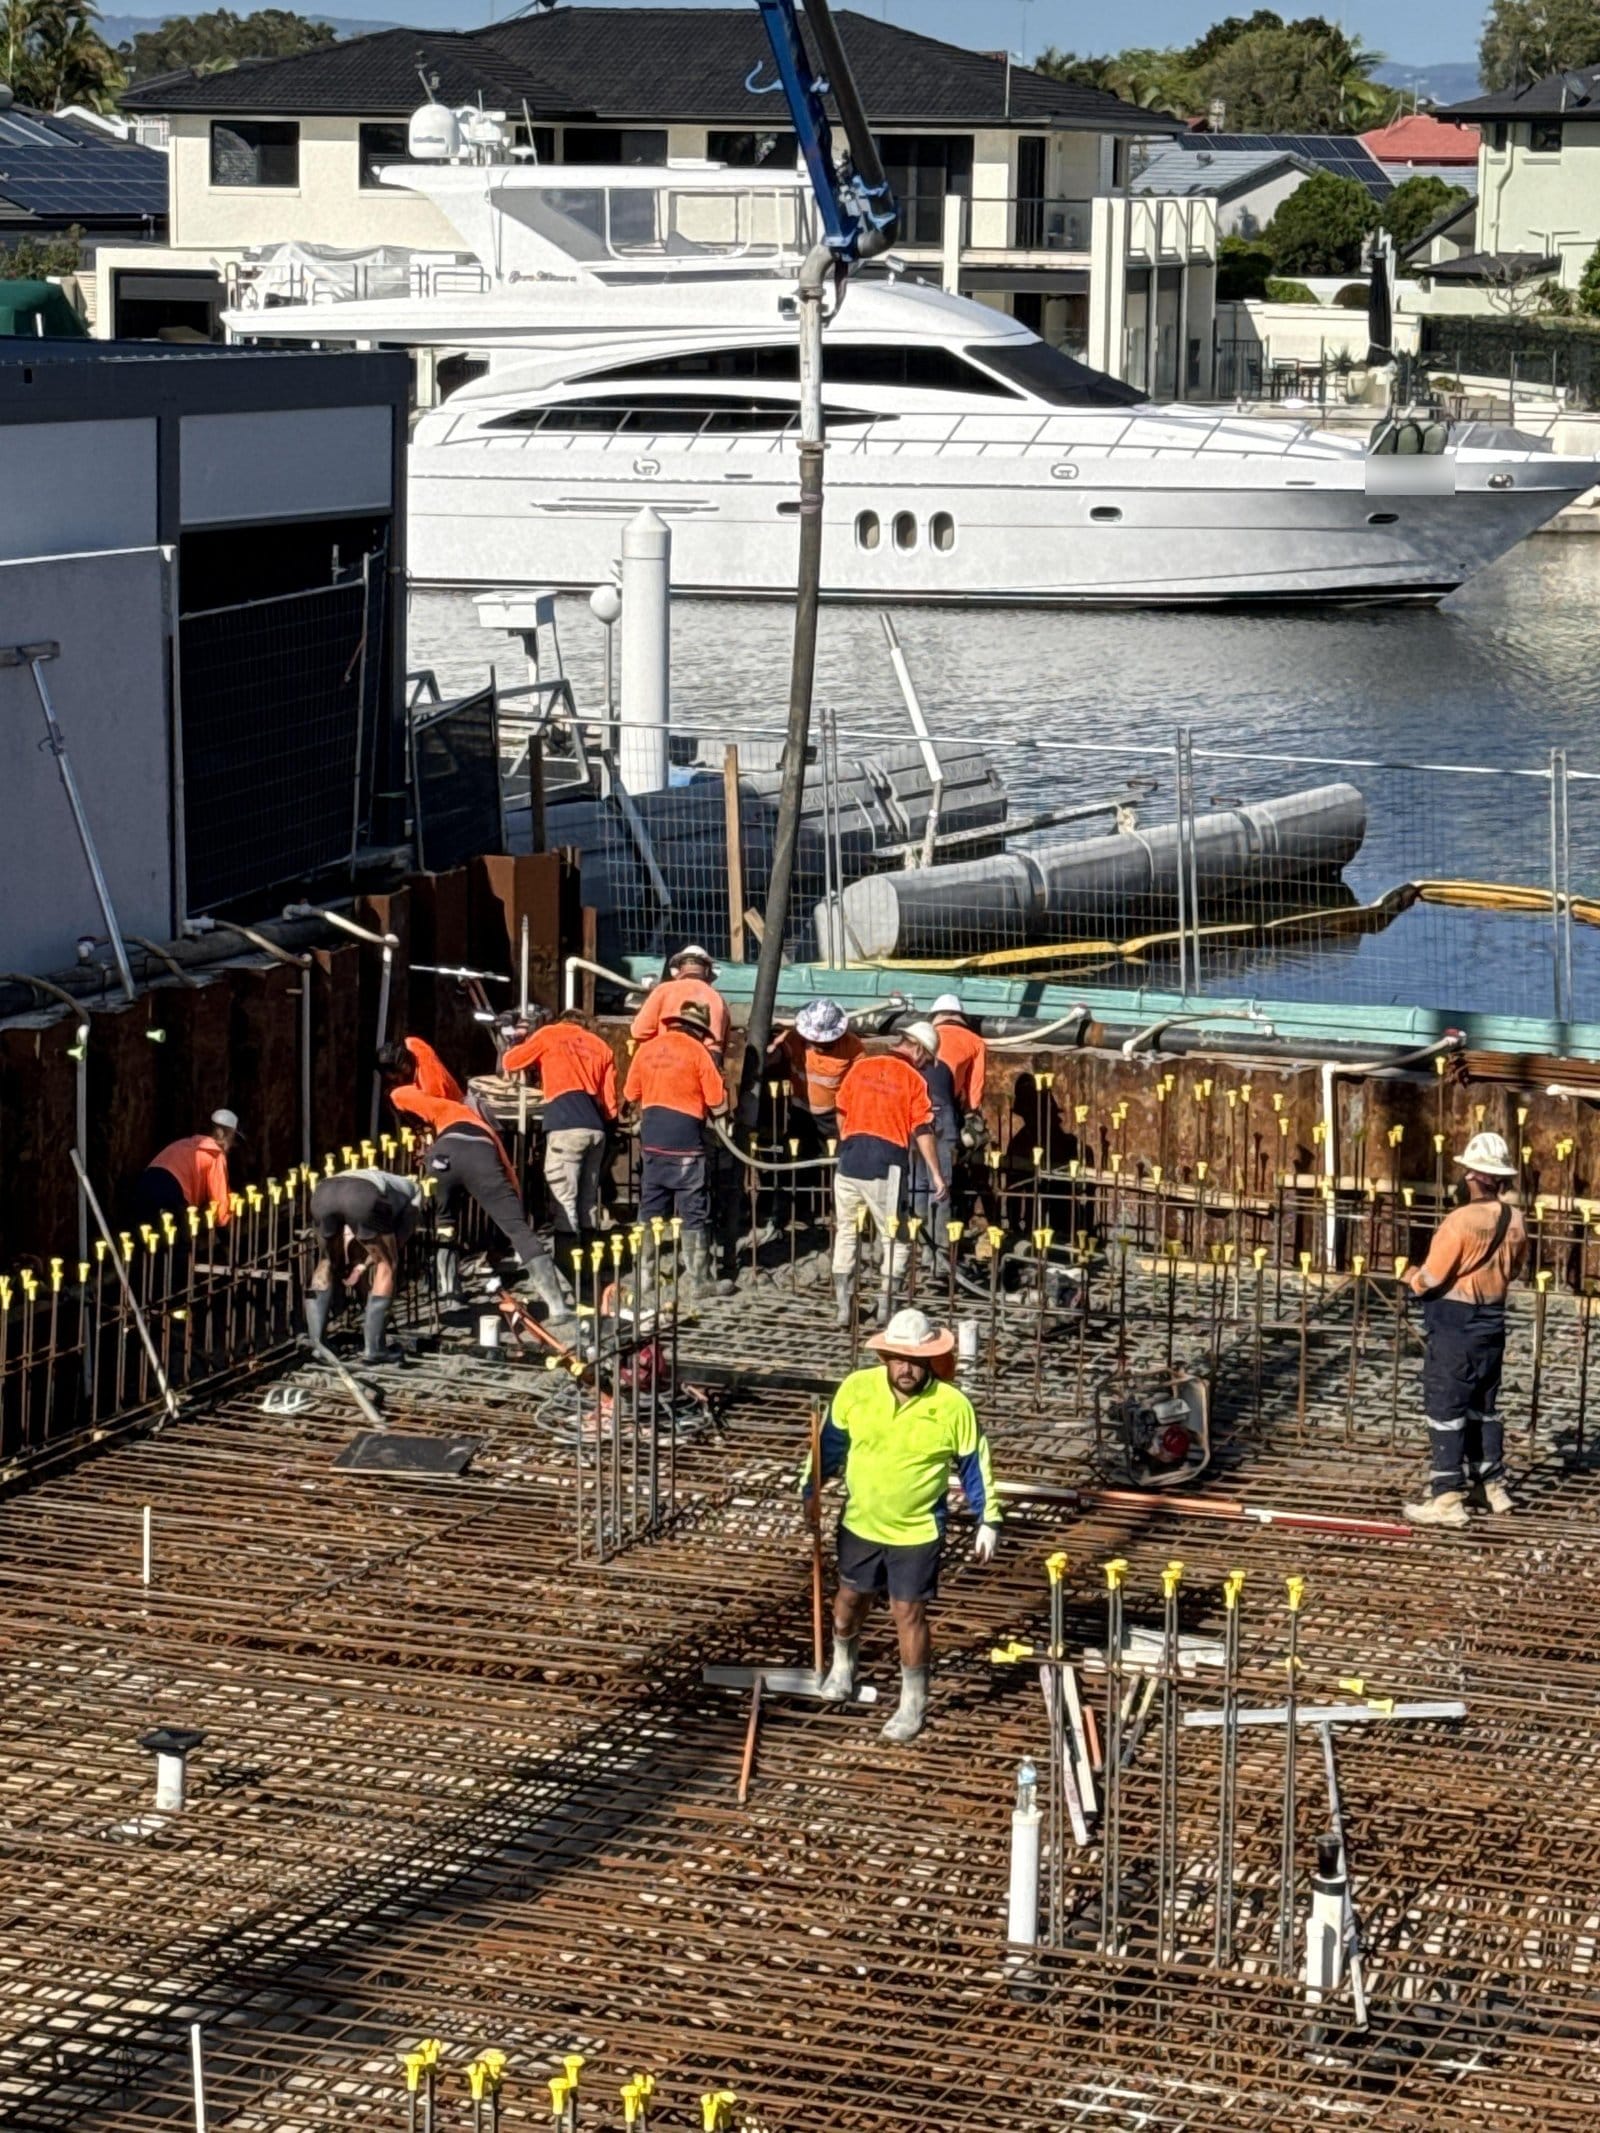
- A 50 metre boom pump and 15 concreters. They did a great job.
- Finished by 3 pm.
- 228 cubic metres. We'd allowed for 250, so 228 was the magic number.
- One pour, no construction joints. A monolithic slab, which is what you want in a basement that sits in groundwater.
How it was finished and cured
Once the concrete was placed, it was finished with power trowels (the "helicopters"; I think three were running) and five or six guys on steel trowels.
Then two sprays went on:
- An aliphatic alcohol evaporation retarder. It slows the water leaving the surface while the slab is being worked, which helps against plastic shrinkage cracking. The label says to use it when the air and ground temperatures differ from the concrete by more than 5 °C, and that dry wind makes it worse.
- Sika Rugasol-C over the top. That's the sheen you can see on the slab. Rugasol-C is a surface set retarder: it holds back the setting of the very top layer of paste, which can then be washed or brushed off to leave a rough key for the next pour.
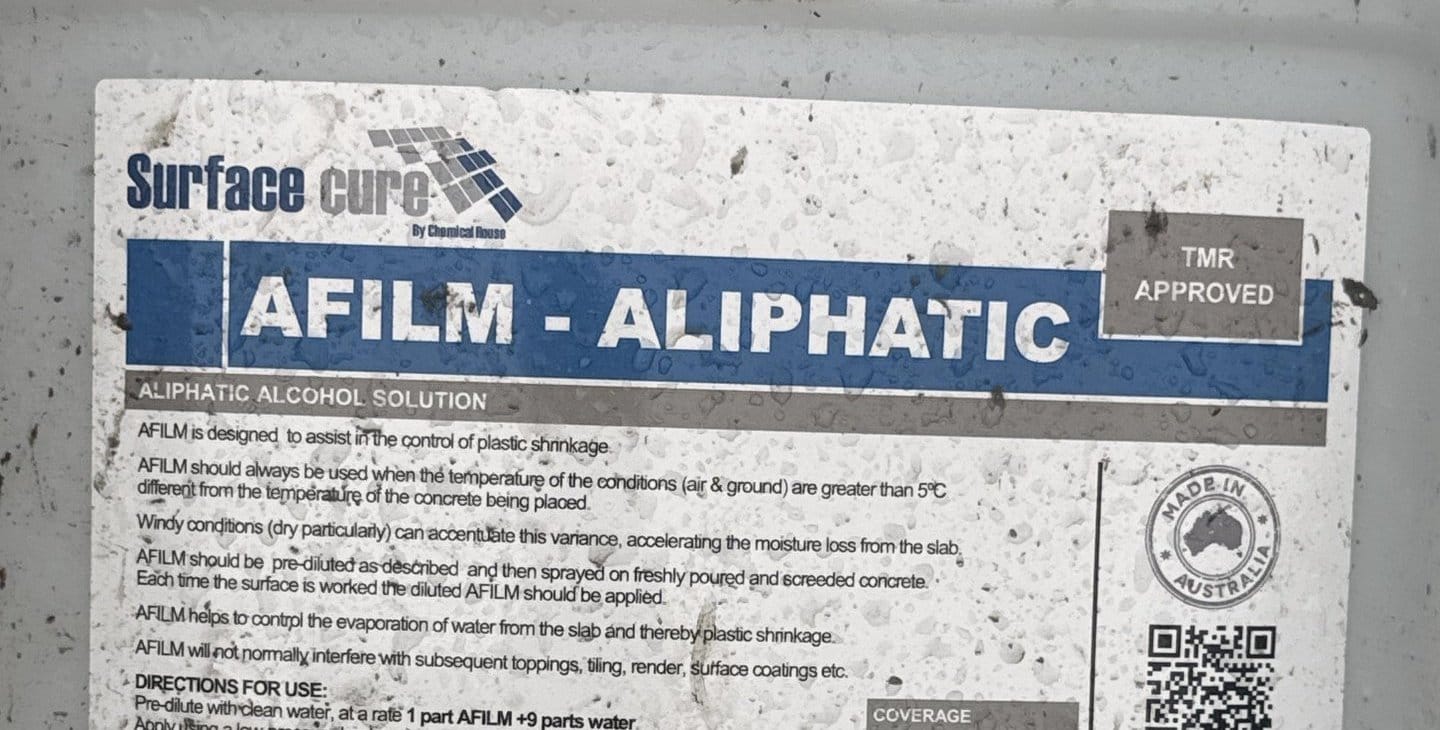
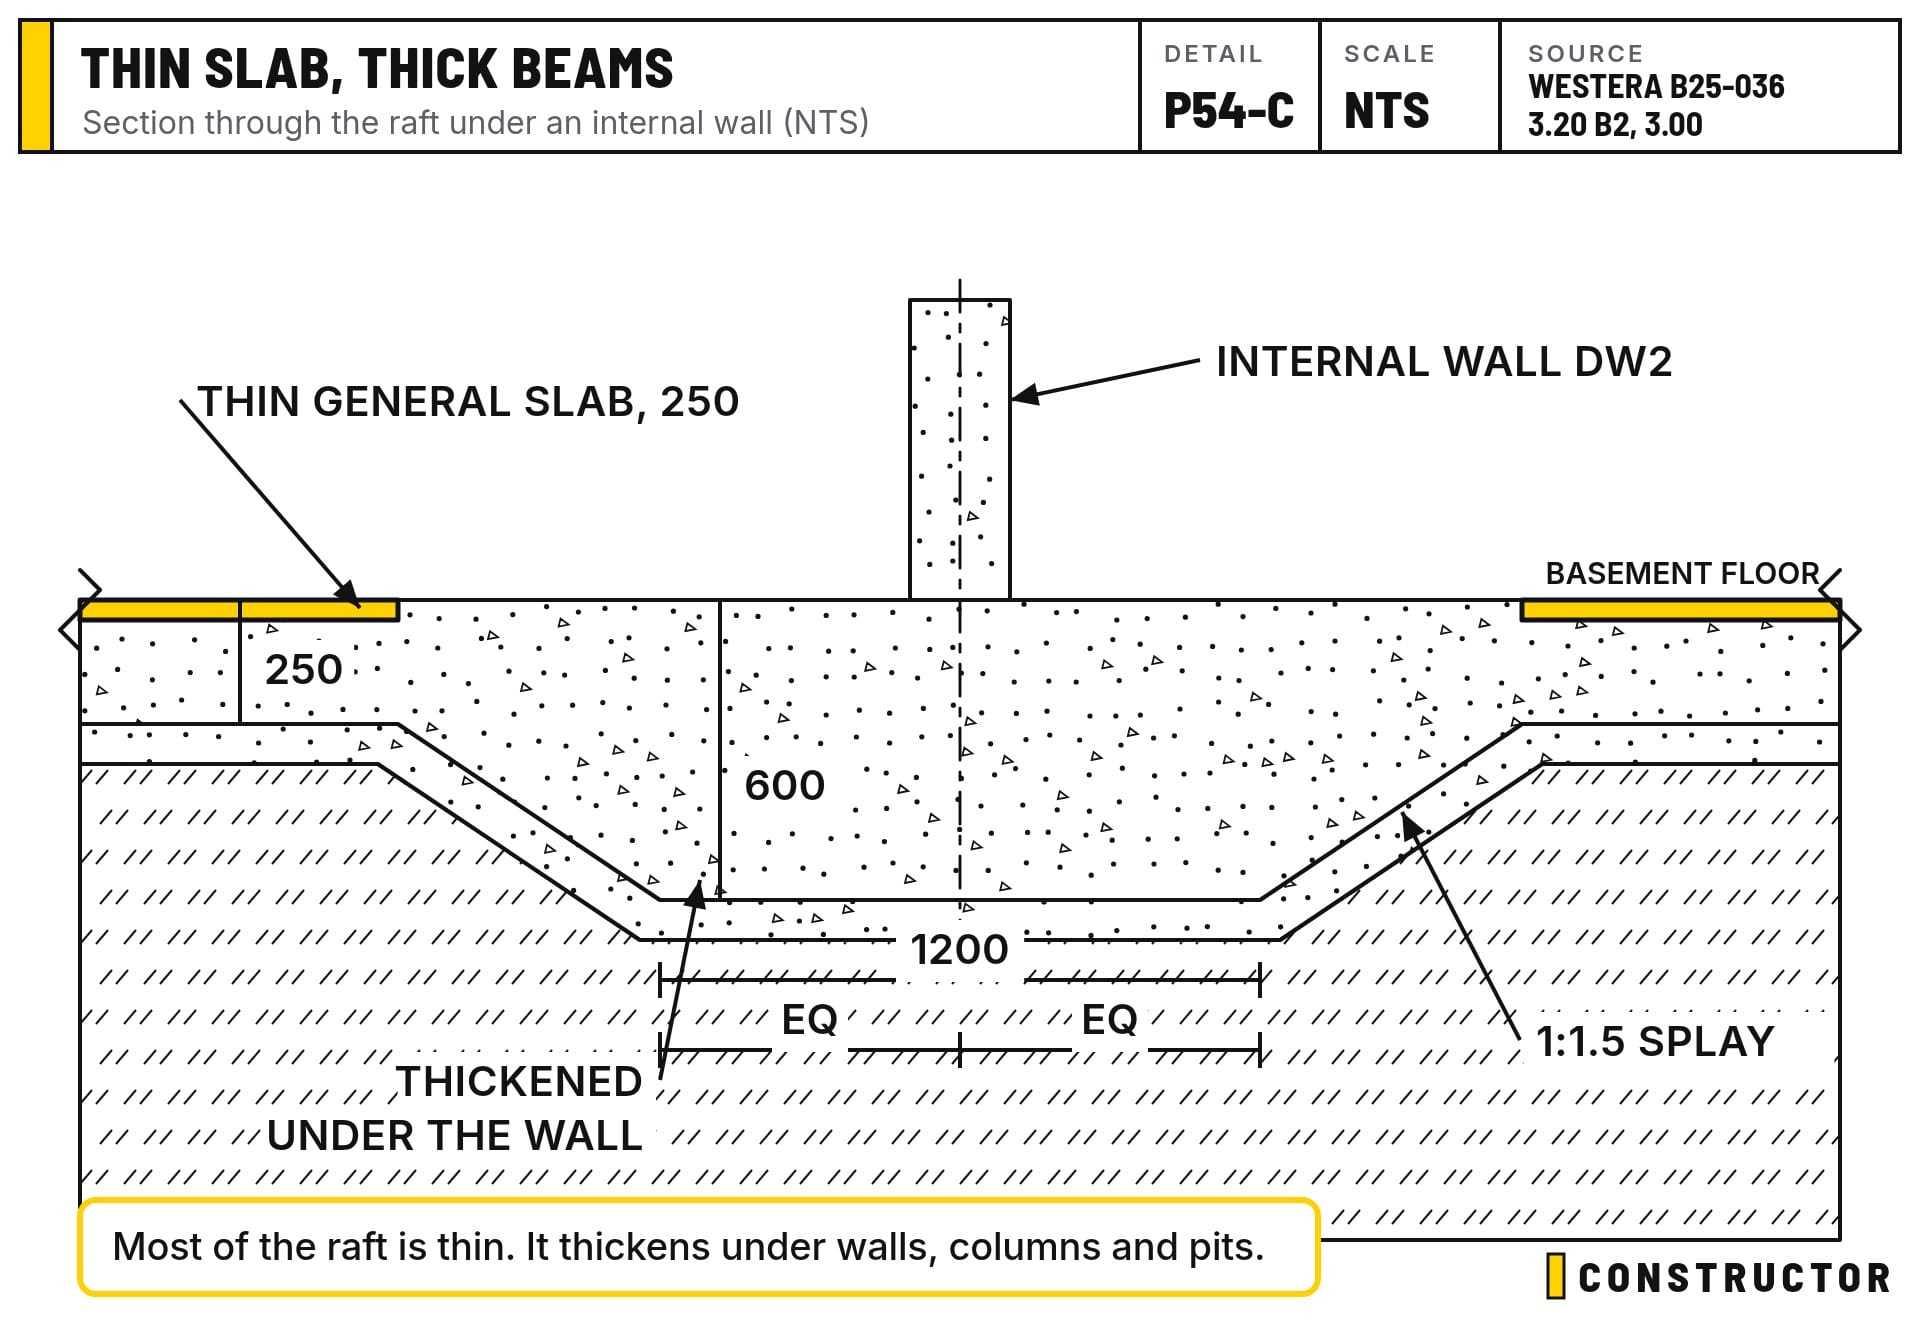
We do have some fine surface cracks. It was a hot day and the surface dried out fairly quickly. Most of the cracks are where the slab is thinnest: our slab is 250 mm thick in its thinnest areas and 600 mm at its thickest, and the cracks are in the 250 mm parts. I'm not worried. We'll keep an eye on them. The slab has Xypex in the mix, and once the slab gets properly wet the Xypex does its thing: it grows crystals in the concrete and seals fine cracks.
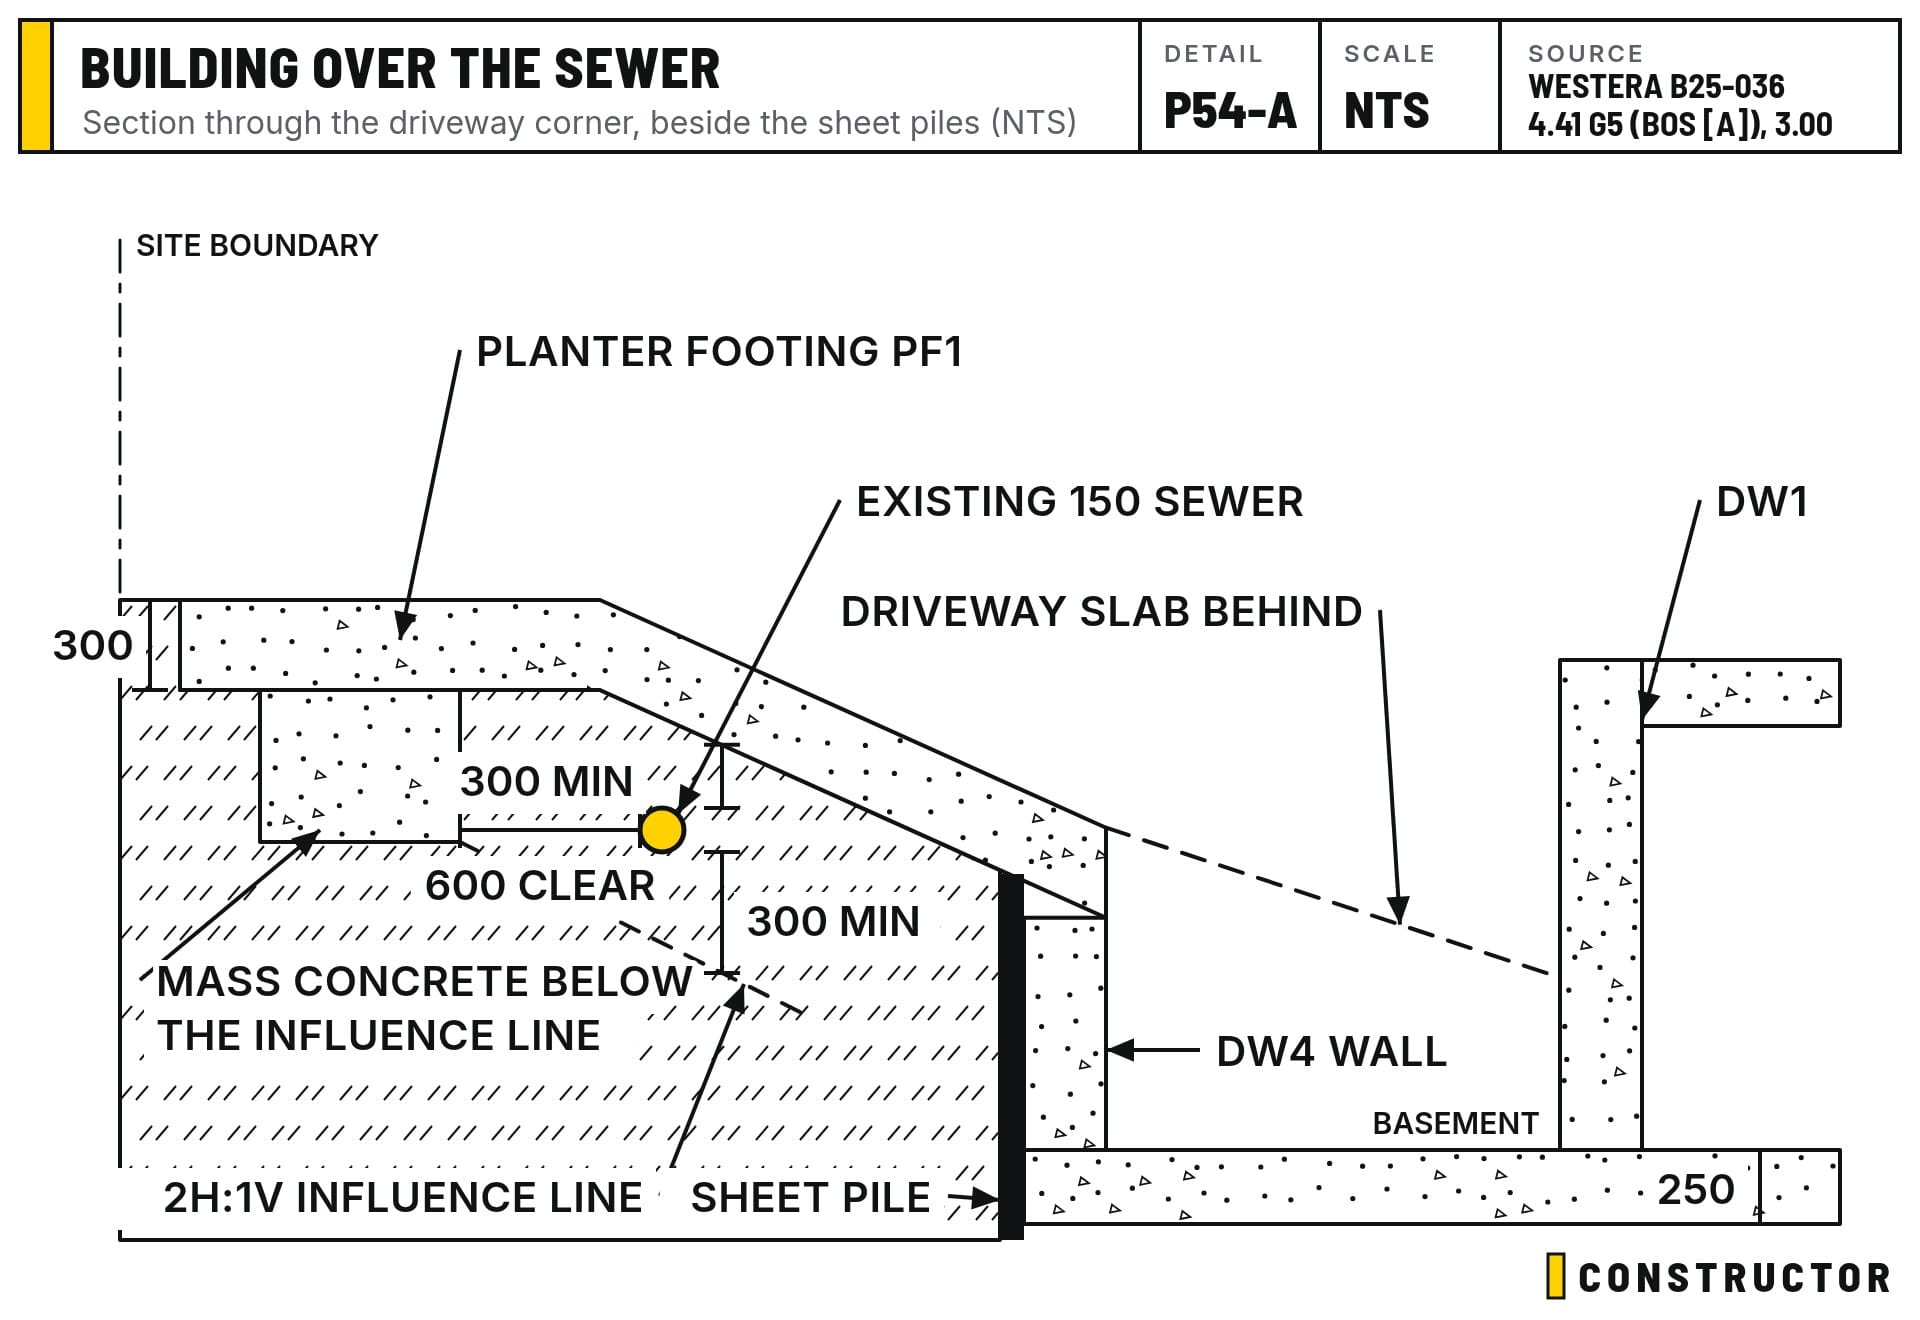
The build-over-sewer detail
Two walls still go in here. This is a building-over-sewer detail. The jump-up for the sewer is under one of the traffic cones, and the sewer itself is about two metres back from the sheet pile wall. Our engineer designed this detail. It all gets filled with gravel, which becomes the base for the driveway slab, so the surface finish here doesn't matter.
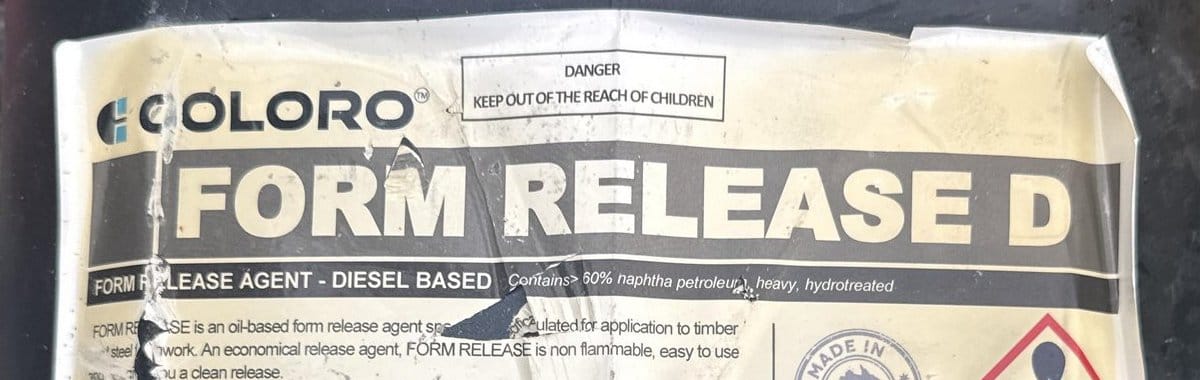
The form sitting on the steel here comes out. We'll fill the gap with a Fosroc repair mortar, and probably treat any voids with Xypex Concentrate before we patch it, to keep the waterproofing intact.
Stripping the forms
Today one of the guys was back, and tomorrow there'll be two. We started pulling out:
- The forms for the set downs, including the formwork for the linear drains that run right through.
- The lacer bars. These held the starter bars straight for the pour. Every tie gets snipped, the bars come out, and every starter gets a yellow safety cap.
- The set-down timbers and the temporary profile timbers. We'll reuse the profile timber to prop the walls, and the LVLs that formed the rebates get stacked to be used again.
Around the edge we've started cleaning up with a jackhammer, a broom and a vacuum, ready for the walls.
The grid goes on the slab
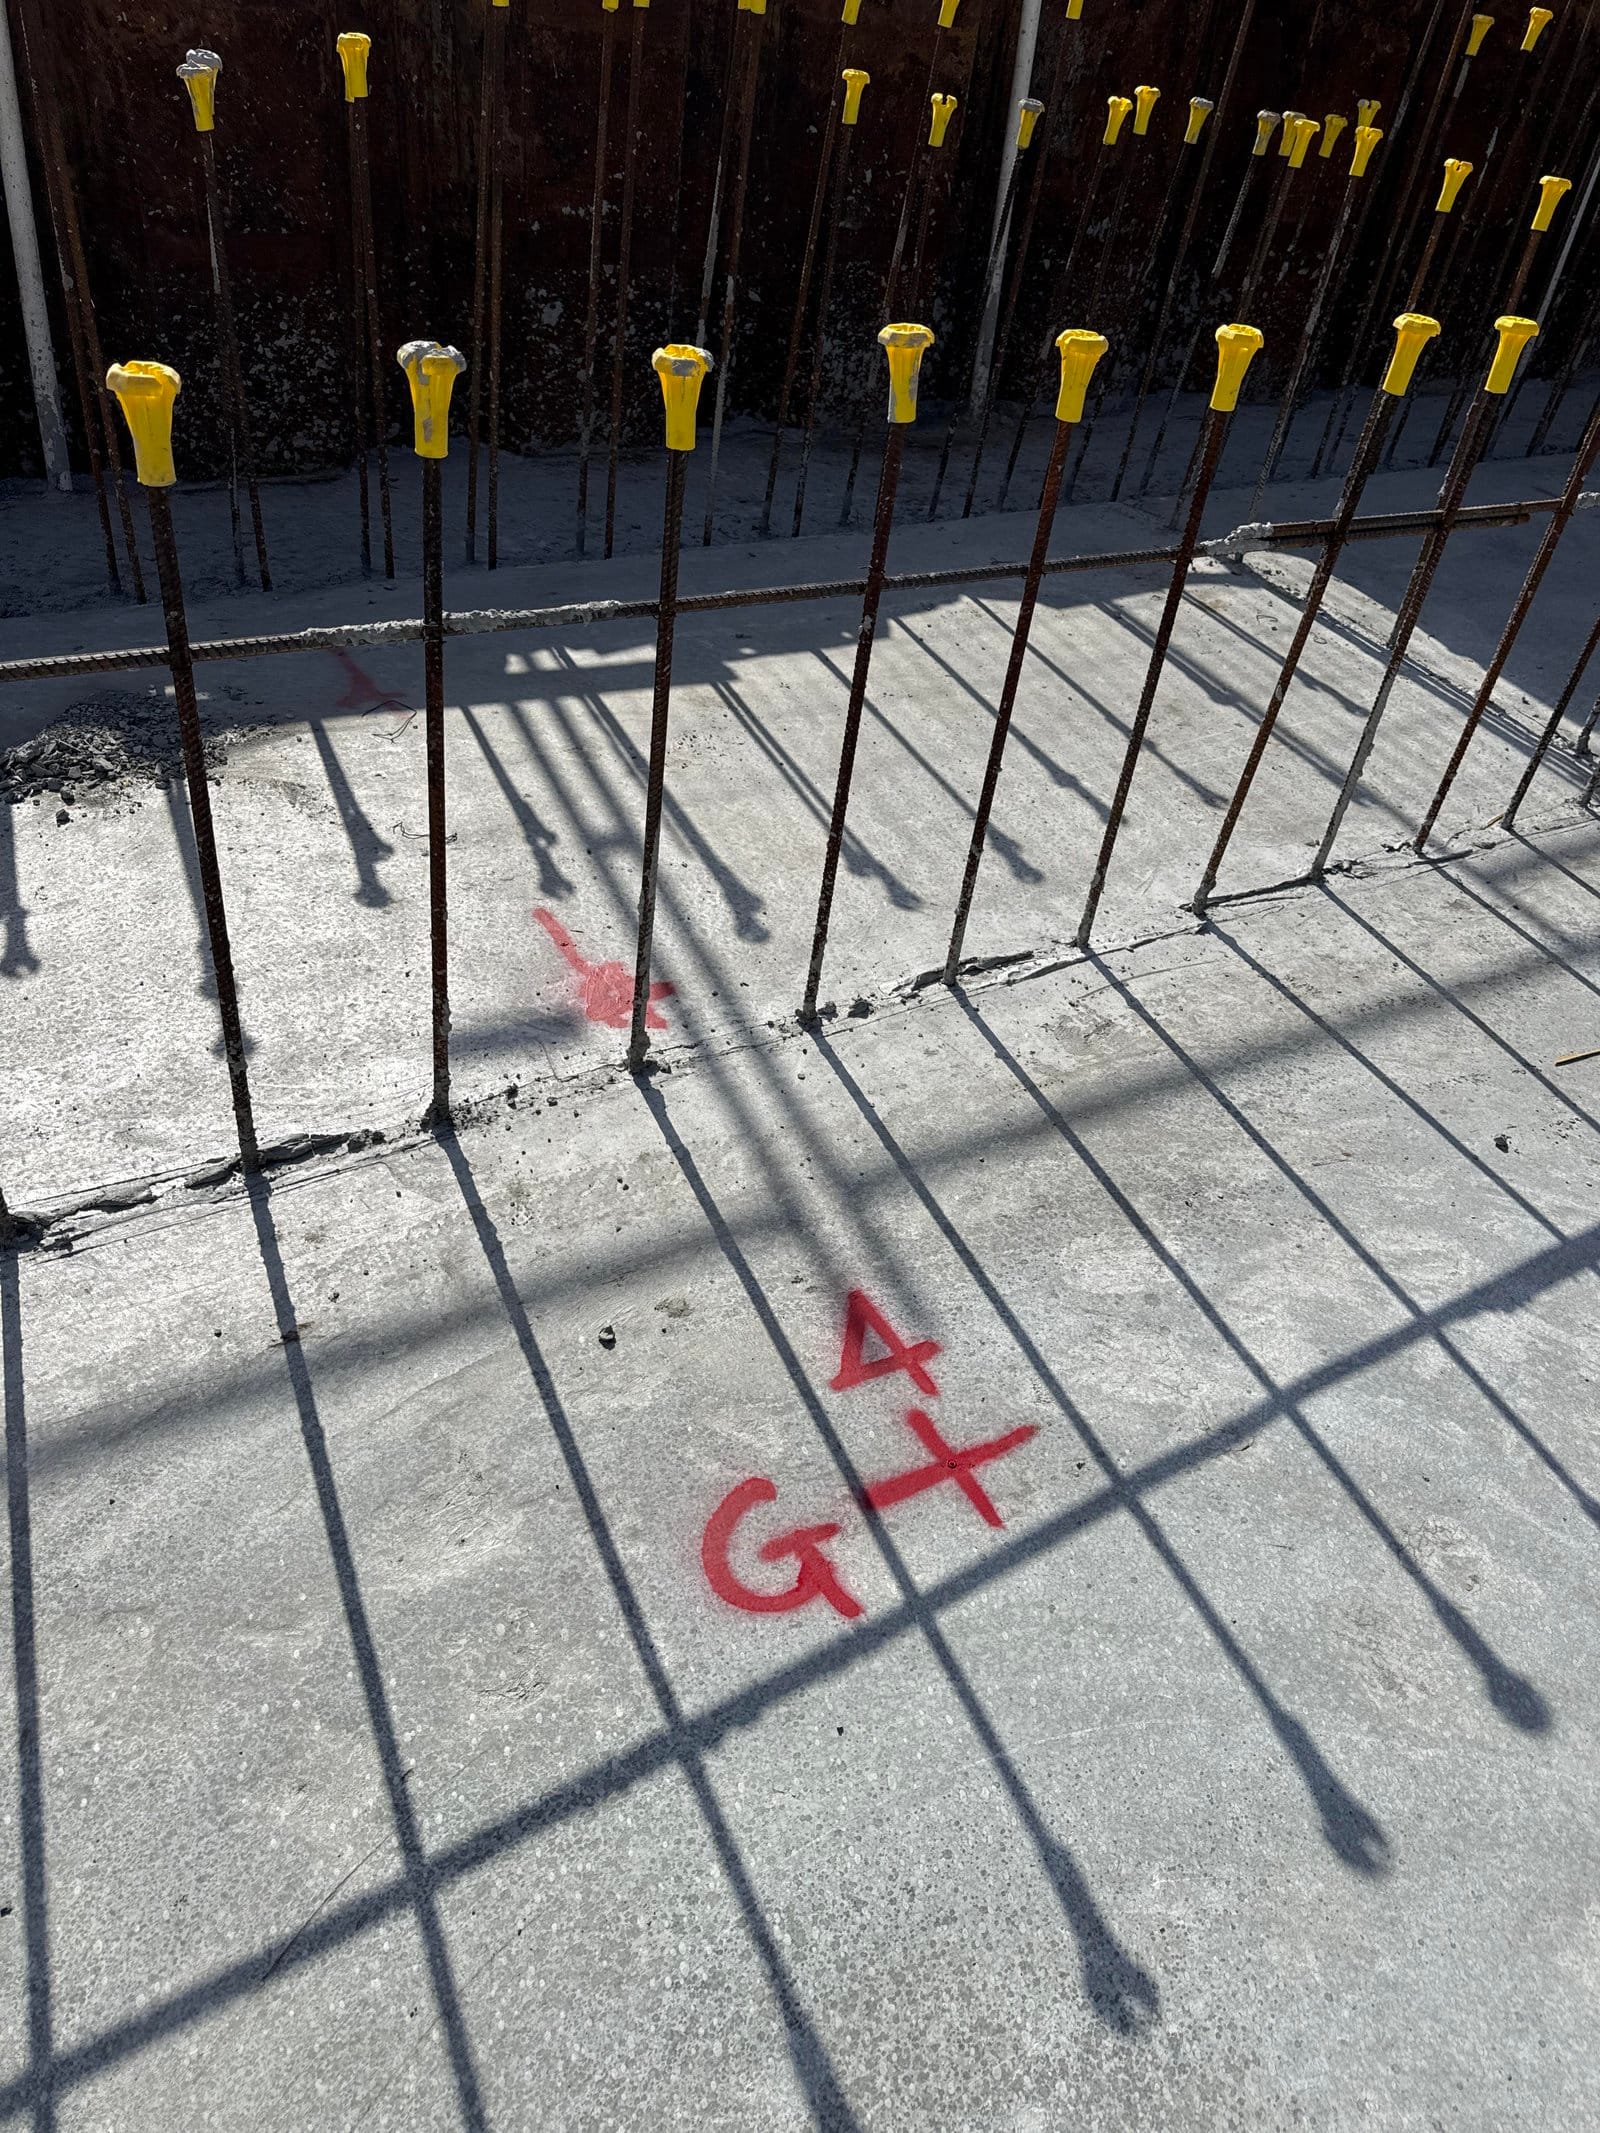
The surveyor was back. The grid lines have been reinstated, this time marked on the slab itself with a small pin at each point. One way runs 1, 2, 3, 4, 5, and the other way A, B, C, D and so on, so every wall can be set out from where two lines cross. D2, E2, F2, G2. It's like Battleships. (It was a long, hot day.)
We've started flicking chalk lines between the points to mark the walls before they go in.
Rediwall for the basement walls
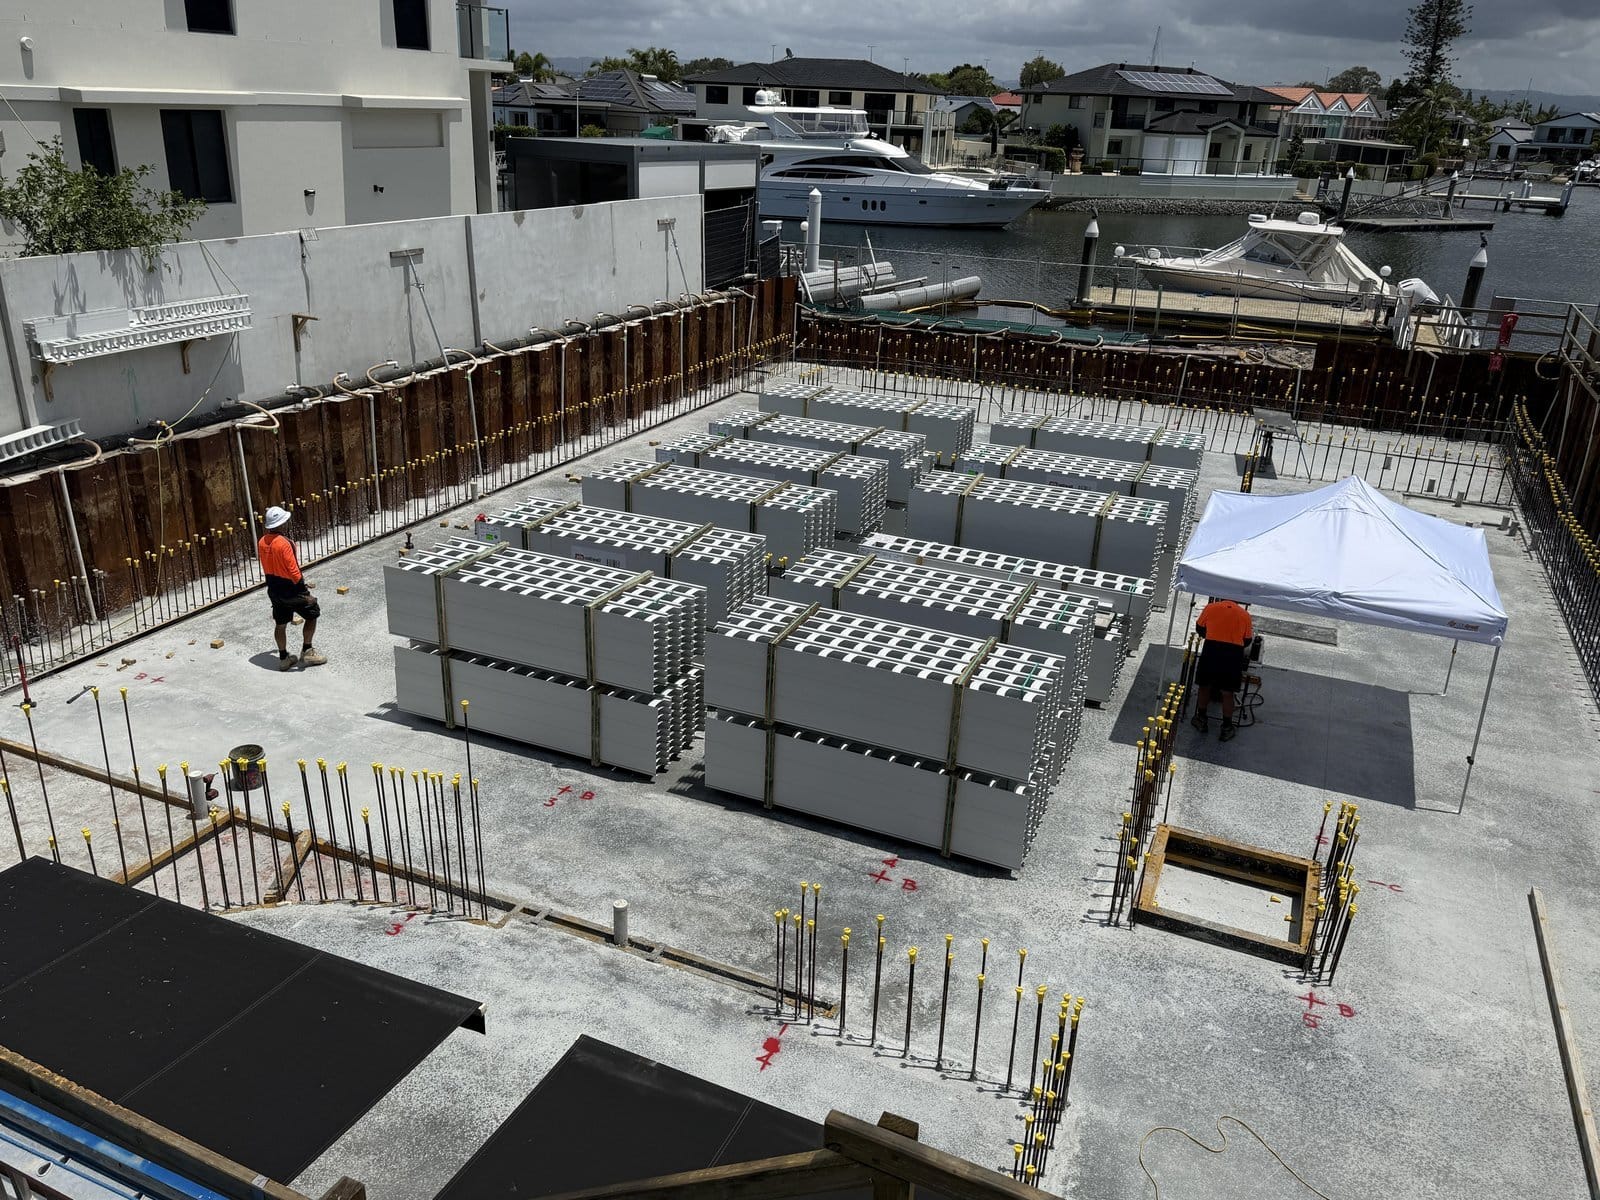
The basement walls are going to be AFS Rediwall, RW275: a 275 mm PVC permanent formwork wall that's filled with steel and concrete. It goes in instead of blockwork. The panels come in 3.2 metre stock lengths. We have a few different wall heights, so we'll stand them up, brace them, and cut them to height in place.
About 25 bundles arrived, which covers the external basement walls. We'd booked a 40 tonne crane; a 70 tonne crane turned up and set up out the front. Flatbeds and semis reversed in, and the crane lifted each load over and onto the slab.
Why not Dincel? It's a good product, and we have no issue with it. We just didn't like the terms of their supply contract. I don't sign contracts that are weighted heavily towards one party. Negotiating them costs too much and rarely works, so the only real choice you have is to go somewhere else. So we did.
Setting out the first walls
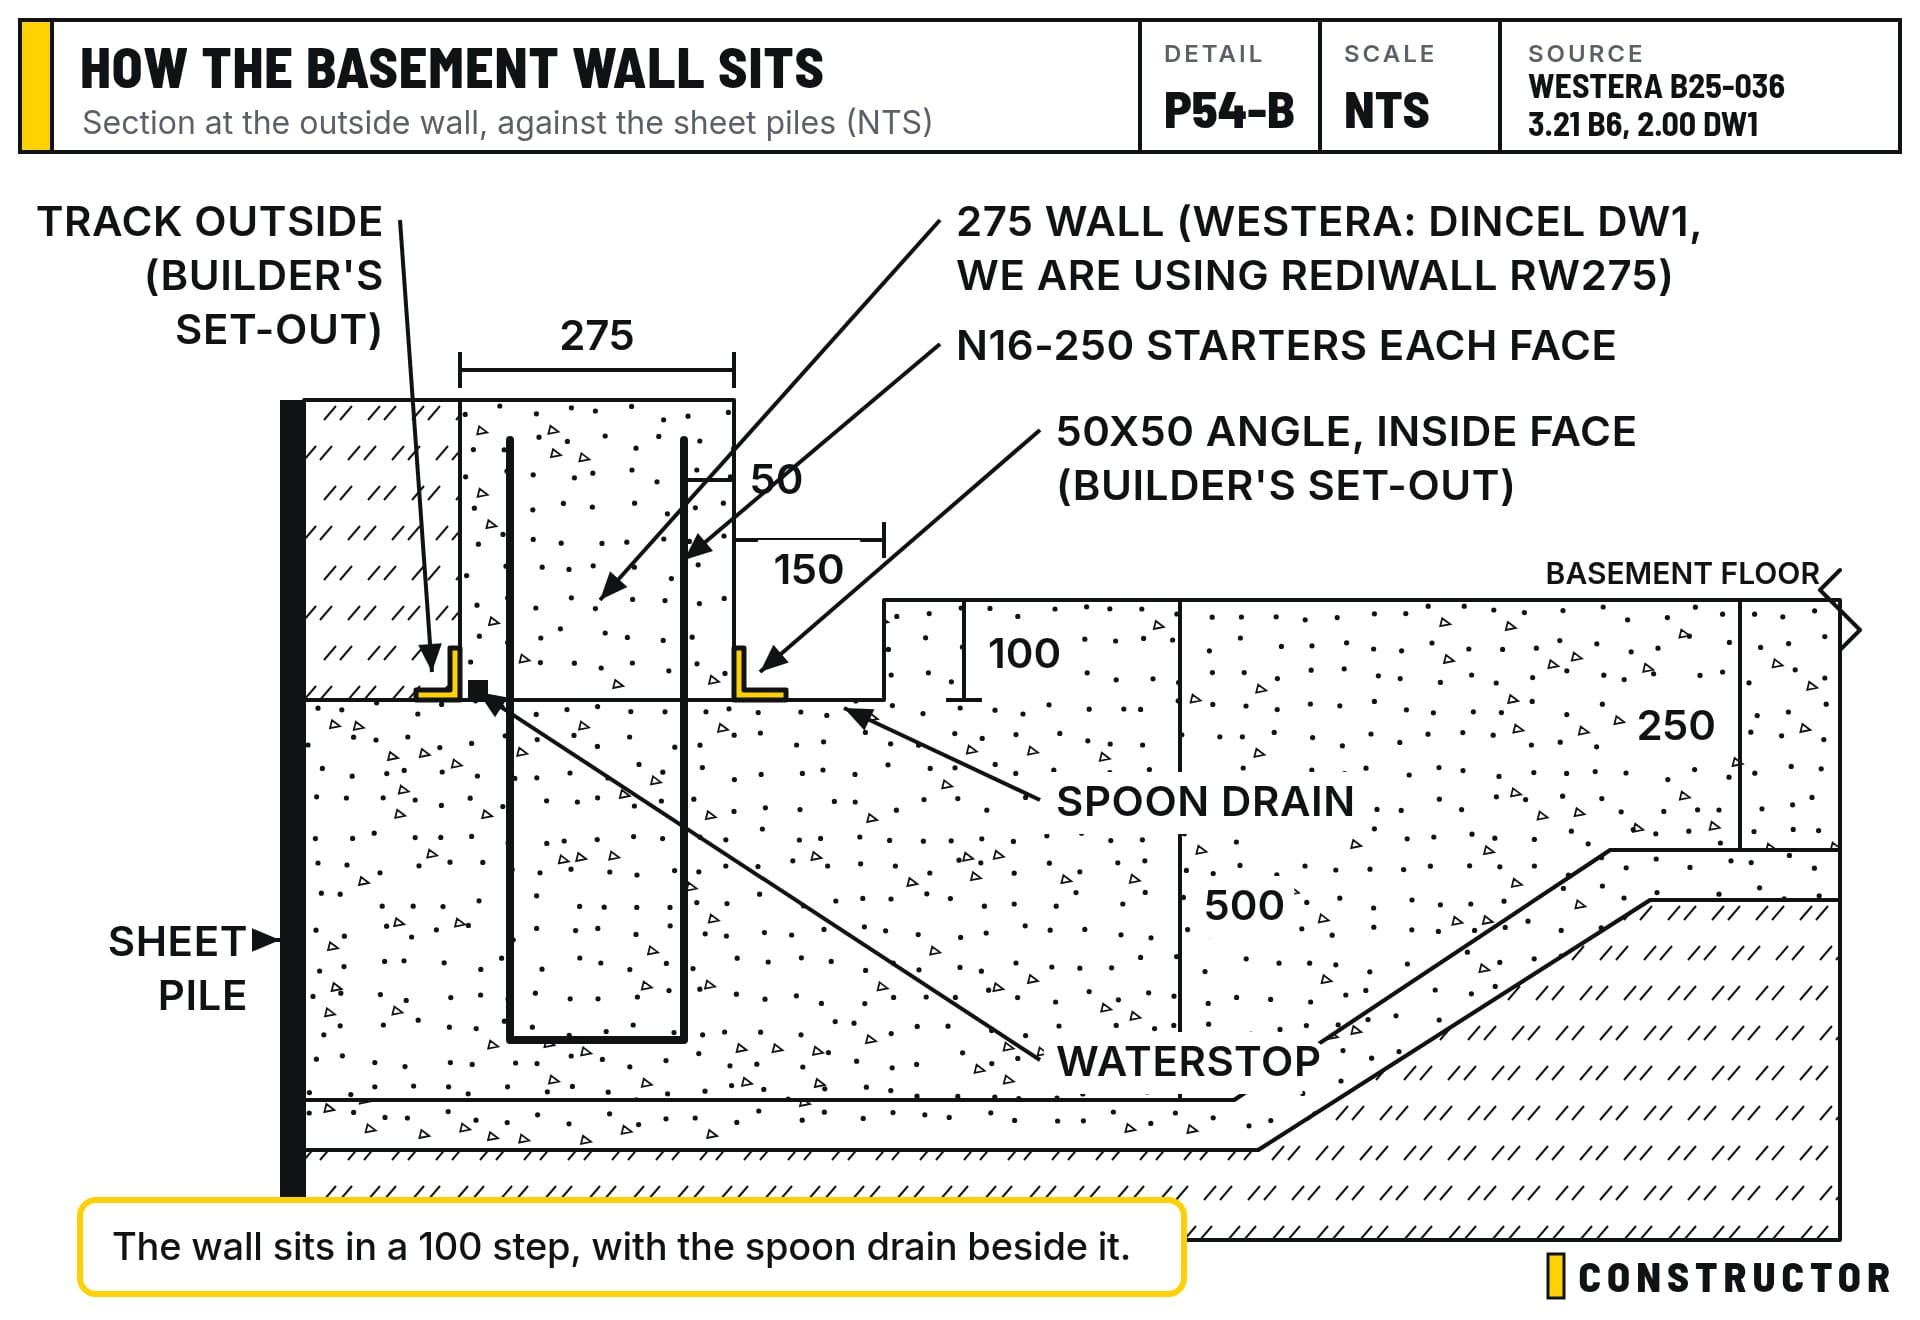
- A 50 x 50 angle goes down along the inside face as a fixed point, so the bottom of the wall can't move. It's glued and then fixed with Ramset powder-actuated fixings every 450 to 500 mm. The adhesive we're using is rated for green concrete, which means concrete less than 28 days old, not concrete that's actually green.
- A track goes on the outside. On one side we can't screw through, but the wall sits hard against the rebate, so it isn't going anywhere.
- The corners go up first, then the runs between them, then the infills.
Stairs and a steel stair base
The stairs were left in place for the pour, blocked up off the reo, and today they got cleaned up so no one trips on the concrete. The stair design isn't finished yet, so we set a piece of 19 mm form ply into the slab where the stair will land. That leaves a recess for a steel base plate later, so the steel stair stringers can be welded to it.
Plan your conduits before the walls are filled
The electrician was on site today to talk about the main power supply and the conduits for the basement. Some of the basement detailing isn't done yet, so we're getting conduits into the walls now as provisions for future points.
The basement will have a coffered ceiling with six large coffers. It'll look good, but mainly it lets us run plumbing and electrical across the basement, with a drop ceiling where we need it. We're also talking about battening out the walls horizontally, so points and light fittings can go anywhere, any time. That costs more and needs another wall finish, but it allows for future changes.
If you don't batten out a solid wall like this, it has to be detailed so the conduits are in the right place before the core fill. Otherwise you'll be chasing concrete walls later. That's doable, but not fun. Conduits are better.
A small logjam
The crane, the vacuum truck (here to empty the sediment tank) and a flatbed all turned up at once. People tell you they'll do things, but not always when. We took one thing at a time and it all worked out: no issues, no safety incidents, and a very productive day.
What's next
Tomorrow two labourers start the big push on the walls, and on Thursday we'll bring in five more. We're coordinating the steel delivery for the walls now. The order of work is: clean the slab, get the corners up, get the track down, stand the panels, and get the steel in, with each person chasing the one in front. We've allowed five to six days to get the basement walls up, and we're aiming to have the ground floor done before Christmas.
I'll post another video once the walls are going up, and explain how the Rediwall goes together.
After your own slab is poured, our C6 Post-Pour Slab Inspection Checklist takes you through what to check.

C6 - Post Pour Slab Inspection Checklist
$59.00 AUD
Last updated 28 Oct 2026 · Revision 4 · Free updates for life
Checklist Type: Minor
Form Factor: Fillable, print-ready PDF (A4, 21 pages)
When to use: After the concrete pour, before the frame goes up
A 61-point checklist to inspect your slab after the pour: records, curing, edges, levels, pipes and cracks, while repairs are still easy to arrange.
✓ Authorship verified on the blockchain · View certificate