
This one starts in the site office, because I hit record a bit early. So you get a quick look at how we run the job behind the scenes, and then we head down into the basement to look at the tanks. They're braced, sealed and ready to pour tomorrow.
The systems behind the job
Most of the paperwork lives in a set of small apps we built for the project. I'll do a proper screencast later, because filming a monitor on a phone doesn't do it justice. Here's the short version:
- Call-ups. Every inspection, delivery and trade booking, so nothing gets missed.
- Site correspondence and requests for quotes.
- Daily progress, tasks and client requests.
- Calls and conversations, and the contact list.
- The gold star list (and the other list). This is where we record the contractors and suppliers we'd happily use again, and the ones we wouldn't.
There are separate apps for project management, site management, quality, and reports and safety. The rest are admin apps that feed those.
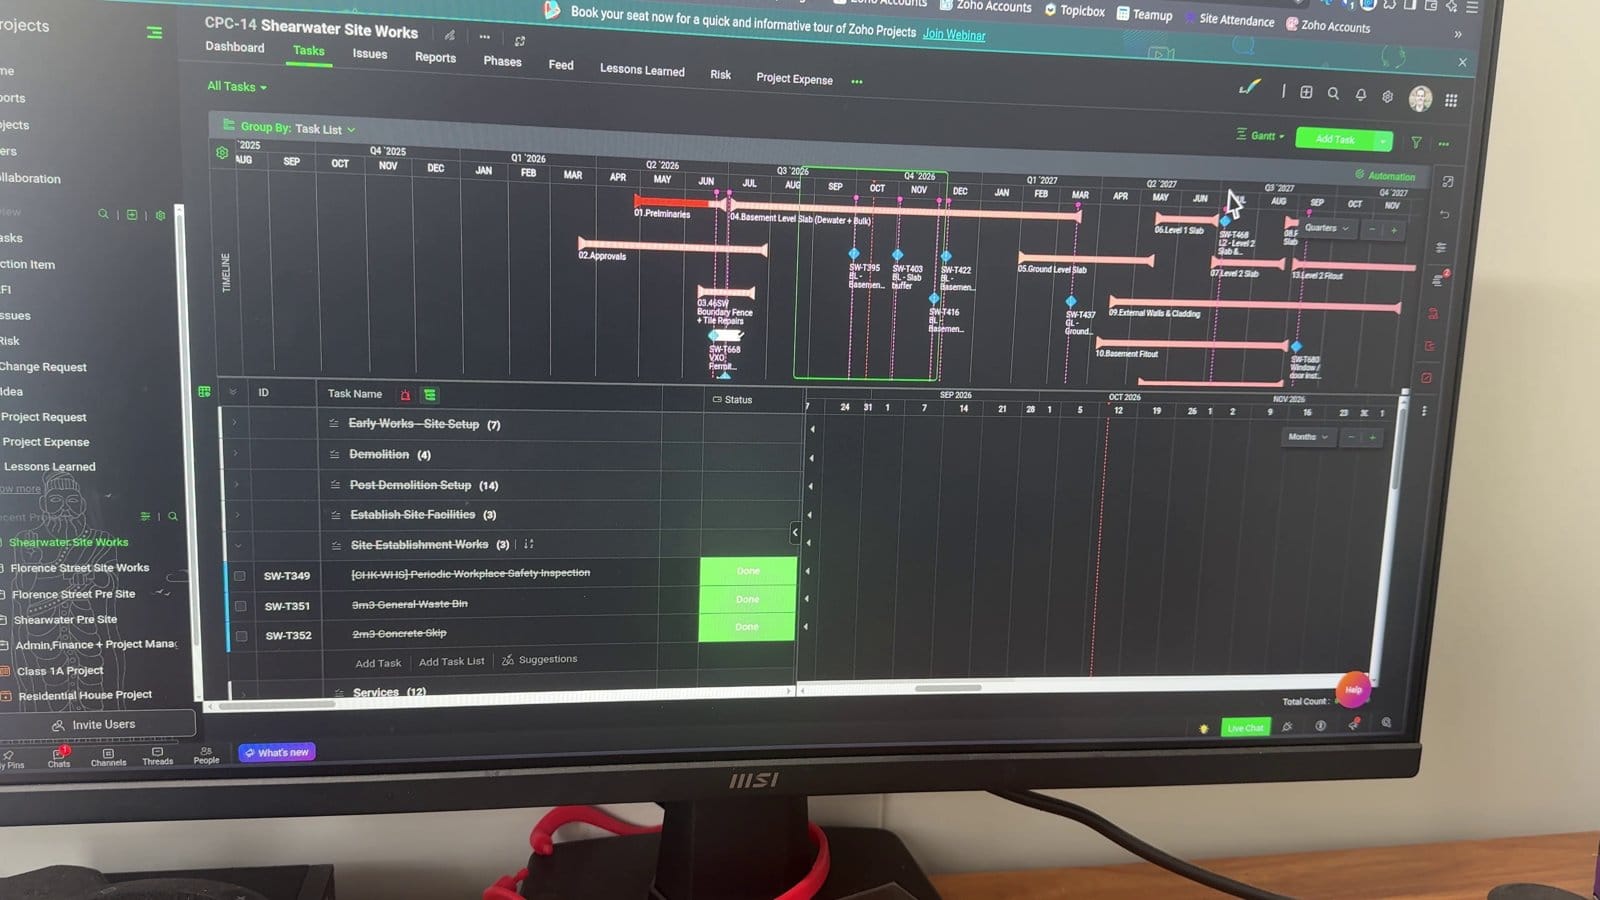
We also run a full Gantt chart for the build, with the critical path marked. It gets updated regularly, and we save a baseline at the end of every month. That makes it easy to see what changed and why.
On another screen is the look-ahead calendar. That's the one I share with the client and the contractors. It holds the call-ups and safety reports, and it's also how we let the neighbours know what's coming up.
The site office
If you've ever wondered what's in a site office, it's not very exciting:
- Hi-vis, hard hats, glasses and keys.
- A printer, a full set of plans and a marked-up set.
- The management plans (dewatering, vibration and the rest), and the safety plan.
- Coffee, a microwave, a fridge and an air fryer.
- Lots of whiteboards.
Then there's my wall. I look like a crazy person, but it does make sense. It has the approvals and permits: the plumbing approval, the vibration management paperwork, details and rates. There's also a quote for a fire suppression system that I still need to look into.
A day lost to the steel fixers
Today was meant to be the day the steel fixers started on the slab. Instead they got sent to another job, which is frustrating when dewatering costs about $3,000 a day (Post 40 explains why).
So today was just a 40-tonne crane lift to bring in the replacement steel. The steel fixers are back tomorrow.
The tank pour is booked for 2 pm tomorrow, the earliest slot we could get. The pump arrives at 1:30 and the concrete at 2:00. There's about 6.5 m³ on call, so it'll come on two trucks.
The tanks, braced and sealed
The plumber was back today and reconnected everything. Around each pipe:
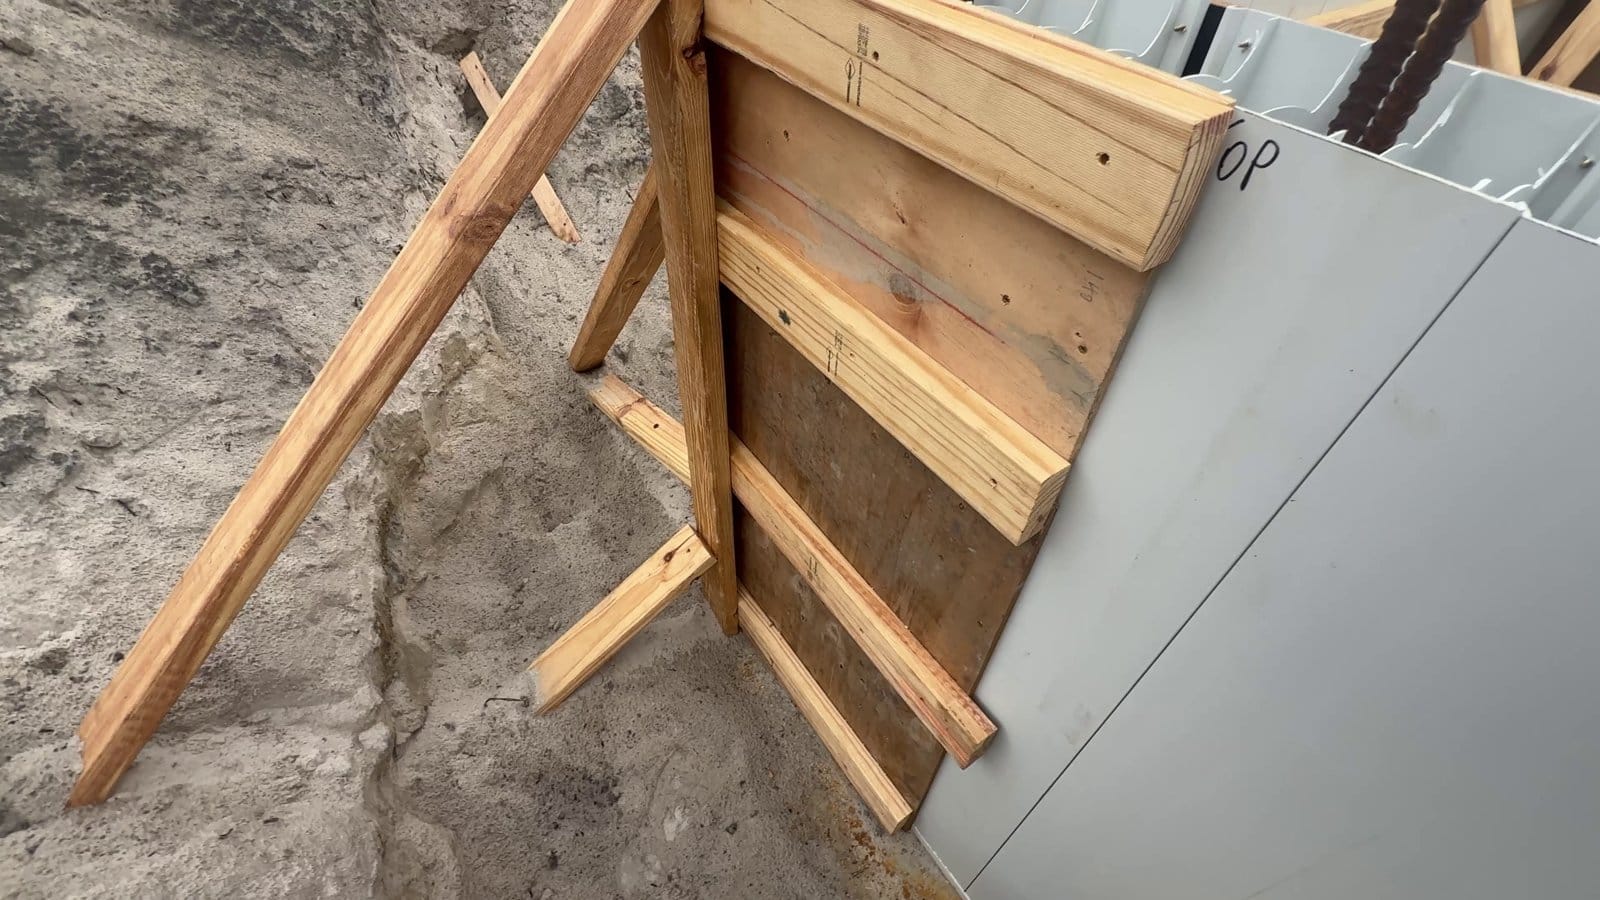
- Ply covers. The oversized holes cut in the Rediwall have ply screwed over them and sealed to the wall, so the core fill can't run out.
- Waterstop. Each pipe has a hydrophilic waterstop ring around it, at the middle of the wall. Some of them were hard to get on, but they're there.
- Conduits. The orange conduits are for the pump wires.
- Lagging. The pipes outside the tank are double-lagged, so they can move with the ground. The allowance is about 20 mm of expected settlement.
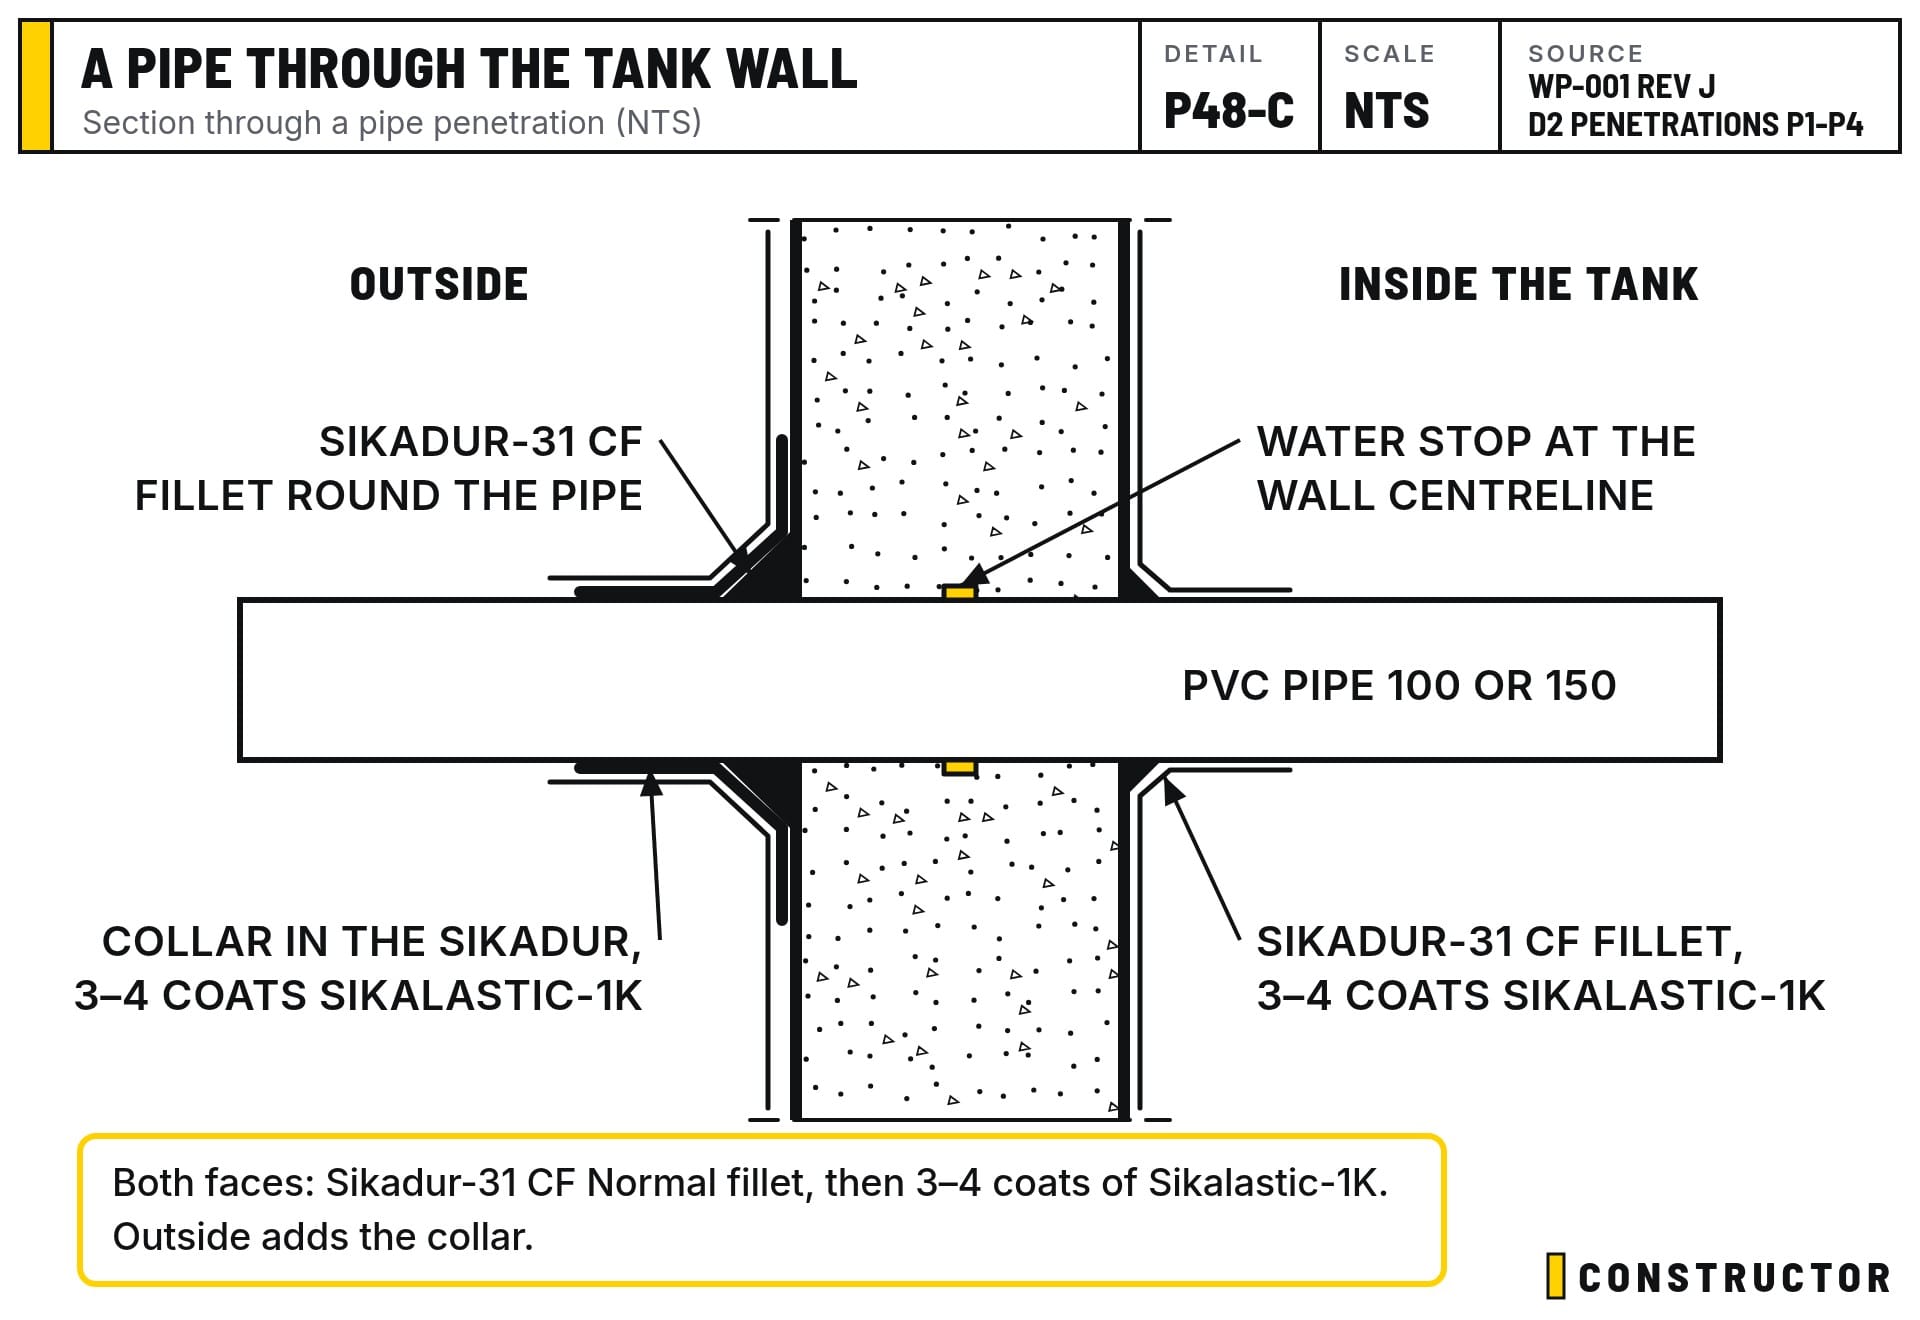
The waterproofing plan for the pipes has been refined since Post 47. The outside gets a Sikadur-31 CF Normal epoxy fillet around the pipe, then a flexible band collar bedded into the wet epoxy, then 3–4 coats of Sikalastic-1K membrane. The inside gets a Sikadur-31 CF Normal fillet with 3–4 coats of Sikalastic-1K over it. We've also swapped the Combiflex band for a WPA Elastoband bedded in Sikadur-31 epoxy, which does the same job without heat welding.
Everything is fully braced for the pour, and all the penetrations are sealed with adhesive except one, which I'll finish in the morning. The engineer has been booked to inspect the steel before we pour.
Steel in the walls
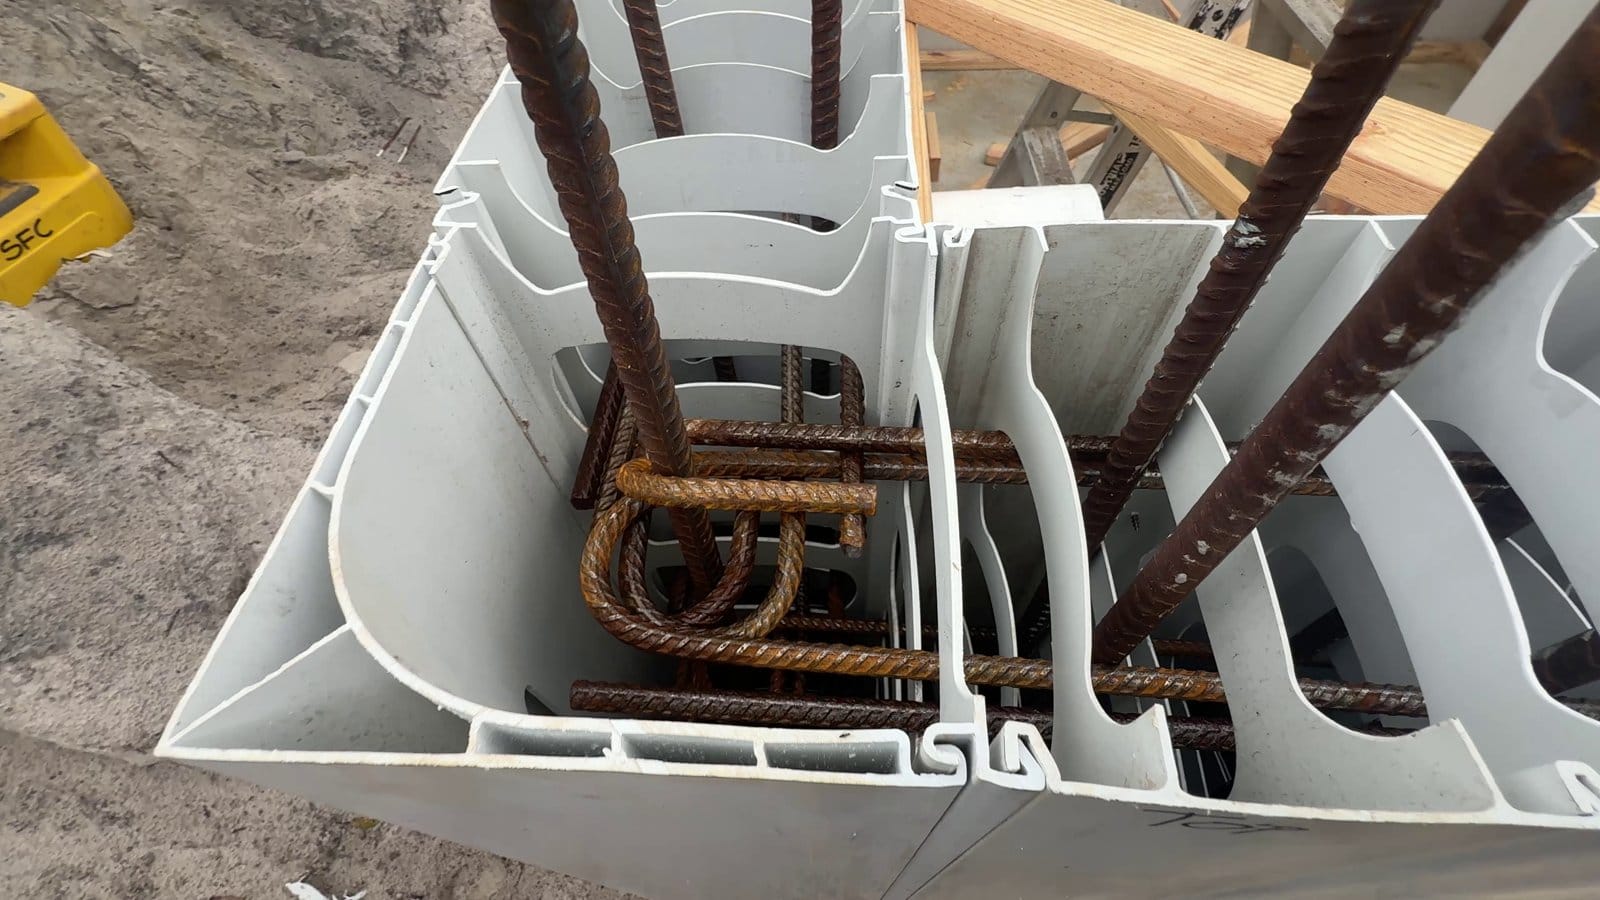
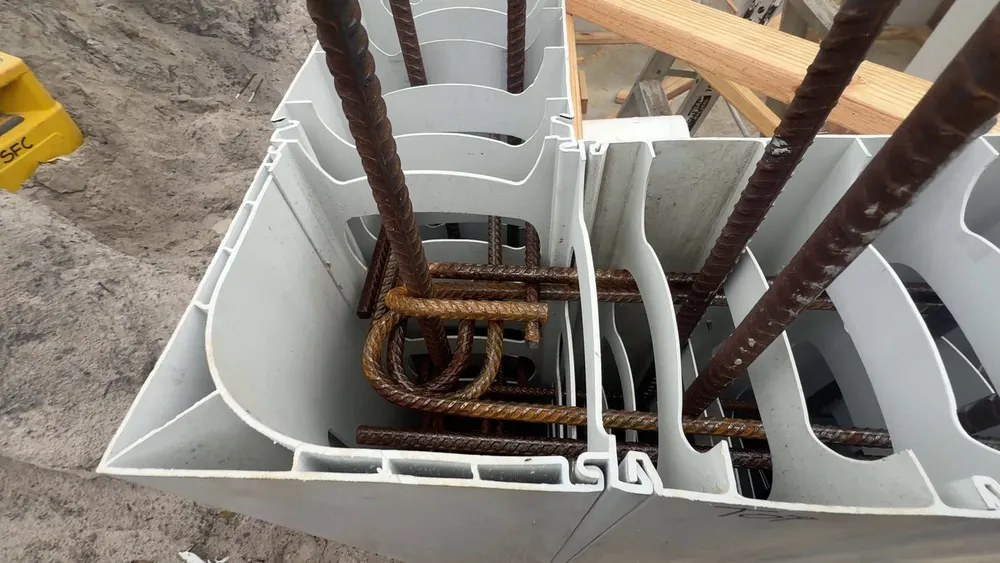
You can see the horizontal bars running through the cells and the vertical bars between them. At every corner there are 600 mm corner bars, those little candy-cane shapes, one at each face. They lap with the straight horizontals so the two walls act as one. Every second course has a pair of horizontals, one near each face, all the way up the wall.
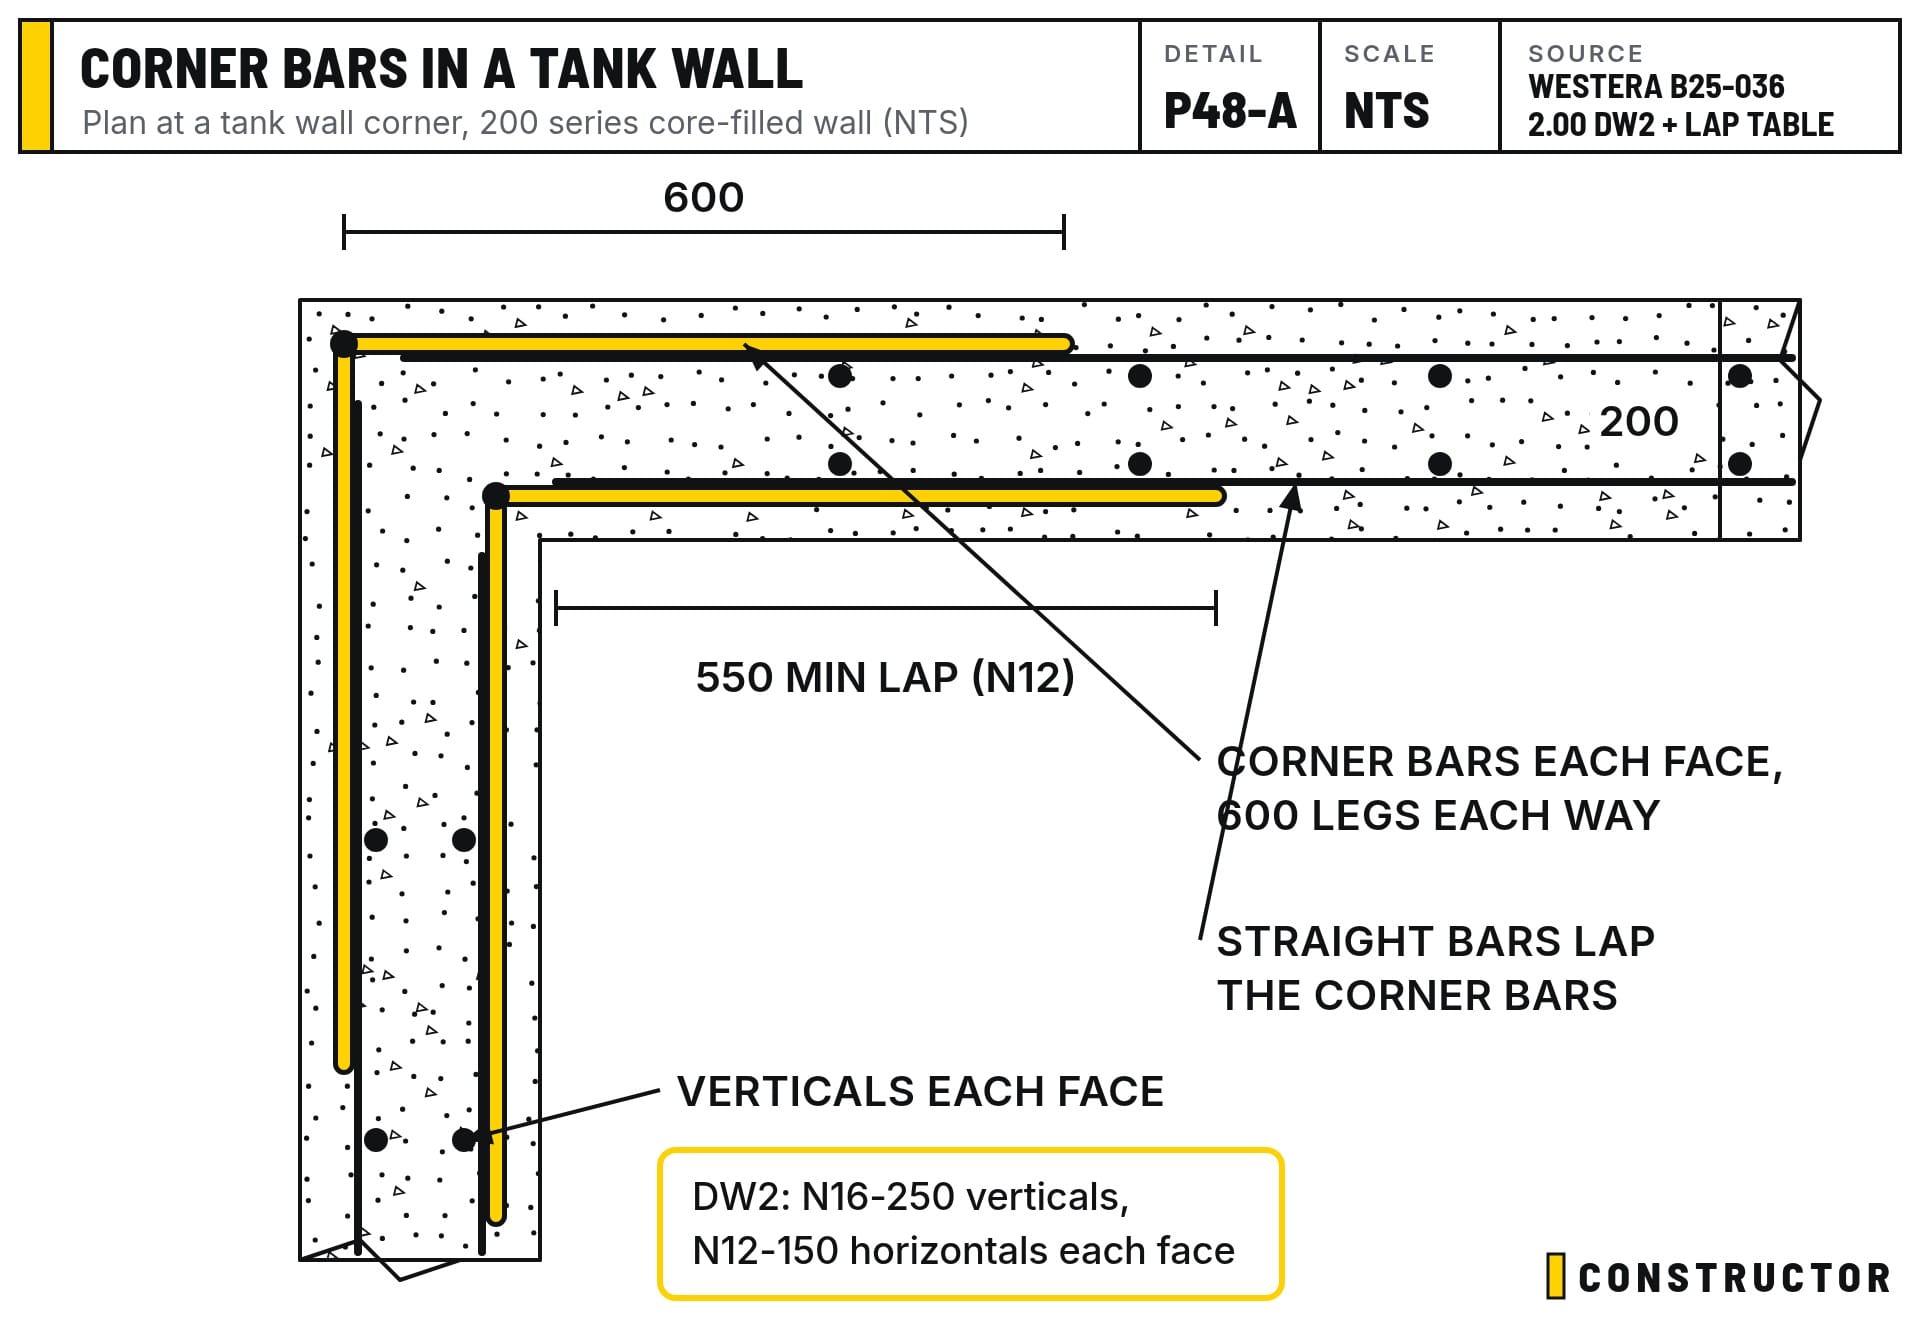
Westera's drawings call for hooked N12 corner bars matching the horizontal bar spacing, with a minimum lap of 550 mm for N12 bars. The 600 mm legs cover that.
The concrete for the walls will be 10 mm aggregate instead of 20 mm. With this much steel, 20 mm stone just won't flow into the gaps, and we don't want blockages. We're going to use 10 mm for all the wall pours, even in the 275 mm walls. Westera's notes allow up to 20 mm aggregate, so 10 mm is within the spec.
The starters and the waterstop
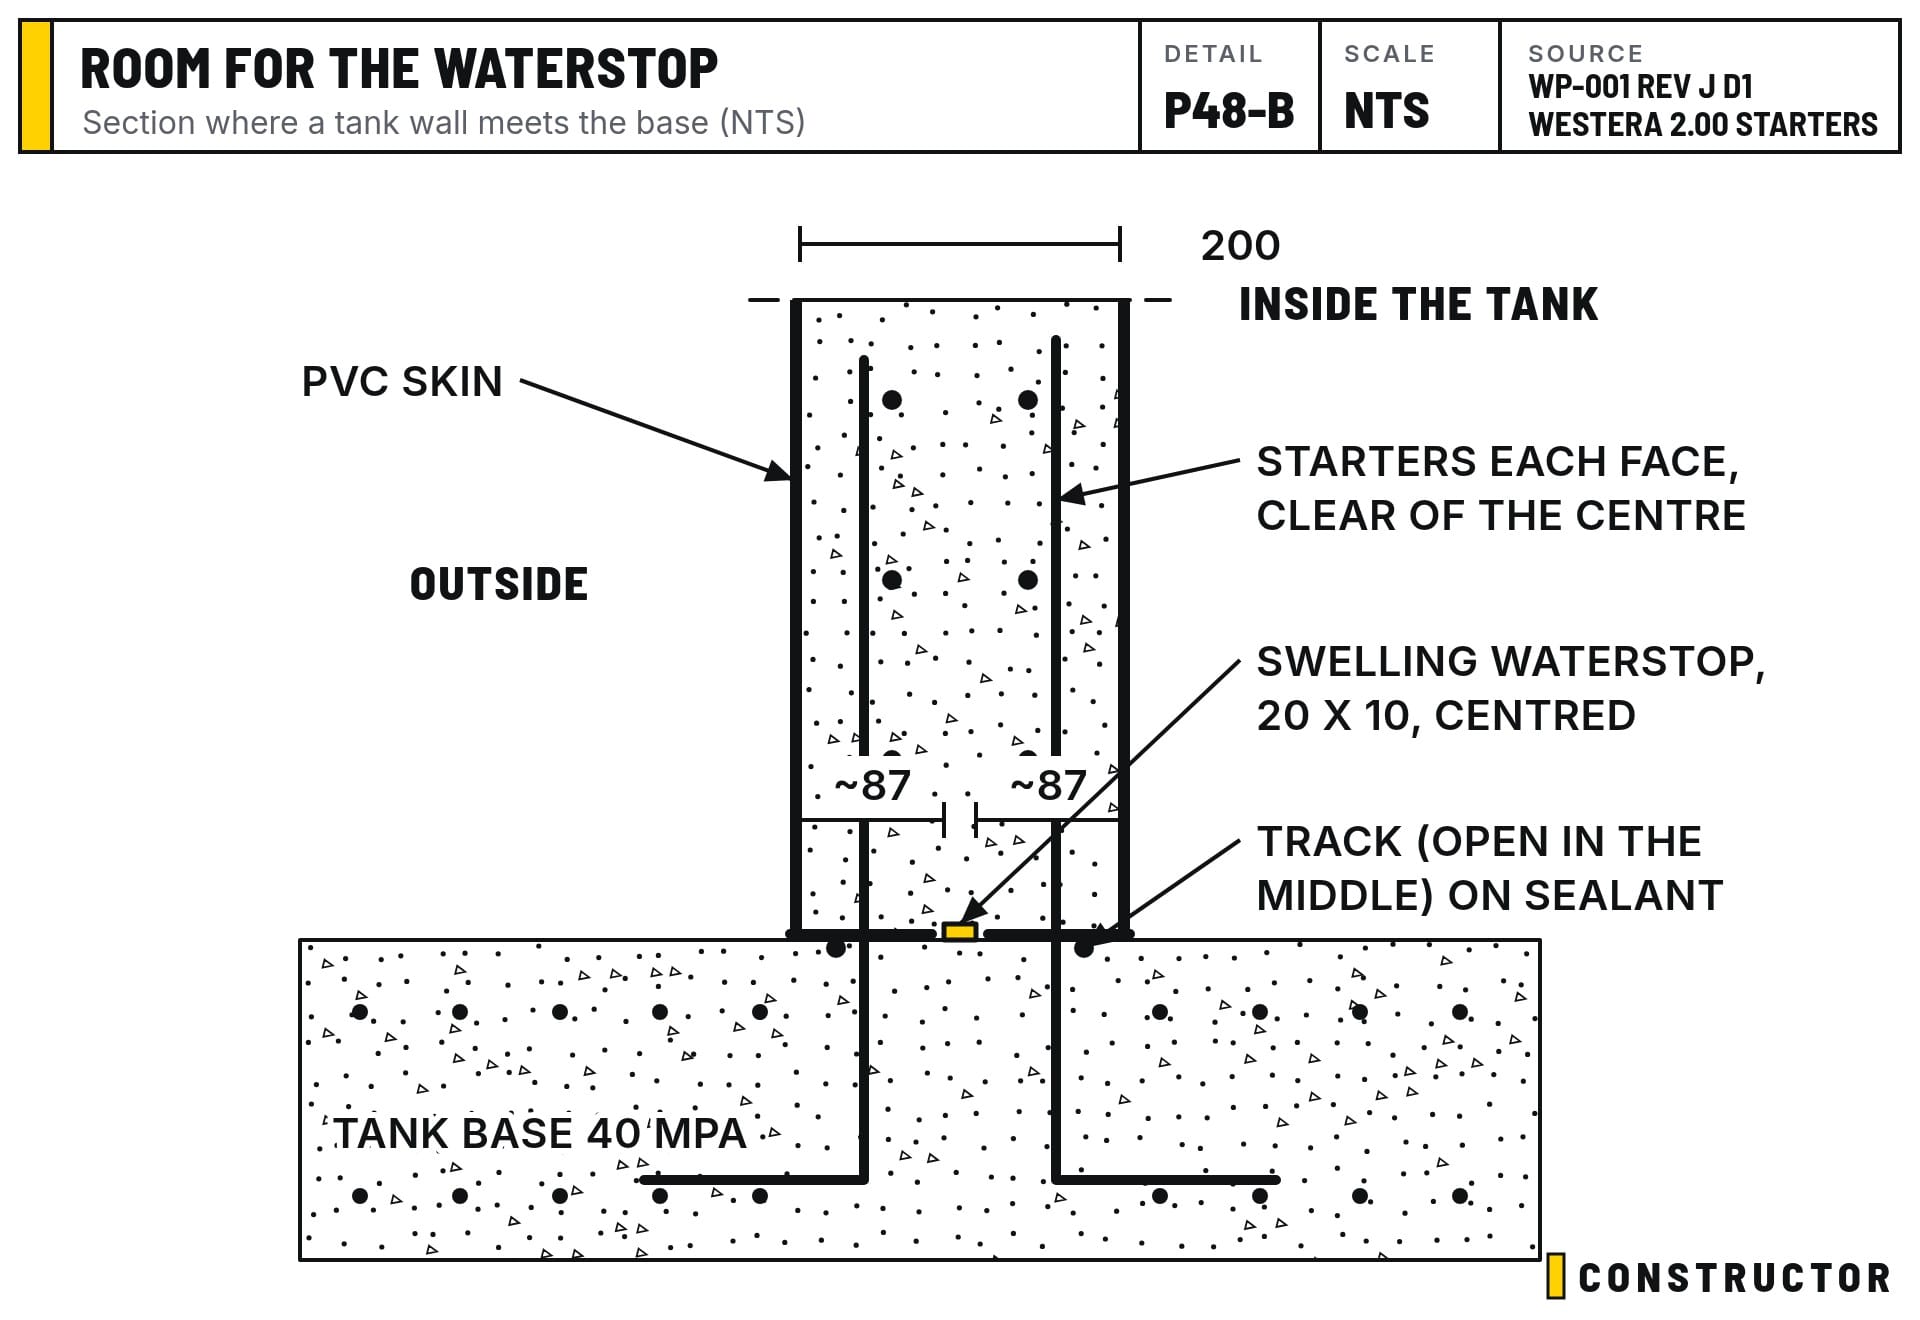
We've been talking to the concreters about getting the starter bars in better positions. The starters need to sit near each face, leaving a clear gap down the middle for the waterstop under the wall. Westera's notes say the starter position is critical, and to tell the engineer before the wall goes on if any bars are out.
The starters for the slab over are in too. I just need to seal one small socket.
Rusty steel is fine. Cover is what matters
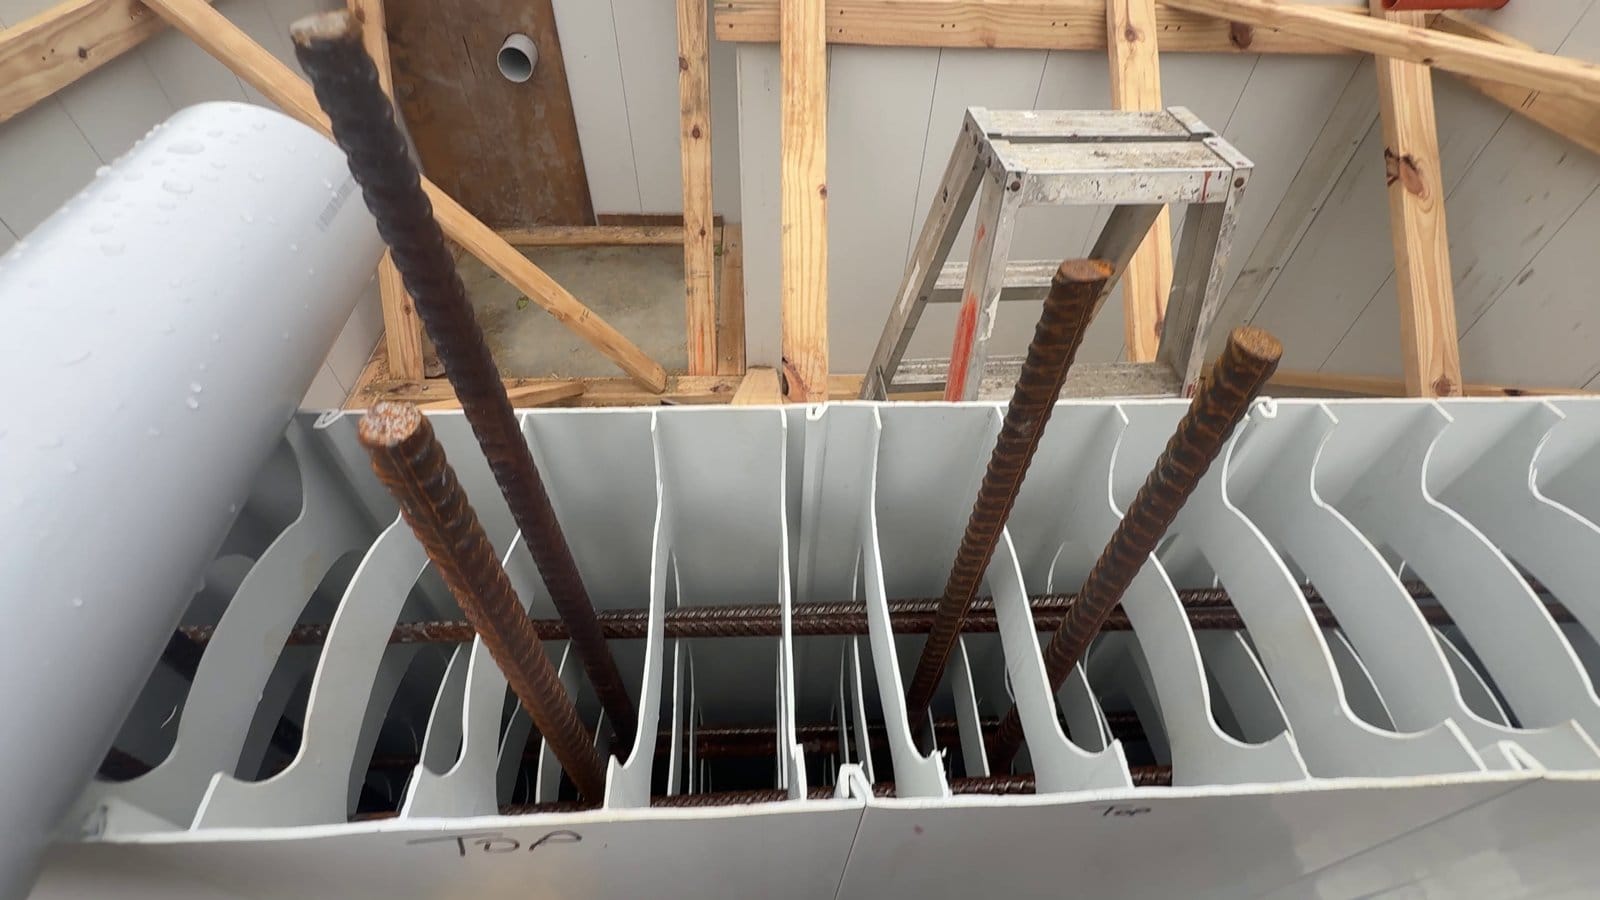
All of this is Y12 deformed bar, and people often worry when they see it rusty. Don't stress. Light surface rust actually helps the concrete grip the bar, so you don't need clean, shiny steel. Once the bar is fully encased in concrete, there's no air getting to it. (Loose, flaky scale is a different matter and should be knocked off.)
The thing that ruins steel is a lack of cover: the depth of concrete between the bar and the outside surface. The closer the steel is to air and moisture, the more likely you'll get concrete cancer. The steel rusts and expands, which cracks the concrete and pushes off whatever is stuck to it. When you see tiles or facade panels falling off a building, it's usually because the cover was poor and the steel rusted behind it.
That's why the drawings set the cover for every element. For the tank base here, Westera specifies 40 MPa concrete with 50 mm bottom cover and 45 mm top cover.
Waterproofing and what's next
Once the walls are poured, we only have one day to waterproof them. The plan:
- Make sure the products are on site tomorrow.
- Strip and clean the formwork.
- Coat the joins and corners, then the walls.
- Form up inside the tanks to support the slab deck, so we can form and cast in the Gatic lids.
- Backfill behind the tanks on Friday.
We've also coordinated another crane with the concreter for the C and D steel layers. The fixers will do the A and B layers tomorrow, so the C and D layers have somewhere to land when they arrive next week. The excavator arrives Friday, ready for Monday. Then there's one more pour for the blinding. We'll blind both areas at the same time, because a pump visit costs around $6,000 and it makes sense to get it all done in one go.
A tip for when the engineer comes out
The engineer asked us to send a video of the steel, but it's very hard to show properly on video, so we asked him to come to site. An engineer's site visit generally costs about $500, even if they're only there for five minutes.
My advice is to get your money's worth. Have your questions ready and pick their brain while they're on site. Ask about anything else you'd like guidance on, not just the item they came to inspect.
I'll film the pour next. It's a bit more exciting: there's more noise, and everyone likes a noisy construction site with big toys.

