Welcome back. This one's a day-by-day progress update rather than the usual weekly round-up. The big push today was the tanks, because they're the sticking point for everything else: until they're poured, waterproofed and backfilled, the main slab steel can't run through.
The acoustic enclosure, up close
The dewatering pump sits inside the acoustic enclosure. A noise meter reads about 72 to 79 dB right at the pump, and noise control is part of the dewatering management plan.
It's built from cheap, lightweight Bunnings temporary fence panels (1,800 x 2,400 mm), with shade cloth, Earthwool and CSR acoustic batts. The tarps came from an auto supplier in South Australia. I punched eyelets into them and zip-tied them on with plenty of budget zip ties. During the day the front is opened up for ventilation, because it gets hot and the dewatering crew want the pump drawing air. At night it's closed and held with an occy strap. The whole thing rests on top of the fence panels, so it pulls apart quickly for servicing.
The froth on the filter primer is saponification: the treatment chemicals turn soapy and foam up. Water breaks it down. (The dewatering crew swear by WD-40 for that too, and for most of the machinery.)
Planning the backfill
- Steel. Replacement steel arrives tomorrow on a 40-tonne crane, to fix the bars that were scheduled too long (Post 46).
- The crane and kibble. On Friday a 70-tonne crane arrives. It's about 35 m to reach, so we measured it out. It lowers the little excavator down into the basement. The excavator loads a 0.6 m³ concrete kibble hanging off the crane, and the crane drops the sand in behind the tank walls to backfill them.
- The 14-tonne. Friday afternoon, after the crane has gone, the 14-tonne excavator comes back. On Monday it digs out the last of the fill, so we can finish the blinding and run the steel all the way through.
The Gatic lids (about 200 kg each, 600 x 600 openings) are on site, ready to be cast into the tank roofs.
Cutting steel in the heat
It was hot today, so I set up a steel cutting station in the shade. A few blocks act as a stop end. Measure once from the stop to the cutter, then feed each bar in and cut, cut, cut. Offcuts go to one side so they get used first. The bar cutter handles 12 mm easily, and 16 mm just takes more effort. A new 3.6 x 3.6 m tarp is on order to replace a $99 shade that didn't last.
Steel in the tank walls
Half the day went into the tanks, and there's a lot of steel in them.
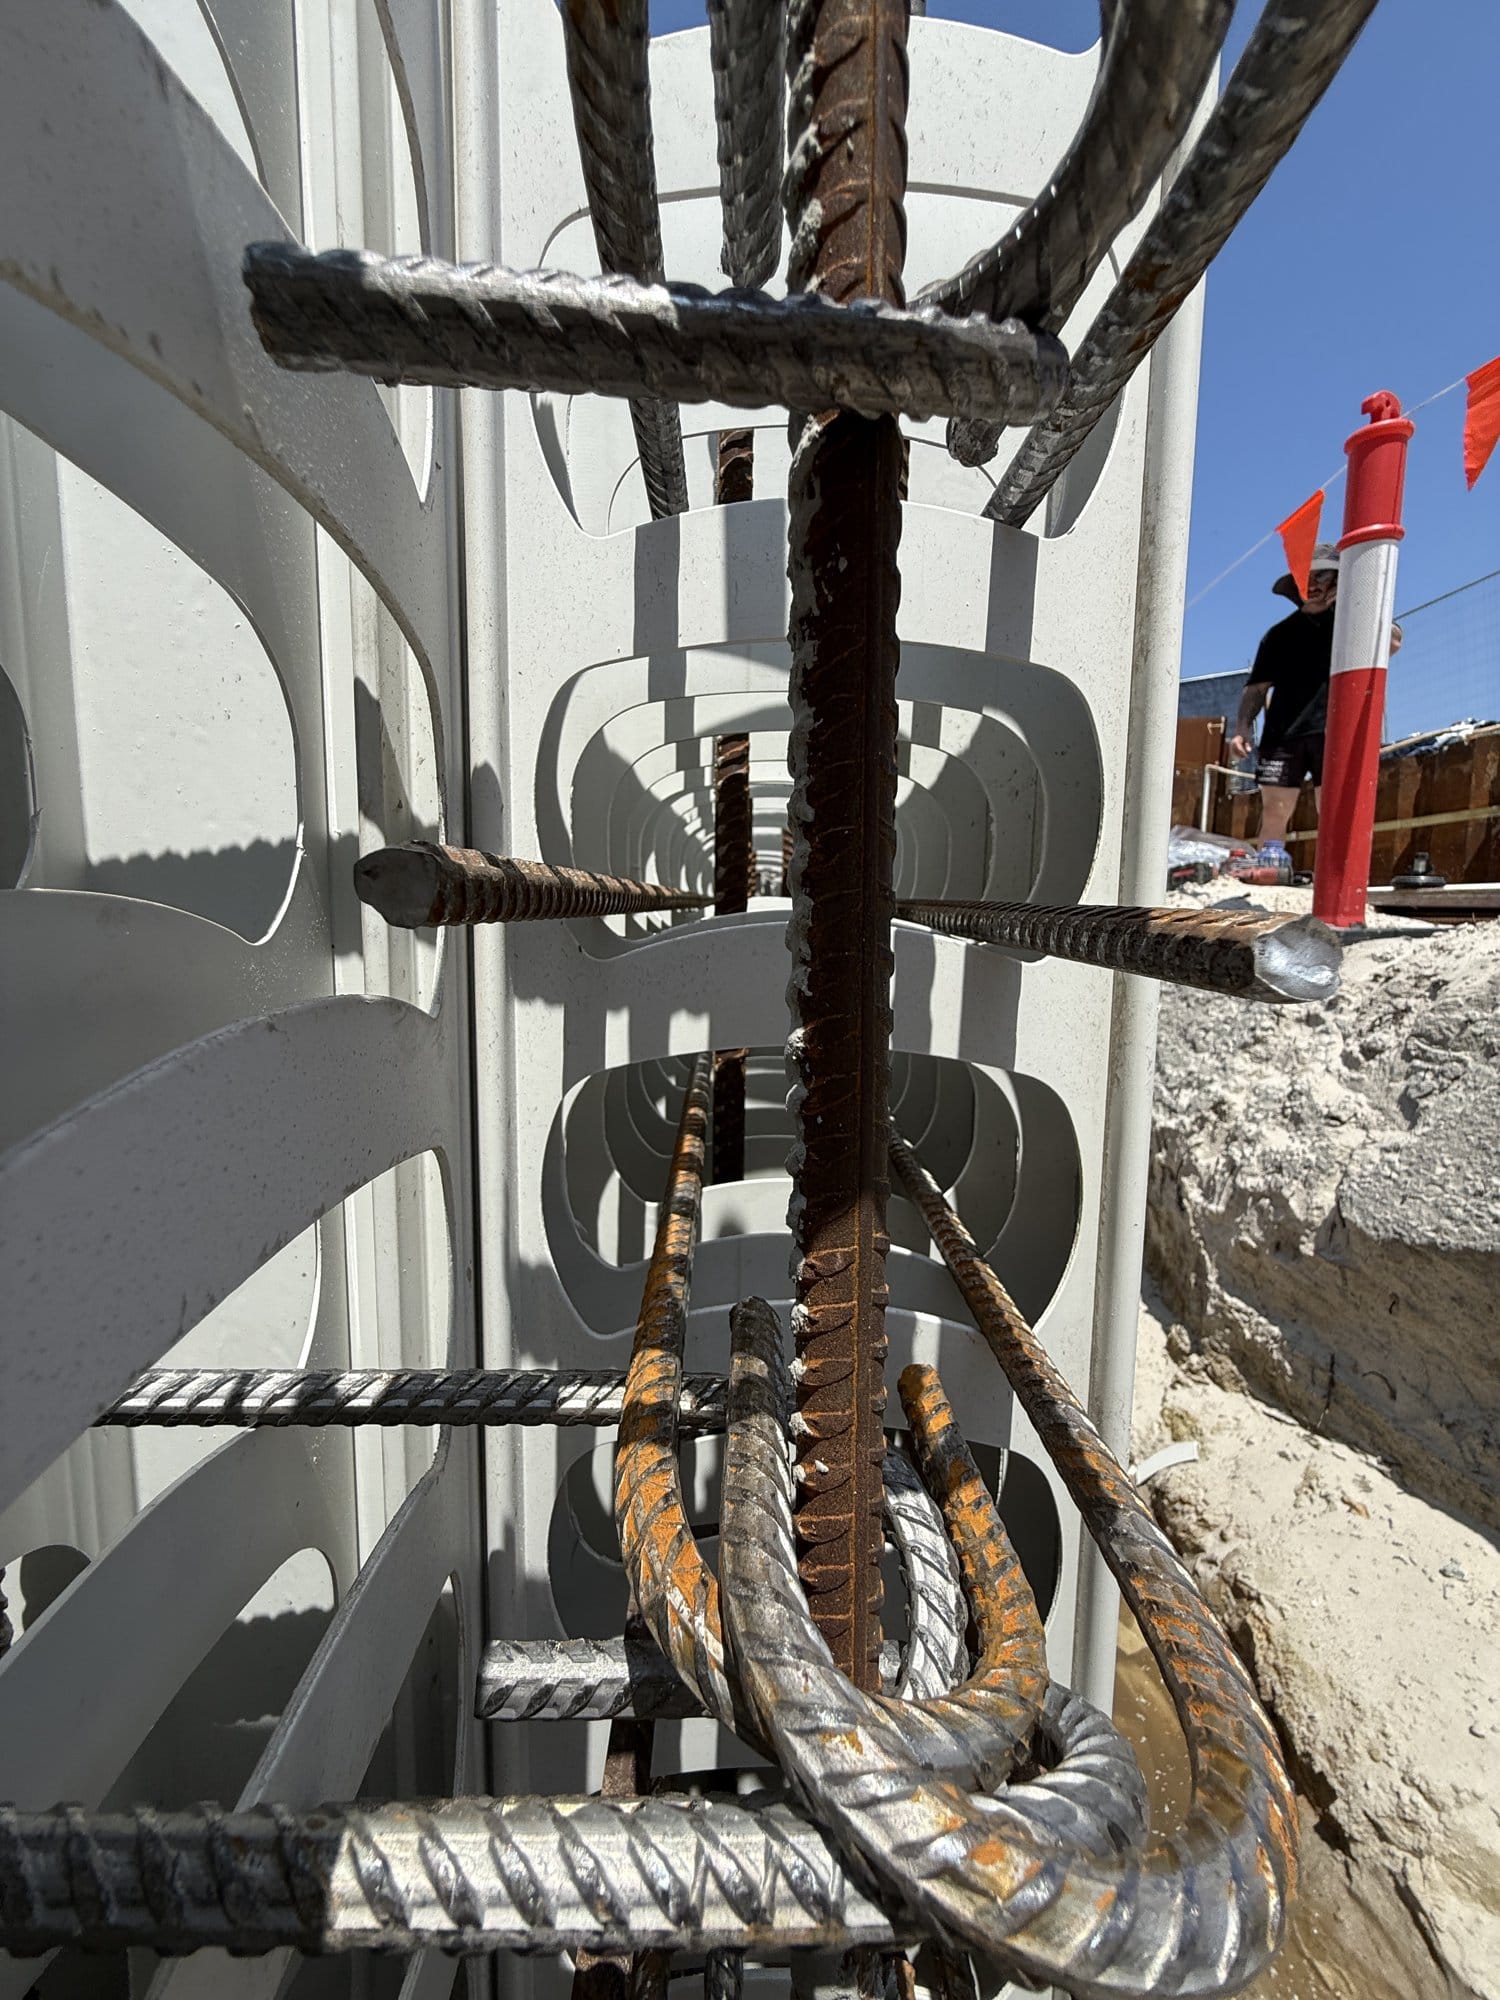
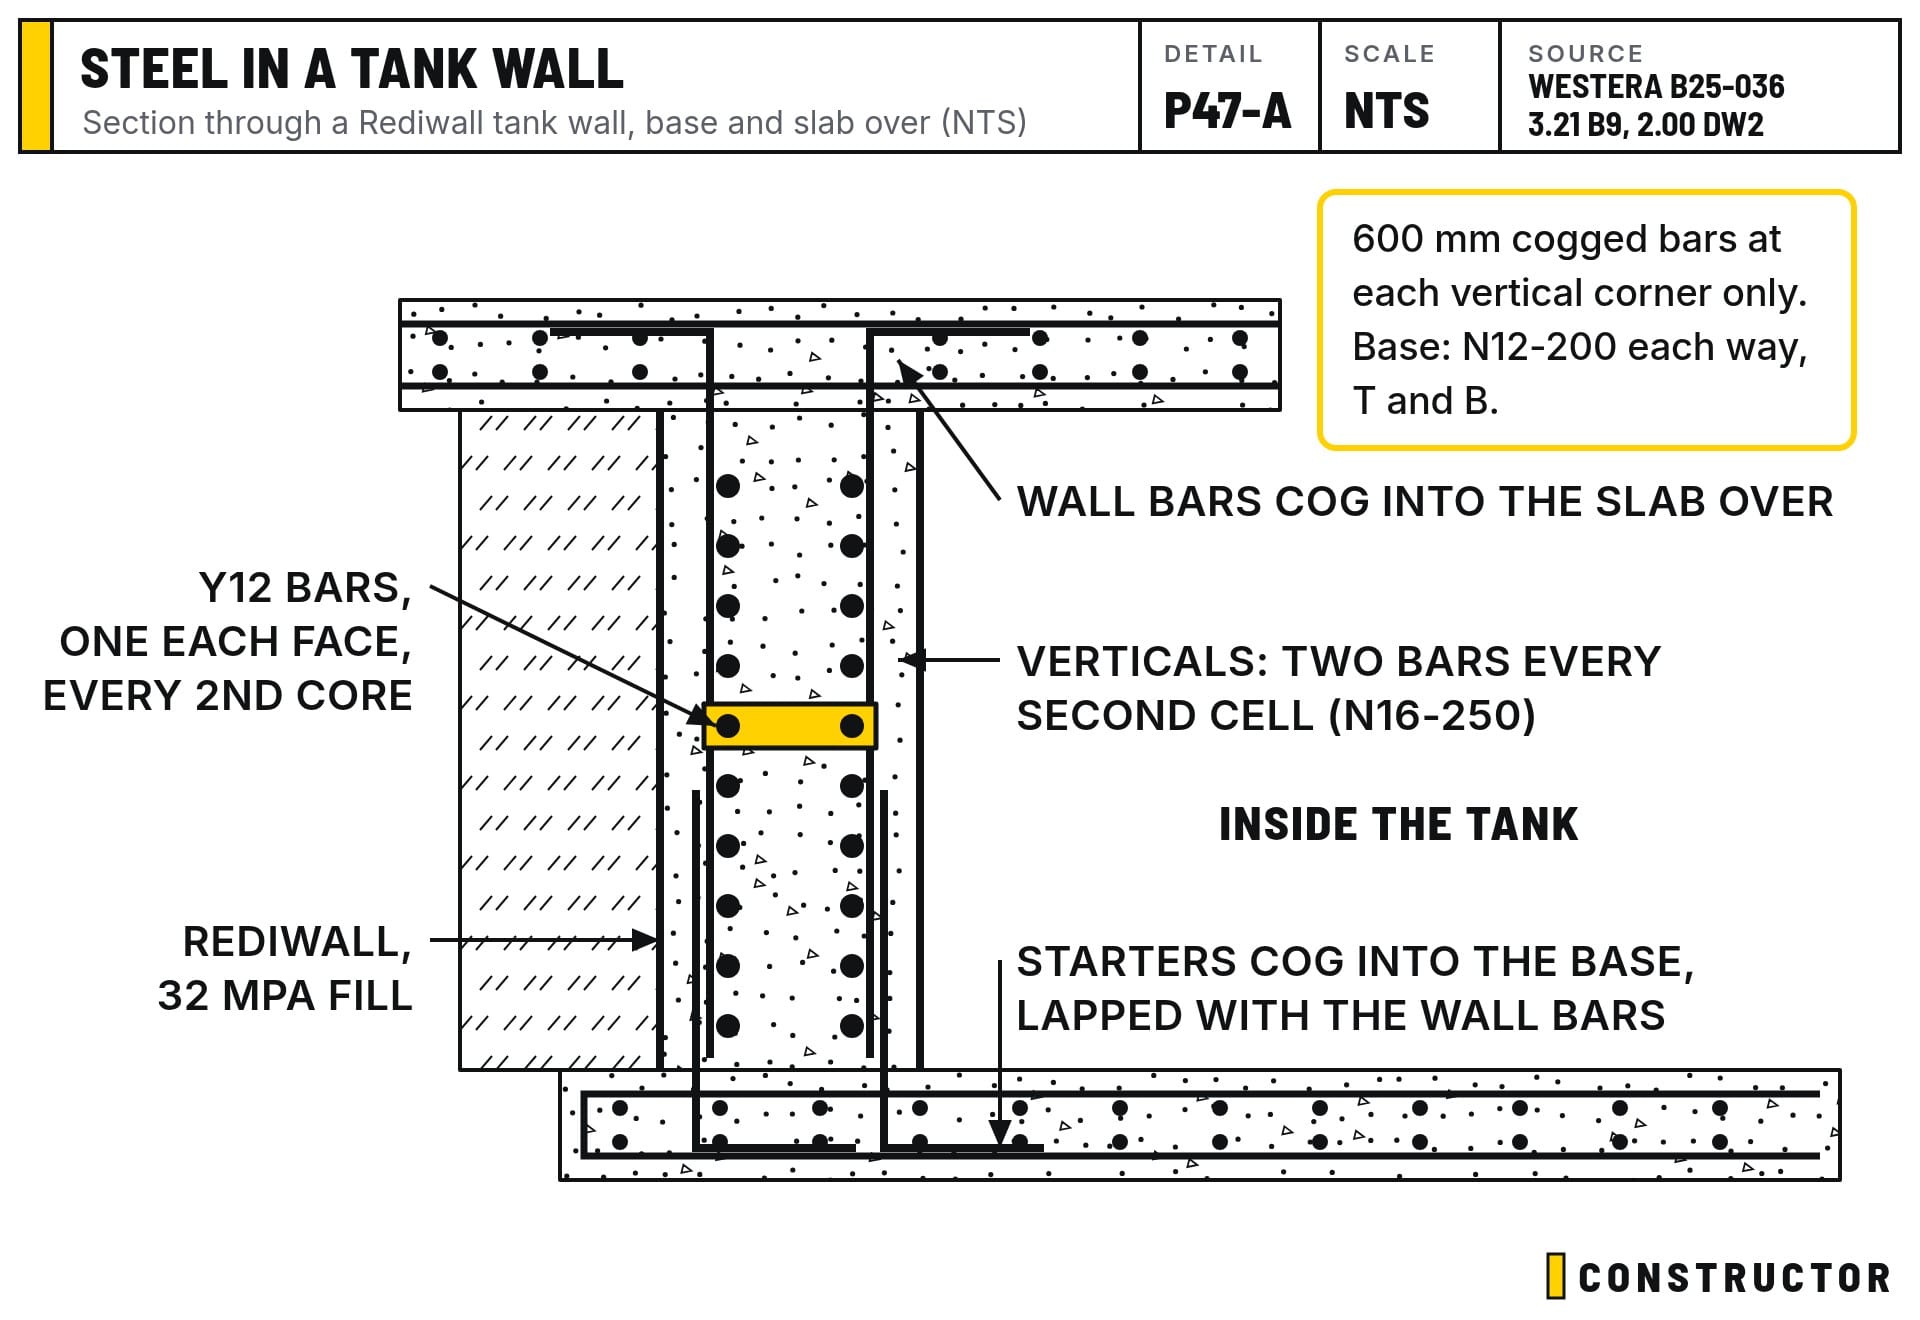
- Verticals. Two vertical bars go in every second cell of the Rediwall, one near each face. Westera's DW2 wall schedule calls for N16 bars at 250 mm centres on each face.
- Horizontals. Looking at the wall from the side, there are two Y12 bars (one each face) in every second core, all the way up the wall and along its full length.
- Cogged corner bars. The 600 mm cogged bars (bars with a bent end) go only in the vertical corners, where one wall meets the next, to tie the corners together.
- Starters and droppers. Starters cogged into the tank base lap with the wall verticals, and the wall bars cog into the slab over the top, tying the tank into the main slab. The droppers get set to height tomorrow.
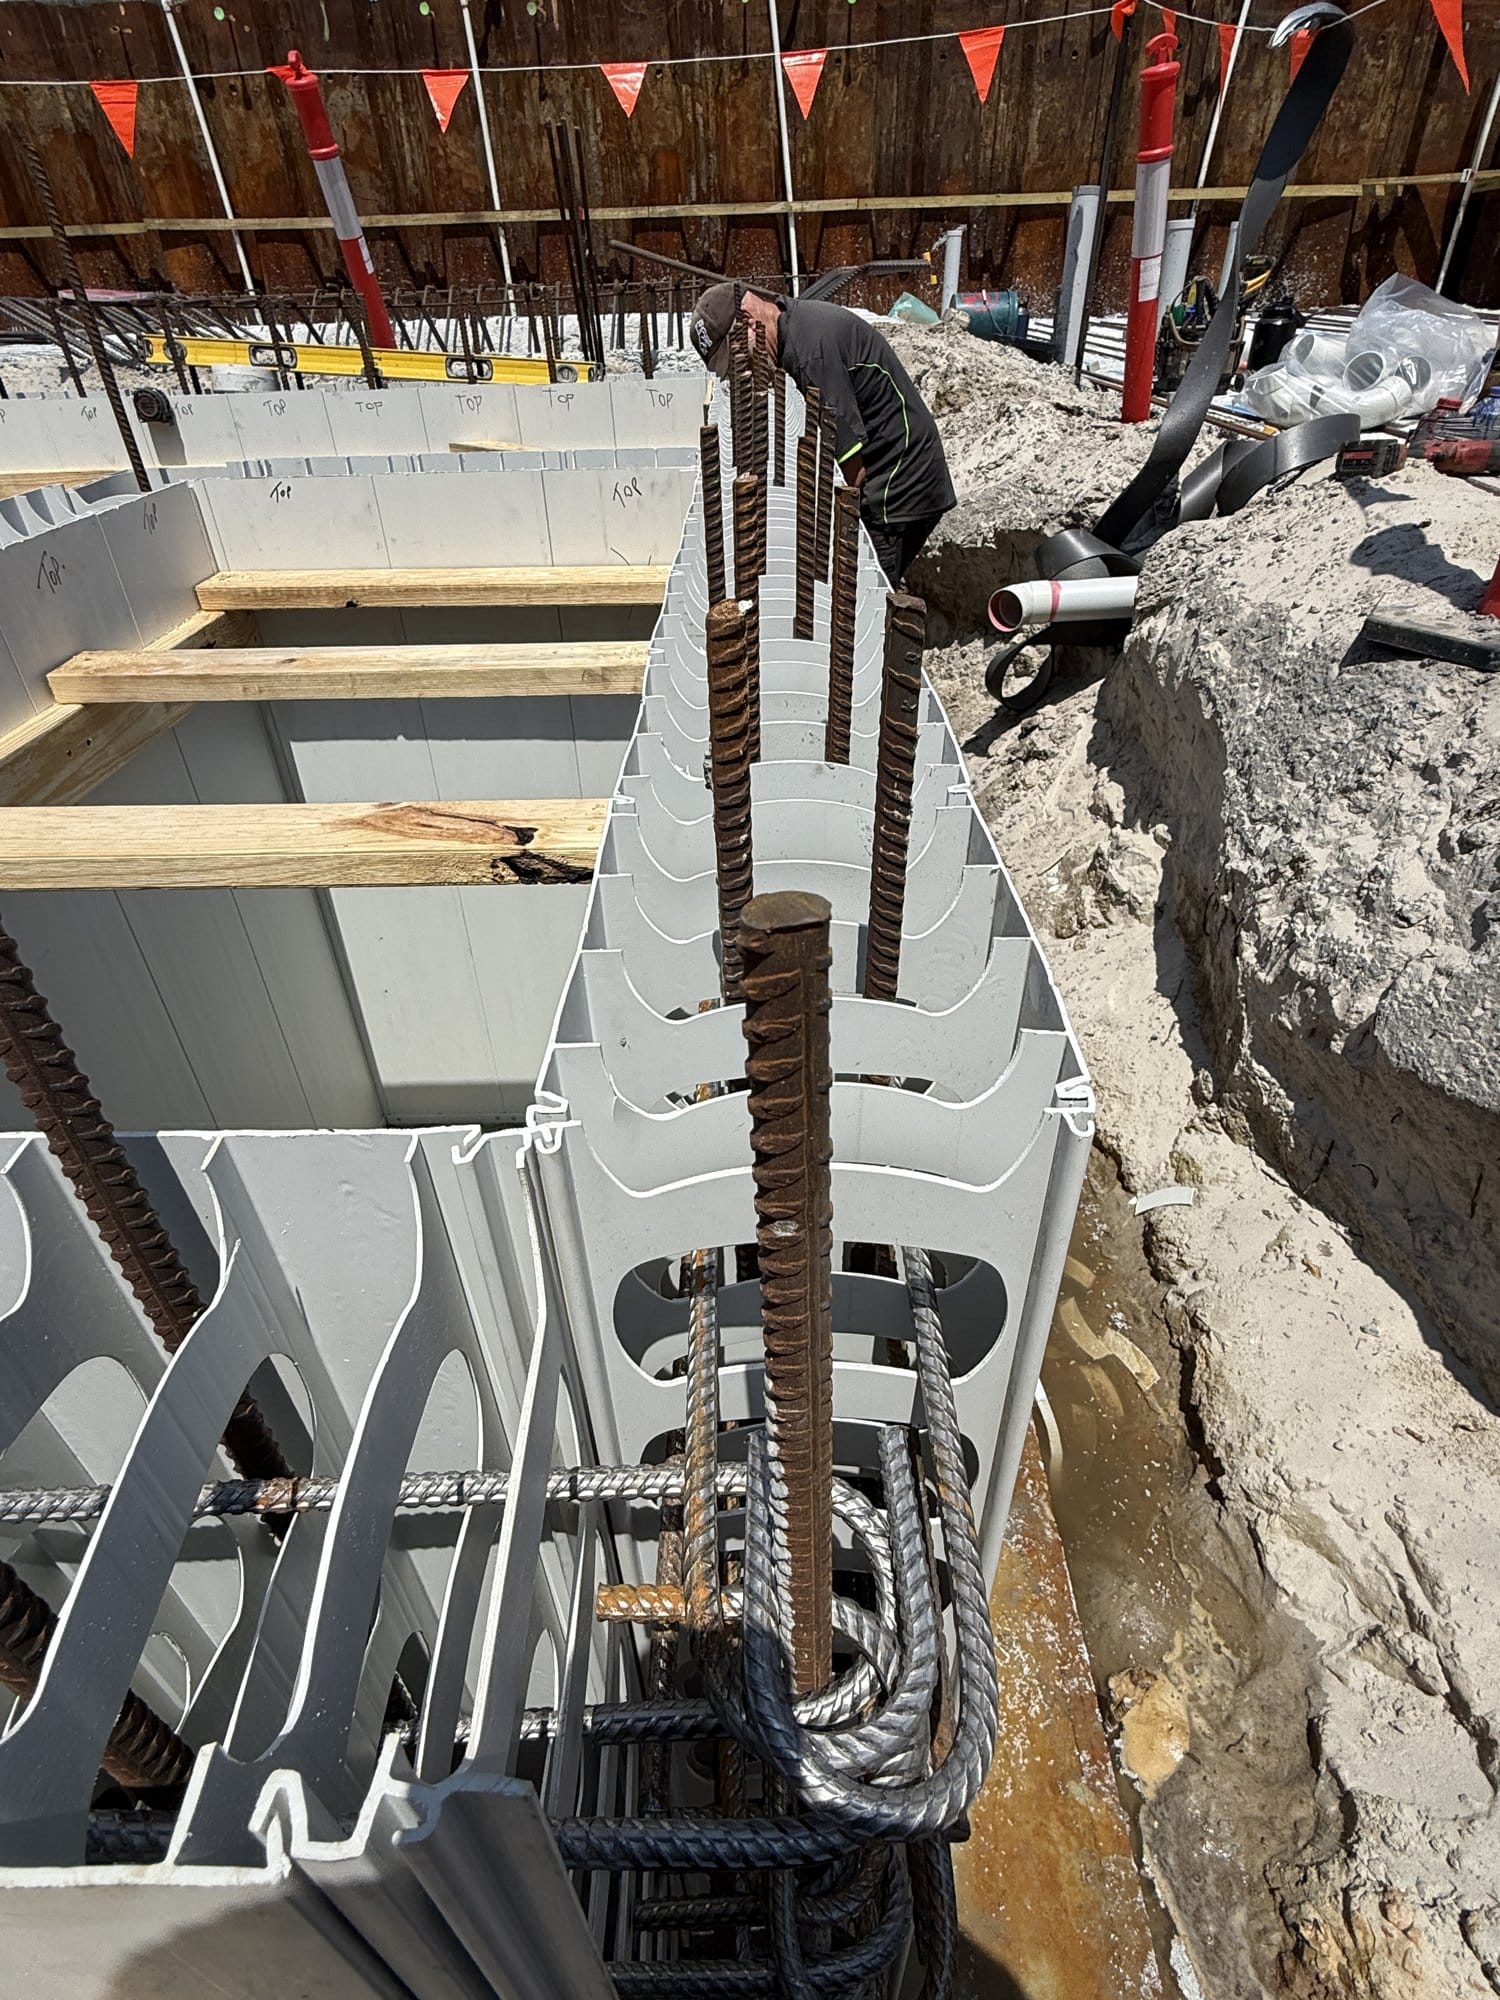
There's so much steel that we're already saying it's over-engineered, like always. The real question is how the concrete will get in around it all. It's going to be hard to vibrate the concrete into place.
Pipe penetrations
The plumber was here all day extending the pipes into the tanks, through oversized holes cut in the Rediwall. The oversize means I can get a hand in to fit a red water stop ring around each pipe. Then a ply cover goes over the hole on both faces, so the core fill concrete doesn't run out. The orange conduits are for the tank pump pipes.
The walls are fully braced and back-propped, ready to pour. We tried to bring the concrete forward a day, but the earliest available is Wednesday. About 6.2 m³ is ordered, with 8 m³ on call.
Waterproofing the tanks
The insides of the tanks get waterproofed after the basement slab is poured over them. There'll be a lot of formwork supporting the slab, and once it's done the tanks are confined spaces. We'll set up blowers to push fresh air in, test the air before anyone goes in (gases collect in low points), and fill in a checklist to record it all.
The critical spot is the floor-to-wall corner. Waterproofing tape won't bond into a sharp 90-degree corner, so it would pop out. So you build a cove, a smooth curve the tape can sit against.
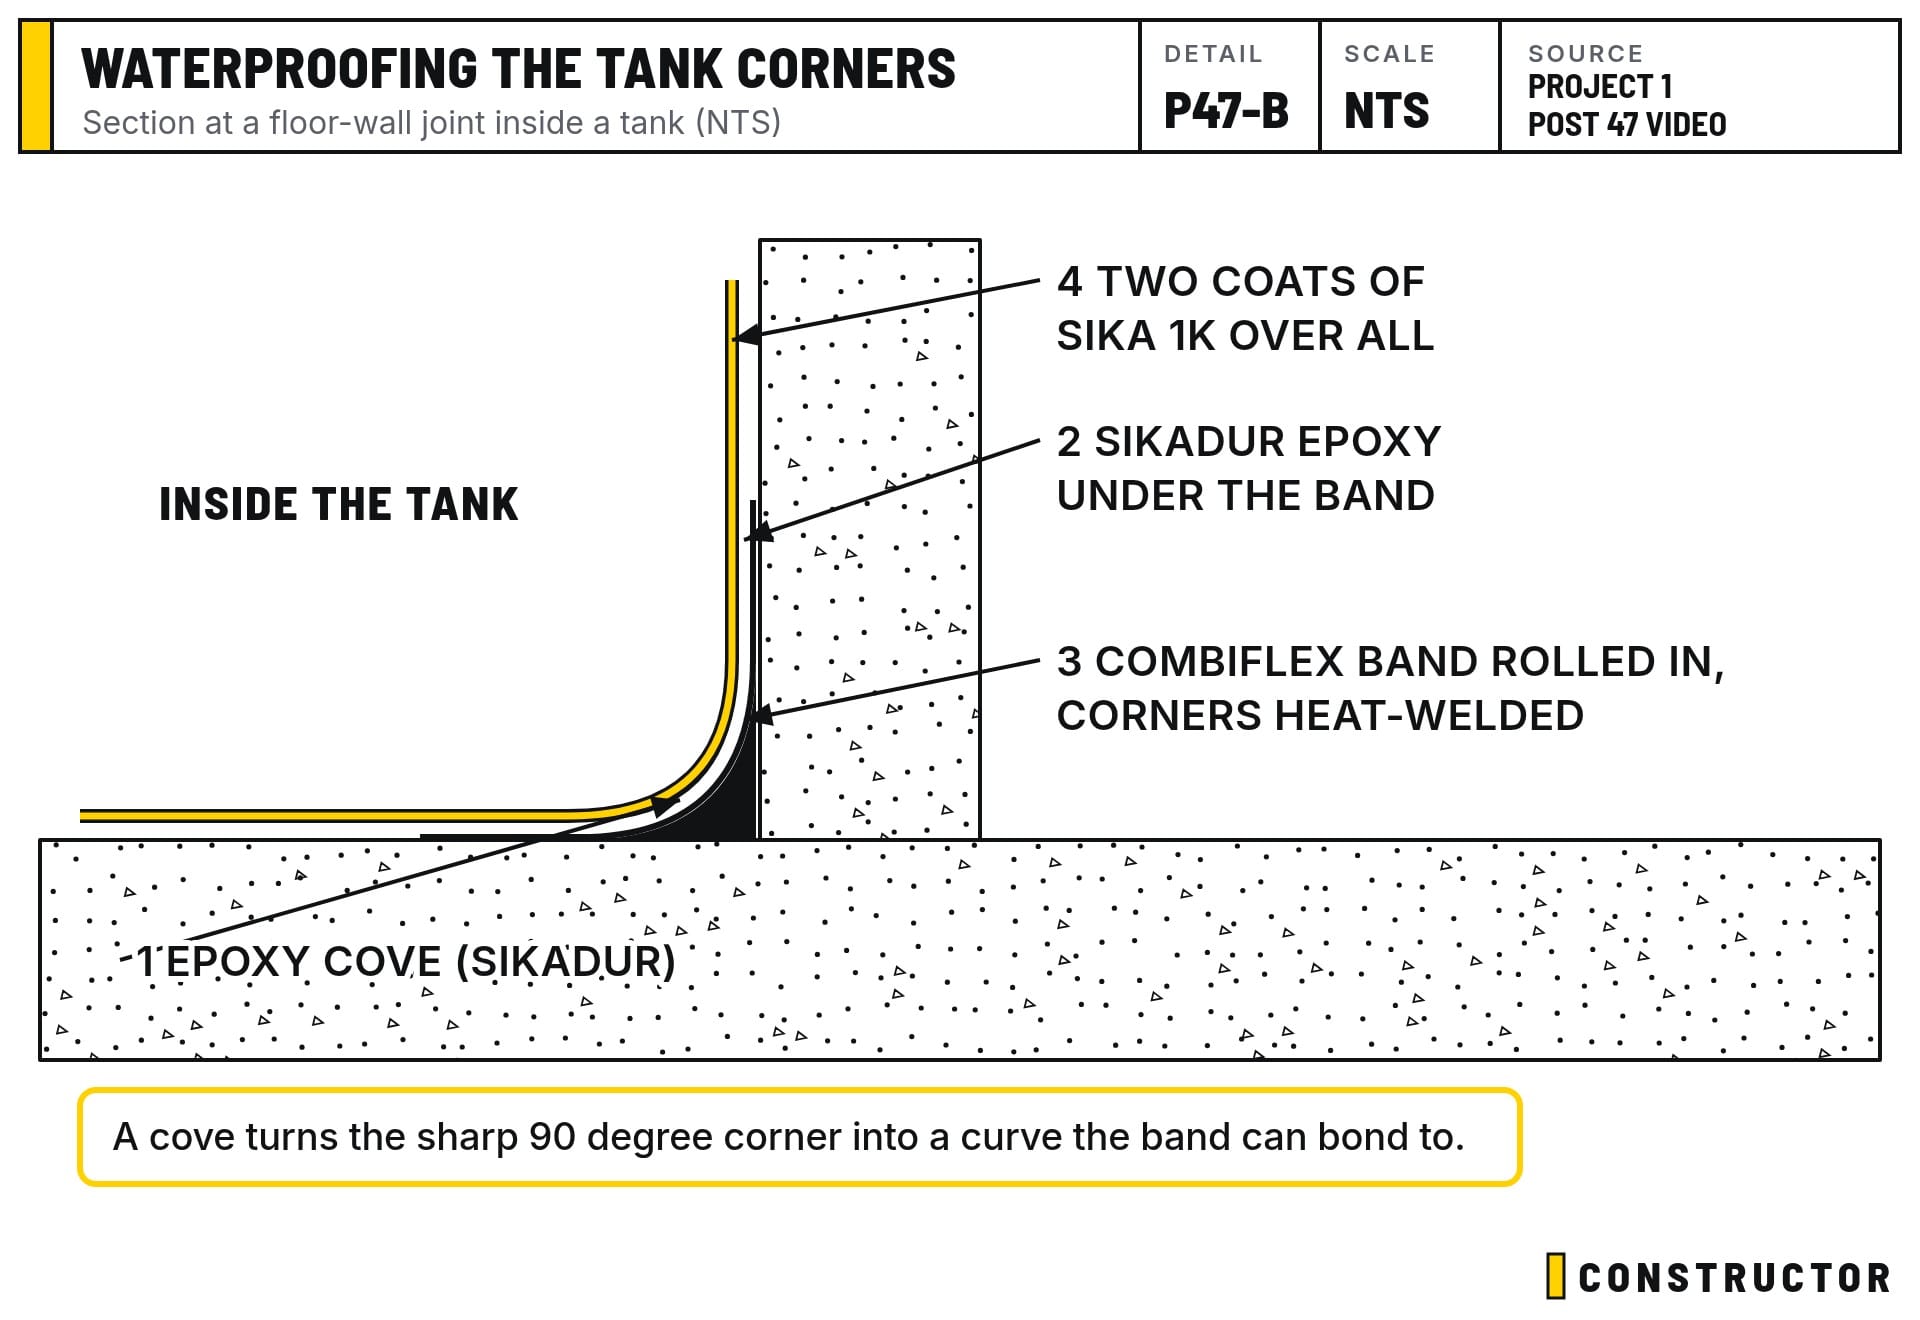
- The cove. It's formed in Sikadur epoxy, the only kind of product rated for hydrostatic or submerged use.
- Epoxy bands. 100 mm bands of Sikadur go down top and bottom.
- The Combiflex band. It's rolled into the wet epoxy. The internal and external corners are pre-formed and plastic-welded with a heat gun.
- The coating. Once the epoxy has cured per the technical data sheet, two coats of Sika 1K go over everything. We'll probably spray it from a pressurised hopper rather than roll it.
The pipe penetrations get the same Combiflex, Sikadur and 1K treatment.
Next
- Tomorrow: six steel fixers will work through the A and B layers, so there's somewhere to land the C and D layers when they arrive. The steel has to go in the right place the first time, because moving it means another crane lift.
- Monday: the plumbers are back to run more pipes through the steel.
- Wednesday: the tank walls get poured, then waterproofed and backfilled.