

Test Your Knowledge Of Tile Design & Installation
Introduction
Ceramic tiles are one of those finishes that can make or break the look and feel of a home. Get them right, and they’ll give you a clean, durable, and easy-to-maintain surface for years. Get them wrong, and you’ll be looking at cracks, lipping (uneven edges), loose tiles, or water damage — sometimes before you’ve even finished unpacking boxes.
The problem is, most homeowners don’t know what “right” actually looks like when it comes to tiling. We tend to trust that the builder and tiler will “do it properly,” but that’s a risky assumption.
Even well-intentioned trades can cut corners if time is short or site conditions aren’t managed properly. And once tiles are down and grouted, it’s almost impossible to check what’s underneath — meaning mistakes stay hidden until they turn into costly repairs.
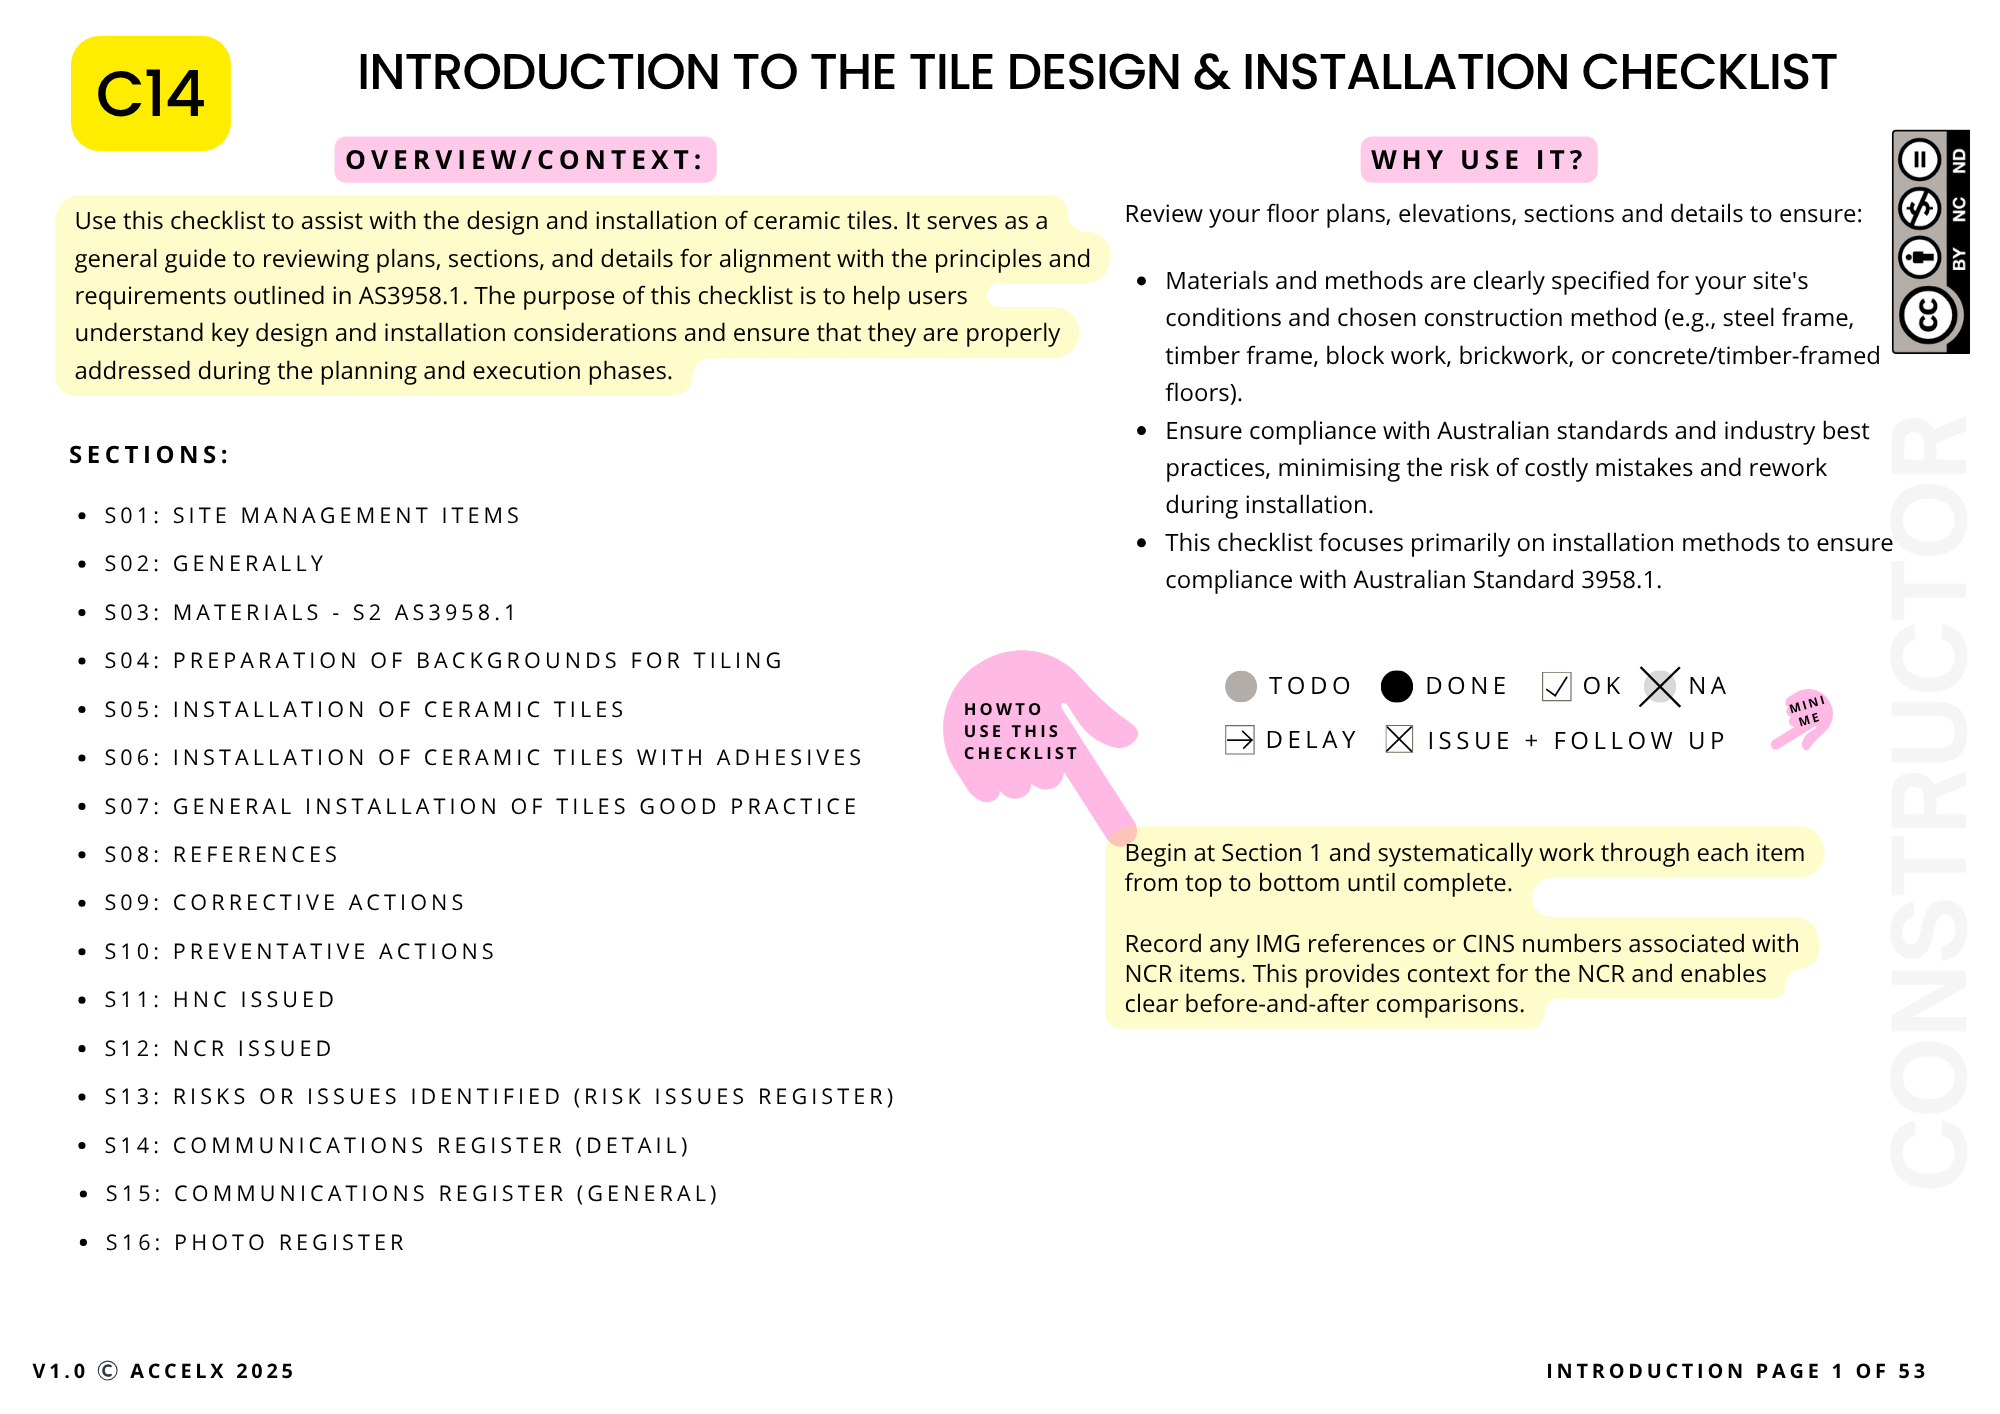
That’s where the C14 Ceramic Tile Design & Installation Inspection Checklist comes in. Think of it as a step-by-step guide to what should happen from the moment tiling is planned, through preparation, and right up to installation.
It’s based on Australian Standard AS3958.1, which is the national benchmark for ceramic tiling, and it covers everything from the quality of materials used, to site preparation, to the finer details like grout choice and movement joints.
In this post, I’m going to walk you through what this checklist is, why it matters, and how you — even without any trade experience — can use it to keep your builder and tiler accountable. We’ll break down technical terms into plain English, point out what’s worth checking, and explain how it all affects your home in terms of time, cost, and quality.
Why You Need a Tiling Checklist
If you’ve ever walked into a newly built home (except a builders display home) and spotted crooked grout lines, tiles that “lip” at the edges, or cracked corners, you’ve seen what happens when tiling isn’t done to standard. It’s more than just an eyesore — poor tiling can lead to water leaks, lifting tiles, and repairs that cost thousands of dollars.
The reality is that in residential construction, tiling is often left until the end of the project, when deadlines are tight and everyone is racing for handover. This is when shortcuts can creep in — and unfortunately, it’s the homeowner who ends up paying for it later, both financially and emotionally.
How It Helps You as a Homeowner
- It’s your quality control tool – You don’t need to be a tiler to know what to look for. The checklist breaks it down into manageable steps you can tick off or query with your builder.
- It saves time and money – Spotting a mistake before tiles are laid is much cheaper and easier than ripping them up later.
- It prevents disputes – If you’ve documented issues before handover, it’s harder for a builder to claim “it was fine when we finished.”
- It protects resale value – Tiling faults are very obvious to prospective buyers. Getting it right the first time helps maintain your home’s value.
Why Builder Quality Checks Aren’t Enough
Builders will tell you they have their own quality control processes — and they do. The problem is, those processes are designed to meet their obligations, not necessarily to protect your long-term interests. If a corner can be cut without breaching the bare minimum standard, some builders will take it to save time or money.
3. Understanding the C14 Checklist Structure
The C14 Ceramic Tile Design & Installation Inspection Checklist is built to guide you through the tiling process from start to finish — not just the part where the tiles go on the wall or floor. It’s designed so each section follows the logical sequence of a build, making it easier for you to know what should be happening and when.
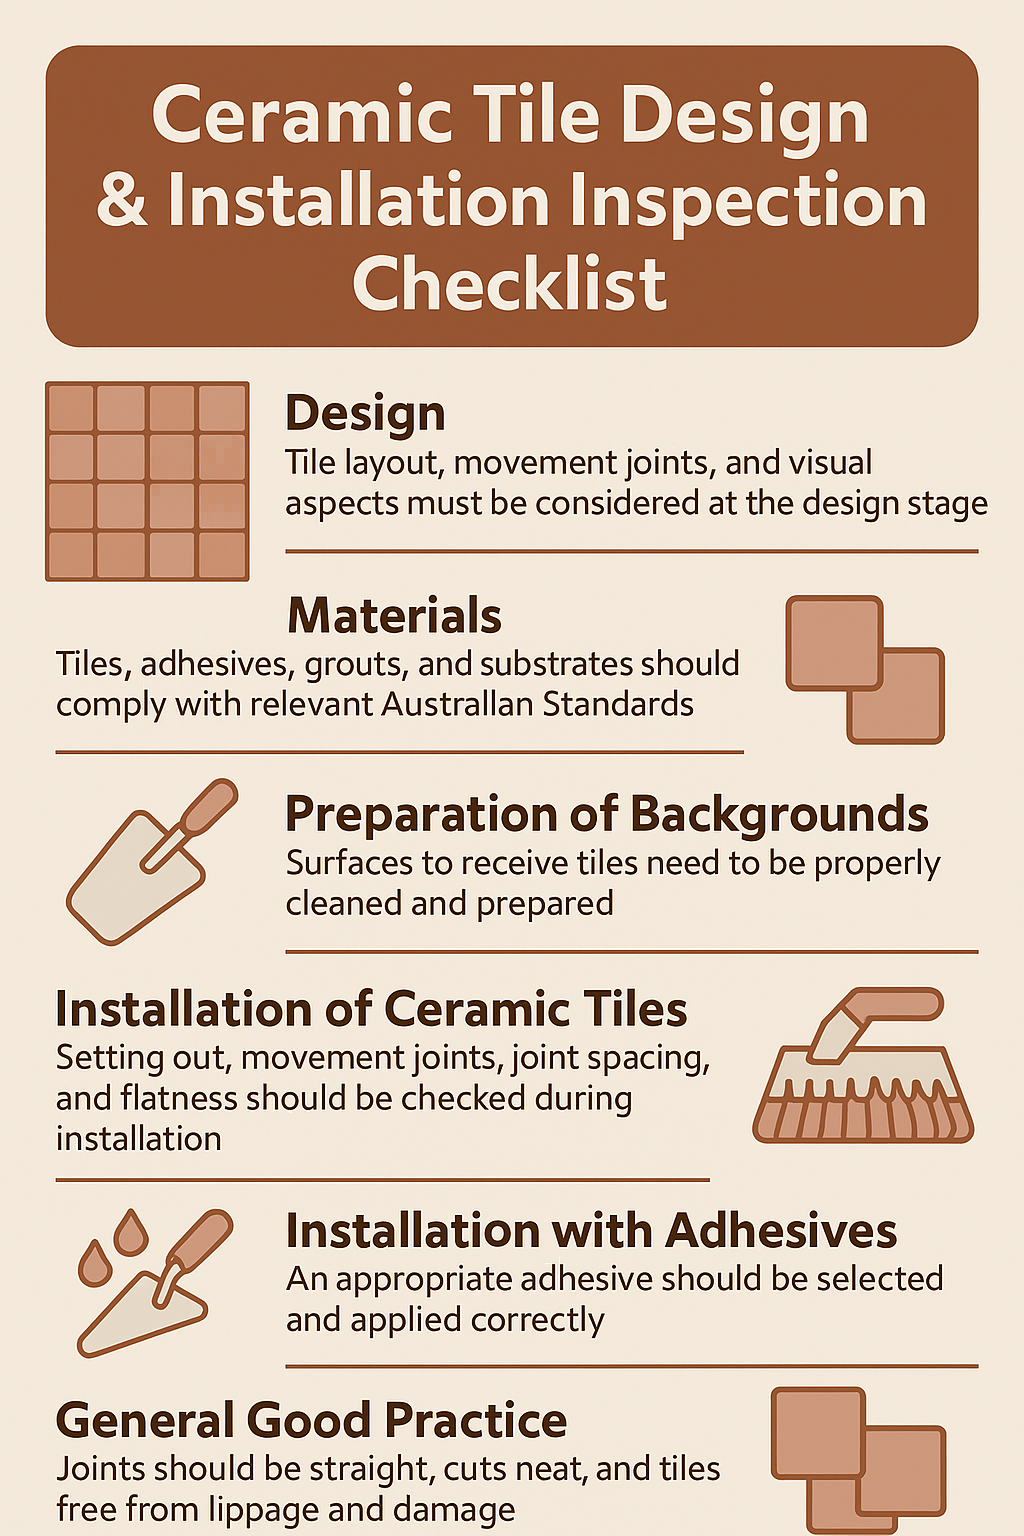
Here’s how it’s set out, and what each section is about:
1. Site Management Items
Before a single tile is unpacked, the site itself needs to be in order. This section checks things like:
- Is there proper erosion and sediment control in place? (Stops mud and slurry washing into drains or onto neighbouring properties.)
- Are the builder’s safety signs and fencing secure and visible?
- Are driveways, kerbs, and neighbouring yards protected from damage?
- Is the worksite tidy and safe to access?
Why it matters: A messy or unsafe site is a red flag. If basic site care isn’t in place, attention to detail on your tiling could also be lacking.
2. General Site Conditions
This section focuses on the day-to-day state of the site:
- Are walkways clear?
- Are materials stored safely so they’re not damaged?
- Is the site protected from weather or contamination?
Why it matters: Poor storage or exposure to moisture can ruin adhesives, warp tiles, or contaminate surfaces before installation even begins.
3. Materials (AS3958.1 Requirements)
This is where the checklist ensures all materials meet Australian Standards:
- Adhesives, grouts, and sealants match the manufacturer’s recommendations and the type of tile being installed.
- Substrates (the surface under the tiles) are the correct thickness, quality, and type for the job — e.g., concrete, fibre-cement, plywood, plasterboard.
- Movement joints and sealants are suitable for their location and traffic load.
Why it matters: Using the wrong materials is one of the quickest ways to shorten the life of your tiles. The checklist makes sure the right products are used from the start.
4. Preparation of Backgrounds for Tiling
Tiles will only ever be as good as the surface they’re stuck to. This section checks that:
- Surfaces are flat, clean, and structurally sound.
- Existing finishes are properly removed or prepared.
- Substrates are dry enough for adhesive to bond correctly.
- Timber floors, concrete slabs, and wall linings are prepared to the correct standard.
Why it matters: Skipping or rushing prep work is the number one cause of tiles lifting, cracking, or leaking later.
5. Installation of Ceramic Tiles
This is the heart of the checklist and covers:
- Correct “setting out” (the layout plan for tiles so cuts are minimal and symmetrical).
- Proper joint spacing for grout lines.
- Movement joints placed where they should be to handle expansion and contraction.
- Weather and temperature considerations during installation.
Why it matters: Once tiles are set, it’s hard to fix layout mistakes or hidden issues without starting again.
6. Installation with Adhesives (if applicable)
Some tiles need specific adhesive types or application methods. This section ensures:
- Adhesive type matches the tile and substrate.
- Adhesive is applied to the correct depth and coverage.
Why it matters: The wrong adhesive or poor application can cause tiles to pop off the surface over time.
7. General Good Practice
Covers all the small but important finishing touches:
- Clean grout lines.
- Straight joints.
- Neat cuts.
- No “lippage” (uneven tile edges that create a trip hazard and look untidy).
Why it matters: Good practice is what separates “it’s done” from “it’s done well.”
Knowing the checklist structure means you’ll know which stage your builder or tiler is up to and what you should be paying attention to. In the next part, we’ll break each of these sections down in more detail so you can spot potential problems before they become expensive ones.
4.1 Site Management Items
Before anyone starts mixing adhesive or laying tiles, the building site itself needs to be in good shape. It might sound unrelated to tiling, but poor site management can lead to delays, extra costs, or even damaged finishes before they’re complete.
The checklist starts here because if your site is messy, unsafe, or poorly protected, it’s a fair bet other stages of work could suffer from the same lack of care.
What This Section Covers
- Erosion and Sediment Control – Making sure sediment fences are in place and working. These stop soil and debris from washing into storm water drains during rain.
- Builder’s Signage and Safety Signs – Signs should be upright, secure, and easy to see from the street. This isn’t just about safety — it’s a basic compliance requirement.
- Damage to Surrounding Areas – Kerbs, driveways, light poles, and neighbouring yards should be protected and undamaged. If damage has already occurred, it should be photographed and reported.
- Access Control – Keeping vehicles and materials off grass verges or areas that could be easily damaged.
- Drainage – Water should be directed away from the building so it doesn’t pool under the slab or structure.
- On-Site Amenities – Toilets should be within the site boundaries, not on the council verge. This is about following rules, not just convenience.
- Material Storage – Pallets, tiles, and adhesives should be stored neatly and under cover where possible to prevent damage or contamination before they’re needed.
Why It Matters for Homeowners
You might think “I’m only here for the tiles,” but good site management has a ripple effect:
- Protects your investment – Stored tiles and adhesives are expensive; if they’re damaged or spoiled before installation, replacement costs can be passed on to you.
- Avoids delays – Fixing a drainage or damage issue mid-build can push everything back.
- Signals quality culture – A clean, organised site usually reflects trades who take care in their work.
What You Can Do as the Homeowner
- Walk the site before tiling starts — check for signs of water pooling, damage to materials, or poor storage.
- If you see pallets of tiles sitting uncovered in the rain, ask your site supervisor to confirm they’re still fit for use.
- Take dated photos if something looks wrong — it’s easier to resolve disputes with proof.
4.2 General Site Conditions
Even if the site starts out well-organised, things can quickly slide during construction — especially as trades overlap and the deadline for handover looms. The General Site Conditions section of the C14 checklist keeps the focus on maintaining a safe, tidy, and well-prepared environment right up until the last tile is in place.
Tiles, adhesives, and substrates are all sensitive to their surroundings. Excess dust, moisture, or poor storage can damage materials before they’re even installed. Bad site access can make trades rush or cut corners. And poor safety setups can increase the risk of accidents, which cause delays and cost blowouts.
What This Section Covers
- Clear Access & Egress – Walkways and work areas must be free of clutter so tilers can work efficiently and safely.
- Material Storage – Tiles and adhesives should be stored on stable surfaces, under cover, and supported so they don’t warp or crack.
- Weather Protection – Materials need to be kept dry; moisture can ruin adhesives or cause tiles to stain before installation.
- Public Protection – Barriers or screens should be in place where work areas are near public access points.
- Traffic Management – Any site traffic plans should be followed to prevent accidents and avoid damage to stored materials.
- Clean Work Areas – Areas where tiles will be installed should be kept free of rubbish, dust, and mud.
- Safe Deliveries – Deliveries should follow the erosion and sediment control plan so heavy vehicles don’t damage site conditions or materials.
Why It Matters for Homeowners
- Prevents material loss – Moisture-damaged adhesives or chipped tiles can be unusable, leading to extra costs or mismatched replacements.
- Reduces installation risks – Clear, safe access means tilers can move and work without rushing or improvising.
- Keeps the schedule on track – An orderly site reduces the chance of delays caused by preventable accidents or damage.
What You Can Do as the Homeowner
- Visit the site before tiling starts and look for any signs of poor storage or protection.
- Ask where tiles and adhesives are being kept and confirm they’re under cover.
- Check that areas to be tiled are clean and ready — if there’s debris or mud, it’s a warning sign preparation may not be done properly.
4.3 Materials (AS3958.1 Requirements)
Tiles might look simple, but what’s underneath and around them plays a huge role in how they perform. The Materials section of the C14 checklist ensures that every component — from the tile itself to the adhesive and grout — meets Australian Standard AS3958.1.
This is important because not all tiles, adhesives, or substrates are created equal. Using the wrong combination can lead to loose tiles, staining, cracking, or moisture problems — sometimes within months of moving in.
What This Section Covers
Tiles
- Compliance – Floor and wall tiles should comply with AS 4662, meaning they’ve been tested for things like strength, water absorption, and slip resistance.
- Mosaic Tiles – Suitability and fixing methods should be confirmed with the supplier or manufacturer.
Adhesives
- Standards – Adhesives must meet AS 4992 or ISO 13007 standards.
- Compatibility – Some adhesives can react badly with certain tile types; they should be tested before use.
- Water Resistance – If the adhesive needs to be water-resistant (e.g., for wet areas), this must be confirmed.
Grouts
- Performance – Grouts should have low shrinkage, good adhesion to the tile edges, and be easy to work with.
- Colour – The grout colour should match the project specifications — mismatched grout is noticeable and hard to fix.
Substrates (Background Materials)
This is the surface tiles are fixed to, and it can include:
- Plywood – Must be the correct thickness (minimum 10 mm) and meet Australian Standards for dry or wet areas.
- Fibre-Cement Sheet – Minimum 6 mm thick for floors and walls; thicker for heavy-duty areas.
- Structural Particleboard – Minimum 19 mm thick and compliant with AS/NZS 1859.
- Gypsum Plasterboard – Must be at least 10 mm thick, with edges and fixing done to the correct specifications.
Movement Joint Materials
- Purpose – These are small gaps that allow tiles to expand and contract without cracking.
- Materials – Joints can be filled with backing rods, sealants, or preformed strips, all suited to the expected movement and conditions.
Other Materials
- Cement, Sand, and Lime – Must meet their relevant Australian Standards and be clean, fresh, and free from contamination.
- Water – Should be fresh and clean — seawater is a definite no-go.
- Underlays and Separating Layers – Used to isolate tiles from the substrate when required, and must be installed to manufacturer’s instructions.
Why It Matters for Homeowners
- Durability – Standards exist for a reason; compliant products are tested for performance.
- Compatibility – Even a quality product can fail if used with the wrong partner (e.g., incompatible adhesive and tile).
- Moisture Protection – Using the correct materials in wet areas helps prevent leaks and mould growth.
What You Can Do as the Homeowner
- Ask your builder or tiler for the brand and product name of all adhesives, grouts, and substrates they plan to use.
- Confirm these products meet the relevant Australian Standards — you can look this up online or ask the manufacturer directly.
- If substitutions are made due to supply issues, request written confirmation they meet or exceed the same standard.
4.4 Preparation of Backgrounds for Tiling
No matter how expensive your tiles are, or how skilled your tiler is, a bad surface underneath will eventually ruin the job. The Preparation of Backgrounds section in the C14 checklist focuses on making sure every surface that will receive tiles — whether it’s a floor, wall, or even a deck — is clean, flat, strong, and ready to bond.
Think of it like painting: if you don’t prepare the wall properly before you open the tin, the paint won’t last. The same goes for tiles — only the stakes are higher because removing and replacing them is messy, disruptive, and costly.
What This Section Covers
General Requirements
- Surfaces must be dry, clean, and free from contaminants like dust, oil, wax, paint, or curing compounds.
- Loose or damaged materials must be removed.
- Falls (slopes) for wet areas must be correct before tiling starts — tiling won’t fix a bad fall.
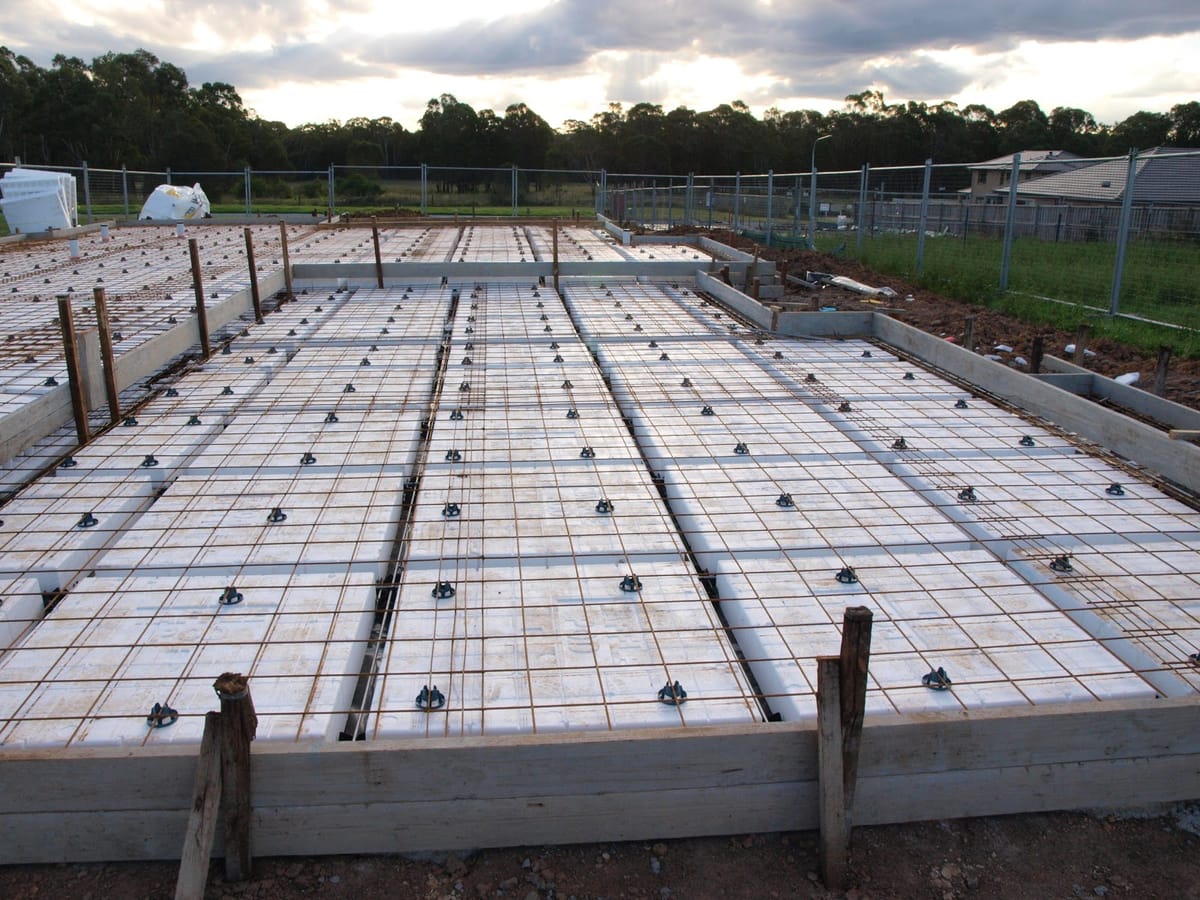
Concrete Floors
- Must be flat within tolerances set out in AS3958.1.
- Need to cure and dry for the correct time (usually several weeks) before tiling.
- Contaminants (like form release agents) must be mechanically or chemically removed.
- Screeds (levelling layers) may be added for an even surface.
Timber Floors
- May need a separating layer or an underlay (such as fibre-cement sheeting) to prevent movement from cracking the tiles.
- Loose boards must be re-nailed or screwed down.
- Surfaces may need sanding flat before underlay installation.
Wall Substrates
- Plasterboard, plywood, fibre-cement, or other sheeting must be installed to their relevant Australian Standards.
- Sheets must be fixed with the correct spacing, edge clearances, and movement joints.
- Wet area linings must meet waterproofing requirements (AS 3740).
Existing Surfaces
- Old finishes (tiles, vinyl, paint) should be removed unless they’re sound and compatible.
- If they’re left in place, a separating layer may be required.
Why It Matters for Homeowners
- Longevity – Most tile failures trace back to poor preparation, not the tiles themselves.
- Waterproofing Integrity – Especially in wet areas, bad prep can cause leaks and hidden damage.
- Appearance – Uneven backgrounds create lippage (uneven tile edges), which is ugly and dangerous.
What You Can Do as the Homeowner
- Ask your builder what preparation method will be used for each surface type.
- If you see tilers working over dirty, wet, or obviously uneven surfaces — stop the job and ask questions.
- Confirm that wet area preparation includes proper waterproofing and correct falls before tiling starts.
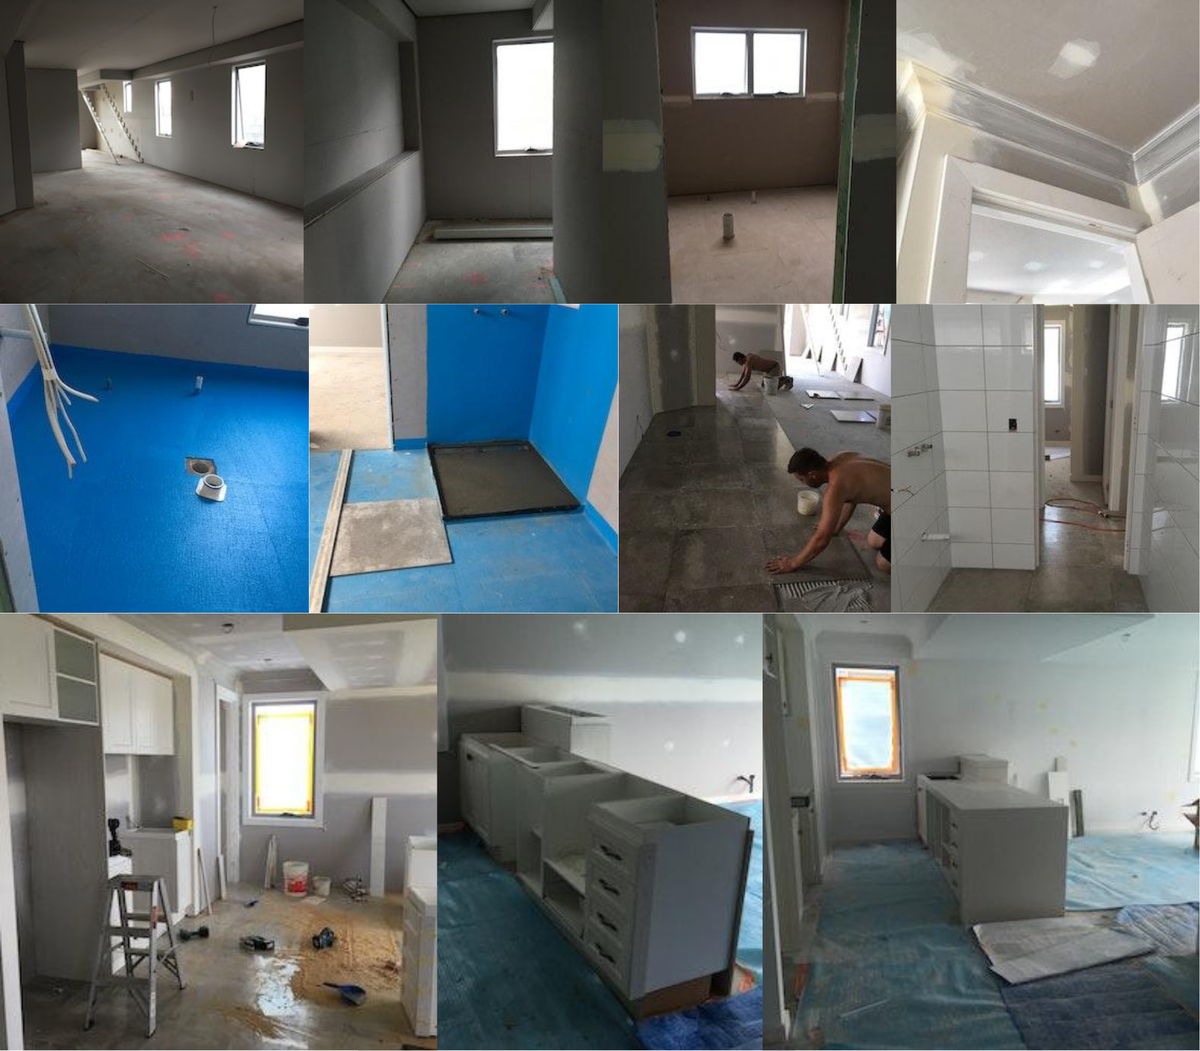
4.5 Installation of Ceramic Tiles
This is the stage most homeowners actually see — tiles going on walls or floors. But the C14 checklist goes much deeper than “stick them on and grout.” It focuses on making sure tiles are installed in a way that looks great, performs well, and complies with AS3958.1 so you’re not dealing with problems later.
What This Section Covers
Setting Out (Tile Layout)
- Datum Levels – The starting point for tile heights is established so patterns run evenly and cuts are minimal.
- Whole Tiles Where Possible – The aim is to keep cuts to a minimum and place them in less noticeable areas.
- Fixtures & Features – Tile lines should align neatly around windows, baths, kitchen benches, and other focal points.
Movement Joints
- These are gaps that allow for expansion and contraction so tiles don’t crack.
- Should be positioned at walls, changes in floor type, and large open areas (spacing depends on whether it’s indoors or outdoors).
- Must be filled with flexible materials that can handle movement without splitting.
Joint Spacing & Grout Lines
- Grout lines should be consistent and straight, with widths set out in the plans or to manufacturer recommendations.
- Narrow or uneven grout lines are often a sign of rushed work.
Weather & Temperature
- Tiles should not be installed when the air is too cold (below 5°C) or when the surface is too hot (above 40°C).
- Excess humidity or heat can stop adhesives and grouts from curing properly.
Surface Flatness
- The finished surface should be flat and free from “lippage” — where one tile edge sits higher than its neighbour.
- Australian Standards have set limits for allowable lippage depending on tile type and joint width.
Site Protection
- Once laid, tiles should be protected from traffic until the adhesive and grout have cured.
- In high-traffic builds, temporary coverings may be needed to prevent damage before handover.
Why It Matters for Homeowners
- Appearance – Bad layout or obvious cuts will annoy you every time you look at them.
- Durability – Skipping movement joints or incorrect adhesive use can lead to cracked or loose tiles.
- Cost – Fixing tiling faults often means full removal and replacement, which is expensive and messy.
What You Can Do as the Homeowner
- Visit during installation (with the supervisor’s permission) to check layout before too many tiles are fixed.
- Ask to see where movement joints will go — they should be planned, not an afterthought.
- If the grout lines look uneven or tiles don’t feel flat underfoot, speak up before grouting starts.
4.6 Installation with Adhesives
Adhesive isn’t just “glue for tiles” — it’s a specialised product designed to bond tiles to different surfaces under different conditions. The C14 checklist treats adhesive selection and application seriously because the wrong choice, or poor application, can cause tiles to lift, crack, or let water through.
What This Section Covers
Choosing the Right Adhesive
- Tile Type – Heavy stone-look tiles, porcelain, and mosaics can require different adhesive strengths and compositions.
- Substrate Type – Concrete, fibre-cement sheet, plywood, or existing tiles each have different bonding requirements.
- Wet vs Dry Areas – Wet areas like bathrooms or laundries may need water-resistant or flexible adhesives.
Compliance
- All adhesives must meet AS 4992 or ISO 13007 standards, ensuring they’re tested for strength, flexibility, and bonding performance.
Application Method
- Adhesive should be applied evenly, using the correct notched trowel size for the tile being installed.
- Full Coverage – Particularly in wet areas, the adhesive must fully support the tile with no voids (gaps) underneath where water can collect.
- Back-buttering (coating the back of the tile with adhesive) may be required for large-format tiles to improve bond strength.
Environmental Conditions
- Installation shouldn’t happen in extreme heat, cold, or high humidity without following manufacturer recommendations.
- Adhesive should not be allowed to skin over (dry on the surface) before the tile is pressed into place — this prevents bonding.
Why It Matters for Homeowners
- Avoiding Tile Failure – Poor bonding is one of the most common causes of tiles lifting or cracking.
- Moisture Control – Full adhesive coverage in wet areas prevents water getting behind tiles and damaging the substrate.
- Performance Over Time – The right adhesive choice ensures your tiles stay put for decades, not just until the warranty ends.
What You Can Do as the Homeowner
- Ask which adhesive will be used and why it’s suited to your tile and substrate type.
- If possible, check during installation that the adhesive is being spread evenly and the correct trowel notch is being used.
- For large tiles, confirm whether back-buttering is part of the installation plan.
4.7 General Good Practice
Once tiles are installed, the difference between “good enough” and “done well” is often in the finishing touches. The General Good Practice section of the C14 checklist is where the finer details are checked — the things you might not notice on day one, but will definitely notice (and be annoyed by) if they’re wrong.
What This Section Covers
Straight and Consistent Joints
- Grout lines should be straight, even, and consistent across the room or wall.
- Uneven joints stand out and make the entire job look sloppy, even if the tiles themselves are perfect.
Neat Cuts
- Cut tiles should have smooth edges without chips or jagged lines.
- Cuts should be positioned where they’re least noticeable, such as under cabinetry or at the edges of a room, not in high-visibility areas.
No Lippage
- Lippage is when the edge of one tile sits higher than the tile next to it, creating a trip hazard and an uneven look.
- The Australian Standard allows only a small amount of lippage, depending on the tile type and joint width.
Clean Work
- Excess adhesive or grout should be cleaned off before it sets.
- Finished tiles should be free from cracks, scratches, or surface damage caused during installation.
Correct Accessory Installation
- Trim pieces, nosings, or feature strips should be fully bedded in adhesive and aligned properly.
- Accessories should be flush with surrounding tiles, not sticking out or sitting low.
Why It Matters for Homeowners
- First Impressions – Visitors won’t measure your grout width, but they’ll notice if something looks “off.”
- Safety – Lippage can cause trips and falls, especially in high-traffic areas.
- Ease of Cleaning – Poorly finished edges and excess grout are harder to clean and can harbour dirt or mould.
What You Can Do as the Homeowner
- Inspect tiles from different angles — lighting can reveal lippage or uneven joints.
- Look closely at cut tiles around fixtures; rough or uneven edges are not acceptable.
- Run your hand across tile joints — you should not feel a noticeable step between tiles.
5. How to Use the Checklist Effectively as a Homeowner
The C14 Checklist isn’t meant to be a piece of paperwork you tick once at the end. Nor is it meant to be "ammunition" to attack anyone.
It’s a tool you can use to keep track of quality from the planning stage right through to the final clean-up. If you use it properly, you’ll spot issues early, avoid unnecessary disputes, and make sure you get the tiling finish you paid for.
Start Early
- Review it before tiling starts – Go through the checklist before any work begins on site. Get familiar with the terms and details, and ask your builder how they’ll meet the standards and manage compliance. This shows you’re focused on quality from the start, not just the final look.
- Review materials in advance – Ask for product details for tiles, adhesives, and grouts early so you can confirm they meet the relevant Australian Standards.
Inspect at Key Stages
- Before Preparation Starts – Check that the site is tidy, materials are stored correctly, and surfaces are ready for prep.
- After Surface Preparation – Before any tiles are laid, confirm that backgrounds are clean, flat, and meet the fall requirements in wet areas.
- During Installation – If possible, visit while tiling is in progress to check layout, joint spacing, and adhesive coverage.
- Before Grouting – This is your last chance to spot uneven tiles or poor alignment before they’re locked in.
Document Everything
- Take Photos – Date-stamped photos are a homeowner’s best friend in case of disputes.
- Make Notes – If you spot something odd, write it down along with the date, time, and who you spoke to about it.
- Keep Copies – If the checklist is updated or marked by your builder, keep a copy for your records.
Work With (Not Against) Your Builder
- Ask questions rather than making accusations — you’ll get better cooperation.
- Frame it as a shared goal: “I want to make sure we’re meeting standards so it looks great and lasts a long time.”
- If you’re not sure about something technical, ask for the tiler or site supervisor to explain it to you in plain terms.
Act Quickly on Issues
- Don’t wait until handover to raise concerns — by then, fixing a fault can mean pulling out finished work.
- Raise concerns in writing as soon as possible so they’re officially noted.
6. Common Mistakes the Checklist Helps Prevent
Tiling problems are rarely just “bad luck” — they usually come from skipping steps, using the wrong materials, or cutting corners. The C14 Ceramic Tile Design & Installation Inspection Checklist is designed to catch these issues before they become expensive headaches.
1. Skipping Proper Surface Preparation
The Problem: Tiling straight over uneven, dirty, or damp surfaces is asking for trouble. Adhesive won’t bond properly, and tiles can crack, lift, or let water in.
How the Checklist Helps: It forces a pre-installation inspection of every surface, confirming it’s clean, dry, flat, and structurally sound before work starts.
2. Using the Wrong Adhesive or Grout
The Problem: Adhesive needs to match both the tile type and the substrate. The wrong product can cause tiles to debond, especially in wet or high-traffic areas.
How the Checklist Helps: It requires adhesives and grouts to meet Australian Standards (AS 4992, AS3958.1) and be suited to the job’s specific conditions.
3. Ignoring Movement Joints
The Problem: Tiles expand and contract with temperature and humidity changes. Without movement joints, this stress can cause cracking or tenting (tiles lifting in the middle).
How the Checklist Helps: It ensures movement joints are planned, positioned correctly, and filled with flexible sealants.
4. Poor Setting Out (Tile Layout)
The Problem: Crooked grout lines, tiny awkward cuts, or misaligned patterns can make even expensive tiles look cheap.
How the Checklist Helps: It checks layout before installation, aiming for symmetry, minimal cuts, and neat alignment around fixtures.
5. Lippage (Uneven Tile Edges)
The Problem: Raised edges not only look bad but can create trip hazards and make cleaning difficult.
How the Checklist Helps: It enforces flatness tolerances from AS3958.1, ensuring tiles are laid evenly.
6. Inadequate Site Protection
The Problem: Foot traffic, dropped tools, or other trades can damage tiles before handover.
How the Checklist Helps: It specifies protecting tiled areas until adhesives and grouts are fully cured, sometimes requiring temporary coverings.
7. Poor Finishing Touches
The Problem: Rough cuts, chipped edges, or leftover grout haze can spoil the final look.
How the Checklist Helps: It includes checks for neat cuts, clean grout lines, and damage-free tiles before sign-off.
🛠 C14 Checklist — Quick Guide
What’s It All About?
You’d be surprised how many tiling problems start long before the first tile is laid. Uneven floors, wrong adhesives, no movement joints — these can lead to costly repairs, water damage, and endless frustration.
The C14 Ceramic Tile Design & Installation Inspection Checklist helps you spot issues early. It’s based on Australian Standard AS3958.1, so you’re checking work against recognised, industry-accepted benchmarks — not guesswork.
When Do You Use It?
Use it before tiling starts to confirm the site, materials, and preparation are all up to standard. Keep it handy during and after installation to make sure nothing’s missed.
- Before Preparation Begins — Check the site is tidy, materials stored correctly, and surfaces clean, flat, and ready.
- After Background Preparation — Ensure substrates, waterproofing, and falls are correct before adhesive or tiles go down.
- During Installation — Check layout, joint spacing, and adhesive coverage.
- Before Grouting — Spot uneven tiles, poor alignment, or missing movement joints before they’re locked in place.
- At Practical Completion — Confirm neat joints, clean cuts, and damage-free tiles before handover.
💡 Tip: The earlier you catch a problem, the cheaper and easier it is to fix. Don’t wait until handover day to start checking.
Conclusion
Tiling isn’t something you want to redo. Once it’s laid, it’s meant to last for decades — so if it’s done poorly, you’re stuck with either living with the flaws or paying a hefty price to rip it out and start over.
The C14 Ceramic Tile Design & Installation Inspection Checklist gives you a way to avoid that scenario. It’s also not about micromanaging your builder or tiler — it’s about having a clear, agreed-upon standard that protects your investment.
By using the checklist from the very start of your build, you:
- Make sure the right materials are selected and stored correctly.
- Ensure surfaces are properly prepared before any tiles go down.
- Keep installation neat, consistent, and compliant with AS3958.1.
- Document quality at every stage, so problems are addressed before they’re locked in.
In short, the checklist helps you shift from hoping your tiling is done right, to knowing it’s done right. That means fewer nasty surprises, a finish you’ll be proud of, and peace of mind every time you walk into a tiled room.
Frequently Asked Questions
1. What is AS3958.1 and why does it matter for my tiles?
AS3958.1 is the Australian Standard for ceramic tiling. It sets out the minimum requirements for materials, preparation, and installation. If your tiling meets this standard, it’s more likely to last, look great, and resist problems like cracking or water damage.
2. Can I ask my builder to follow the C14 checklist?
Builders who care about quality should be following AS3958.1 and demonstrate a quality management system as part of their service. Ask your builder how they ensure compliance with Australian Standards and record and manage quality during construction,
3. What happens if tiles are laid without proper surface preparation?
They might look fine at first, but over time you can get lifting tiles, cracks, or water leaks. Fixing these issues usually means removing and replacing the tiles — a costly and disruptive process.
4. What’s the difference between ceramic and porcelain tiles?
Both are types of ceramic tiles, but porcelain is denser, less porous, and more durable, making it great for high-traffic areas or outdoor use. Ceramic tiles are lighter and often easier to cut, which can make them better for some wall applications.
5. How do I know if the right adhesive is being used?
Ask for the product name and check it against the manufacturer’s recommendations for your specific tile and substrate. It should also meet Australian Standards such as AS 4992 or ISO 13007.
6. What are movement joints and do I need them in my home?
Movement joints are small gaps filled with flexible material that let tiles expand and contract without cracking. Yes, you need them — especially in large tiled areas, areas exposed to sunlight, and where tiles meet walls or other fixed surfaces.
7. How long should I wait before walking on newly laid tiles?
For most jobs, light foot traffic is okay after 24–48 hours, but heavy traffic or moving furniture should wait at least 7 days. Always check with your tiler, as curing times depend on the adhesive and grout used.
8. Should I inspect tiling before grouting?
Absolutely. This is the best time to spot uneven tiles, poor alignment, or lippage before the grout locks everything in place.
9. Can tiling faults be fixed after handover?
Some faults can be repaired, but others require full tile replacement. It’s far easier and cheaper to address issues before handover, while the builder is still on site.
10. Does poor tiling affect my home’s resale value?
Yes — buyers notice uneven grout lines, cracked tiles, and bad finishes. These issues can reduce your home’s appeal and potentially lower offers.
Further Reading


Member discussion